How long to clean ears after piercing: a practical guide
Learn how long to clean ears after piercing, safe methods, and a step-by-step care routine to reduce infection risk in the first weeks. Practical guidance from Cleaning Tips for homeowners and renters.

Within this guide, you’ll learn how long to clean ears after piercing, the safest cleaning frequency, and the best solutions to use. We cover the initial post-piercing routine, how to adapt for different piercing types, and warning signs that mean you should seek professional care. Following these steps supports healing and reduces complications.
Why ear piercing aftercare matters
Healing a new ear piercing is a delicate process. The outer skin around the jewelry is the first barrier against bacteria, and improper care can lead to irritation, swelling, or infection. According to Cleaning Tips, consistent aftercare reduces infection risk and supports faster healing. In the first days after piercing, the skin is in repair mode, and even small missteps—like touching with dirty hands or using the wrong solution—can set back progress. A clean routine helps keep crusties soft and minimizes crust formation around the clasp. The reader should understand that ear piercings are not sterile wounds; they are open punctures that require gentle cleaning, patience, and respect for the healing timeline. In this section, you’ll learn the rationale behind aftercare, what to expect as your piercing settles, and how to tailor care to different ear sites (lobe, helix, forward helix, tragus).
How long to clean ears after piercing: the standard timeline
After a fresh ear piercing, the goal is to keep the area clean while avoiding over-wetting or trauma. A typical progression is to clean once daily during the first week, then reduce to every other day during weeks 2 and 3, and continue as advised by your piercer for the first 4–6 weeks. Some practitioners extend cleansing to the entire healing period, particularly in areas with hair or skin folds, while others recommend minimal cleaning if there is no discharge. It's important to avoid scrubbing the area aggressively; instead, use a gentle saline flush around the jewelry and the surrounding skin. If crust forms, you can soften it with a saline wipe. Remember that the piercing's healing timeline varies by location, skin type, and aftercare adherence. The Cleaning Tips team emphasizes that you should adapt if your body reacts—some people heal faster, others slower. For anyone reading, the essential idea is consistency over intensity.
Cleaning solutions and methods
Safest practice uses a sterile saline solution (0.9% NaCl) for cleansing the outer skin around the piercing. Pure water or tap water should be avoided directly on the piercing, and harsh antiseptics like rubbing alcohol or hydrogen peroxide should not be used on fresh piercings unless explicitly advised by a professional. To clean, dampen a clean cotton pad or gauze with saline and gently wipe around the jewelry, never twisting or pulling on the jewelry itself. Always wash your hands before touching the piercing, and dry the area with a clean towel or disposable paper towel. If crust forms, soaking with saline can help soften it before gentle removal. Cleaning Tips notes that consistency matters more than aggressive cleaning—stick to a gentle routine.
Daily care routine: a practical approach
Create two simple daily touchpoints: morning and evening. In the morning, wash your hands, apply a saline wipe to the outer area, then pat dry with a clean tissue. In the evening, repeat the saline cleanse and inspect the site for redness, swelling, or discharge. If you must shower, keep the head tilted to avoid directing shampoo or soap into the piercing, and rinse the area with saline afterward. Avoid using soap directly on the jewelry unless your piercer recommends it, and never use alcohol-based products on a fresh piercing. The goal is to keep the area clean without irritating the tissue or loosening the jewelry. Cleaning Tips suggests keeping a simple schedule to form a healthy habit that supports healing.
Signs of infection or complications and when to seek help
Even with careful cleaning, infections can occur. Redness that worsens or lasts beyond a few days, increasing swelling, warmth around the piercing, thick yellow or green discharge, or fever are warning signs. If you notice one or more of these symptoms, contact your piercer or a healthcare professional promptly. Do not ignore persistent pain or foul odor, as these can indicate a more serious issue. In the early healing phase, it’s better to err on the side of caution and schedule a check-in with a professional. The Cleaning Tips team emphasizes timely intervention can prevent complications and preserve the healing process.
Jewelry considerations and location tips
Cartilage piercings (helix, forward helix, tragus) may have different aftercare needs than lobes. Cartilage tends to heal slower and can be more prone to irritation, so gentle handling and consistent cleaning are essential. If swelling is significant or your jewelry sits tight against the skin, consult your piercer about adjusting the length or type of jewelry during the healing period. Sleeping on the affected side can irritate the area, so consider a soft sleep position or protective covering. Maintain the jewelry’s cleanliness at all times, but avoid removing or changing jewelry during the initial healing phase unless advised by a professional.
Practical tips and common mistakes to avoid
Common mistakes include over-cleaning, using harsh chemicals, twisting the jewelry, or touching the site with dirty hands. Always use sterile saline, and never substitute with household cleaners. Do not rush the healing process by removing or changing jewelry too soon. If there is persistent discharge, a foul odor, or increasing pain, seek professional guidance rather than attempting home remedies. This section highlights tailored tips for different ear locations and jewelry types to help you maintain a clean, safe healing environment.
Tools & Materials
- Sterile saline solution (0.9% NaCl)(Use pre-mixed single-use packets if possible.)
- Clean cotton pads or gauze(For gentle cleansing around the piercing.)
- Mild fragrance-free soap(Only for washing hands; do not apply directly to the piercing.)
- Soft towel or disposable paper towels(Pat dry; avoid rubbing.)
- Gloves (optional)(Non-latex if you have sensitivities.)
- Antibiotic ointment (as prescribed)(Only if your piercer or doctor recommends.)
Steps
Estimated time: 15-25 minutes per session; daily for the first 1-2 weeks as recommended
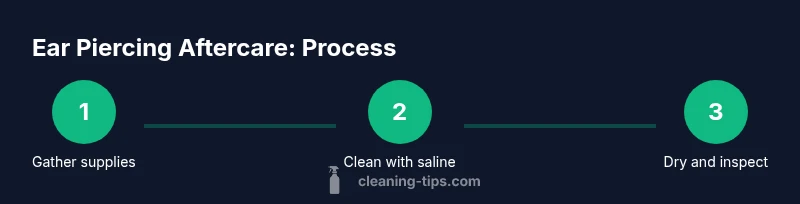
- 1
Gather and prep supplies
Collect sterile saline, clean pads, and a soft towel. Ensure your hands are clean and dry before touching the piercing to prevent introducing bacteria. Set up a clean, well-lit workspace and lay out everything within easy reach.
Tip: Having everything ready reduces the temptation to touch the piercing with dirty hands. - 2
Wash and dry hands
Thoroughly washing hands with soap for at least 20 seconds helps minimize contamination. Dry completely with a clean towel before handling the piercing. Avoid touching your face during the procedure.
Tip: Keep nails short to reduce accidental scratching around the piercing. - 3
Flush the piercing with saline
Dampen a clean pad with saline and gently wipe around the outer edge of the jewelry. Do not twist or pull on the jewelry. Focus on the skin around the piercing rather than trying to wash the jewelry itself.
Tip: If crust forms, apply saline to soften it before gentle removal. - 4
Pat dry and inspect
Gently pat the area dry with a clean tissue or towel. Check for redness, swelling, or discharge. Avoid rubbing the skin; patting minimizes irritation and helps the healing tissue stay intact.
Tip: Note any changes to track healing progress over time. - 5
Rinse if needed and avoid irritants
If you experience irritation, you can repeat a saline rinse, but avoid soap directly on the piercing. Do not use alcohol-based cleaners or hydrogen peroxide on fresh piercings, as these can delay healing.
Tip: Resist the urge to scrub; gentle cleansing is all that's needed. - 6
Avoid manipulating the jewelry
Do not rotate, twist, or remove the jewelry during the initial healing period unless advised by a professional. Refrain from using tap water, fragrances, or oils near the piercing.
Tip: Keep the jewelry clean and check for any movement that causes discomfort. - 7
Document and seek help if needed
Keep a simple log of cleaning times and any symptoms. If redness worsens, discharge changes color, or pain increases, contact your piercer or healthcare provider promptly.
Tip: Early professional advice can prevent complications.
Questions & Answers
How long should I clean my ear piercing daily after getting it?
Clean the outer area as advised by your piercer, typically once or twice daily for the first week, then taper as healing progresses. Avoid over-cleaning, which can irritate tissue.
Clean the outer area once or twice daily for the first week, then adjust as healing progresses. Avoid over-cleaning.
Is hydrogen peroxide safe to use on a fresh piercing?
Hydrogen peroxide and alcohol can irritate healing tissue and slow healing. Use sterile saline for cleansing unless your piercer instructs otherwise.
Hydrogen peroxide can irritate healing tissue; use saline instead unless your piercer says otherwise.
Can I remove the jewelry during cleaning?
Only remove if your piercer advised it. In most cases, you should clean around the jewelry without removing it during the initial healing period.
Only remove if your piercer says to, otherwise clean around the jewelry.
What are signs of infection I should watch for?
Increasing redness, swelling, warmth, thick discharge, foul odor, or fever are signs to seek professional care promptly.
Look for redness, swelling, warmth, discolored discharge, or fever and seek help if they appear.
When should I contact a professional about my piercing?
If symptoms worsen or do not improve after a few days, or if discharge changes color, contact your piercer or healthcare provider promptly.
If symptoms worsen or last more than a few days, contact a professional.
Watch Video
The Essentials
- Follow a consistent daily care routine during the first weeks.
- Use sterile saline, not alcohol-based products, on new piercings.
- Avoid touching or manipulating the piercing unless advised.
- Watch for infection signs and act early.
- Consult a professional if unsure about healing progress.