What to Clean Piercings With: Safe Aftercare Guide
Learn what to clean piercings with to support healthy healing. This expert guide covers safe solutions, routines, and tips for common piercing types.

Learn what to clean piercings with to support healthy healing. This guide outlines safe cleansers, the correct saline routine, and what to avoid. By following these steps, you’ll minimize irritation and infection while protecting your jewelry and skin. It also covers rinse frequency, hygiene basics, and when to contact a piercer. Keep this practical reference handy for healing.
Why Safe Cleaning Matters for Piercings
Piercings create an opening from the outside world into your skin, which means keeping the area clean reduces the risk of irritation, infection, and delay in healing. The Cleaning Tips team emphasizes a gentle, consistent approach during the healing period. Start with clean hands, use a mild cleanser, and stick to only sterile saline for routine rinsing. Avoid harsh chemicals such as alcohol, hydrogen peroxide, or iodine near the piercing, as these can dry out or irritate the tissue and prolong healing. Remember: the goal is to keep the skin around the jewelry comfortable while preserving the jewelry’s metal and coating. By following a cautious routine, you support natural tissue recovery and minimize swelling and crusting.
What To Clean Piercings With: Safe Cleansers
The safest cleansers are simple and fragrance-free. Use a 0.9% sterile saline solution for rinsing, either pre-made or prepared at home with non-iodized salt dissolved in boiled, cooled water. A mild, fragrance-free soap can be used sparingly around the area, but never directly on the jewelry during healing. Avoid alcohol-based rubs, hydrogen peroxide, iodines, mouthwash, or any products with fragrance or coloring near the piercing. If you wear tape or dressings, remove them carefully before cleaning to prevent trapping bacteria. For ongoing care, you can also use a saline spray if directed by your piercer. Consistency matters more than intensity, so aim for gentle daily cleansing rather than aggressive scrubbing.
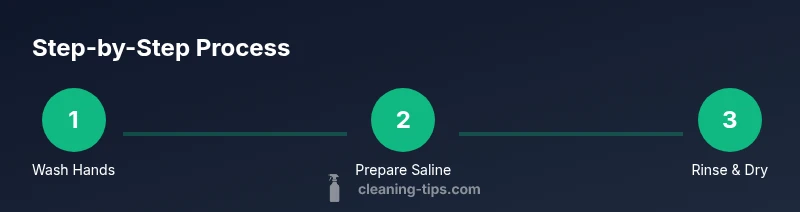
Step-by-Step Cleaning Routine (At-Home)
To support healing, create a simple routine you can repeat daily. Start by washing your hands with soap and water, then dry with a clean paper towel. Prepare your saline rinse and check that your surroundings are clean. Gently rinse the area around the piercing from front to back, avoiding heavy scrubbing of the jewelry itself. If crusties form, soften them with saline and wipe away with a clean gauze or paper towel; never pull or twist the jewelry. Rinse again with saline, then pat dry with a clean, lint-free tissue. If you notice redness or unusual swelling, pause cleaning and consult your piercer. Do not remove jewelry during healing unless your piercer instructs you to do so.
Cleaning For Different Piercing Types
Not all piercings heal the same way. Ear lobes typically require gentler, shorter cleanings, while cartilage piercings can be more sensitive and take longer to settle. Nose and lip piercings are near soft tissue that can be irritated by aggressive cleaning. In all cases, avoid scrubbing the jewelry itself and avoid rotating the jewelry during healing, which can irritate the channel. If your piercing has a higher risk of snagging, consider using a clean, non-woven pad to pad around the area while you wipe. When in doubt, follow your piercer’s specific aftercare instructions and adjust your routine as needed.
Common Mistakes and How to Avoid Them
One common mistake is over-cleaning; cleansing the area too aggressively can strip protective oils and increase irritation. Another is using scented or colored products near the piercing, which can cause a reaction. Touching the piercing with unwashed hands is a frequent culprit; always wash hands before handling jewelry. Do not remove jewelry during the healing phase unless advised, as removal can trap bacteria and delay healing. Finally, avoid swimming in pools, hot tubs, or oceans during the early healing period, unless you can cover the piercing reliably, due to bacteria exposure.
When to Seek Help and How Long Healing Takes
Healing times vary by location and piercing type, but most minor irritation should improve within a few days to a few weeks. If you see increasing redness, fever, swelling, severe pain, or pus, contact your piercer or a medical professional promptly. If the jewelry becomes loose or you notice a change in the position of the piercing, seek professional advice immediately. Remember to follow up with your piercer for a personalized timeline, as healing can be prolonged by smoking, poor hygiene, or trauma.
Daily Habits to Support Piercing Healing
Pair your cleansing with daily hygiene habits to support healing. Keep hands clean and avoid touching the piercing unnecessarily. Sleep on clean pillowcases and wear breathable fabrics to reduce moisture buildup. Maintain a clean bathroom environment and avoid shared towels that could cross-contaminate the area. If your piercings involve metal jewelry, check for any rough edges or scratches that could irritate the skin and address them with your piercer.
Authoritative sources and further reading
To reinforce the guidance above, consult reputable sources on wound care and piercing aftercare. While individual recommendations may vary, general principles such as using saline for cleansing and avoiding irritants remain consistent across medical literature. For deeper reading, see the following sources: CDC wound care guidelines, NIH materials on wound healing, and PubMed-indexed reviews on piercing aftercare. These sources provide background on skin healing, infection signs, and safe hygiene practices. Cleaning Tips synthesis uses these principles to craft practical, at-home routines that homeowners and renters can follow safely.
Tools & Materials
- Sterile saline solution (0.9%)(Pre-made sterile saline or home-made with non-iodized salt; avoid additives)
- Fragrance-free, mild soap(Used for incidental cleansing around the area, not on the jewelry)
- Clean, warm water(Rinsing and diluting cleaners as needed)
- Disposable paper towels or lint-free tissue(Pat dry gently; avoid cloths that shed fibers)
- Non-woven gauze pad (optional)(Use to gently wipe crusties; avoid pulling on jewelry)
- Cotton swabs (optional)(Use sparingly; avoid aggressive scrubbing near the piercing)
Steps
Estimated time: 15-25 minutes per cleaning session
- 1
Wash hands thoroughly
Begin with clean hands. Wet them, apply fragrance-free soap, and lather for 20 seconds before rinsing. Dry with a clean towel.
Tip: Clean hands prevent transferring bacteria to the piercing during cleaning. - 2
Prepare saline rinse
If using homemade saline, mix 1/4 teaspoon non-iodized salt in 8 ounces of boiled, cooled water. Ensure the solution is freshly prepared and not cloudy.
Tip: Label homemade saline with date; discard after 24 hours if unused. - 3
Rinse around the piercing
Gently rinse the area with the saline solution, avoiding direct force on the jewelry. Do not scrub the jewelry or move it aggressively.
Tip: Aim for a mild, steady rinse rather than a strong jet. - 4
Dry and inspect
Pat the area dry with a paper towel. Inspect for redness, swelling, or discharge. If crusties form, soften with saline before wiping away.
Tip: Never reuse dirty pads; use a fresh one for each wipe. - 5
Avoid touching or rotating jewelry
Do not twist, rotate, or reposition the jewelry during healing unless instructed by your piercer. This helps maintain the cleansing channel intact.
Tip: If the jewelry feels loose after cleaning, contact your piercer rather than attempting to adjust it yourself. - 6
Monitor healing progress
Keep a simple log of symptoms and length of healing. If you notice persistent redness, increasing pain, or fever, seek professional advice promptly.
Tip: Record changes weekly to discuss with your piercer at follow-up.
Questions & Answers
Can I use hydrogen peroxide to clean piercings?
No. Hydrogen peroxide can irritate healing tissue and delay recovery. Stick to saline and fragrance-free soap.
Hydrogen peroxide can irritate tissue and delay healing, so avoid it.
What is the best saline solution for piercings?
Use 0.9% sterile saline for rinsing. You can buy pre-made sterile saline or make it at home with non-iodized salt and boiled water.
Use 0.9% sterile saline for rinsing; avoid adding anything else.
How often should I clean piercings during healing?
Clean 2-3 times daily during the healing period, or as advised by your piercer, and keep the area dry and clean between cleans.
Clean two to three times a day during healing.
Can I remove the jewelry during cleaning?
Do not remove jewelry during healing unless your piercer instructs you to. Removal can trap bacteria and reopen the channel.
Don’t remove the jewelry unless your piercer says so.
Are scented soaps safe near piercings?
Scented soaps can irritate healing tissue; use fragrance-free products only around the piercing.
Fragrance-free soap is best for healing piercings.
Watch Video
The Essentials
- Use sterile saline daily for cleansing
- Avoid harsh chemicals near the piercing
- Wash hands before any handling of the area
- Do not rotate or remove jewelry during healing unless advised
- Watch for signs of infection and consult a pro if needed