How to Clean Clogged Ears Safely: A Practical Home Guide
Learn safe, step-by-step methods to clean clogged ears at home. This practical guide explains wax-softening drops, gentle rinsing, essential safety tips, and when to seek professional help.

Goal: safely clear earwax buildup at home using gentle methods. According to Cleaning Tips, you’ll learn when to use ear drops, how to soften wax, and how to avoid risky tools. You’ll also see warning signs that require professional care plus safety tips on ear drops timing, irrigation approach, and when to consult a clinician.
Understanding Ear Clog Causes
Ear canal wax (cerumen) is produced by glands in the outer ear and serves as a protective barrier. Most people can manage routine ear hygiene without tools, but several factors can tip the balance toward buildup. Moisture, temperature, and humidity can soften wax, allowing it to accumulate. A narrow or curved ear canal, aging changes, or the use of hearing aids and earbuds all contribute to trapping wax deeper in the canal. In some cases, inflammation or infection can also alter earwax consistency, making removal more uncomfortable. The Cleaning Tips team notes that wax buildup is common and not always a sign of poor hygiene, but it's important to approach removal with care and respect for the ear’s natural defenses. If you notice persistent fullness, muffled hearing, or itching, seek guidance rather than forcing a cleaning attempt.
Safe, At-Home Options to Try
There are several safe at-home options to address a clogged ear when symptoms are mild and there is no pain or drainage. Start with ear drops specifically designed to soften earwax; follow the product directions and avoid using drops that irritate your skin. After softening, you can gently rinse with warm water using a bulb syringe if you’ve been advised by a clinician. Use only a small amount of water, never aim directly at the eardrum, and stop if you experience pain or dizziness. Dry the outer ear with a clean towel and tilt the head to help drainage. Based on Cleaning Tips analysis, many households benefit from a routine that alternates gentle wax-softening practices with mindful drying, rather than attempting aggressive removal. If you have poor balance, ear infection symptoms, or a history of ear surgery, consult a professional before attempting any self-cleaning.
What Not To Do: Common Mistakes
Avoid inserting cotton swabs, hairpins, or other objects into the ear canal. These actions can push wax deeper, scratch the canal, or rupture the eardrum. Do not heat drops or try home remedies like ear candles; these methods lack evidence and can cause injury. Never use water that is too hot or too cold, and do not attempt repeated flushes in a single day. If you wear hearing aids, remove them before attempting cleaning and wipe the outer ear to prevent moisture buildup. If you experience sudden hearing loss, severe pain, fever, discharge, or bleeding, stop immediately and seek care.
What Not To Do: Common Mistakes (Continued)
Persistent fullness after a safe at-home attempt is a red flag. If you notice drainage, fever, persistent pain, or hearing loss that does not improve after a day or two, schedule an appointment. A clinician can examine the ear, determine whether the blockage is wax or something else, and use sterile instruments or irrigation tools if needed. In cases where the eardrum is perforated or there is a prior ear surgery, professional care is essential. The goal is to restore comfort and hearing without risking damage.
Maintenance and Prevention
To reduce future buildup, limit moisture in the ear canal when you swim, avoid inserting objects into the ear, and maintain a regular, gentle cleaning routine for the outer ear only. Consider routine ear checks if you wear hearing aids or earbuds, and store devices in clean cases to minimize bacteria or wax accumulation. Keeping ears dry after showers and using a micro-fiber towel can prevent dampness that encourages wax softening and collection.
What to Expect After Safe Cleaning
Most people notice improved hearing and less fullness within a day or two after a safe cleaning. Wax may re-accumulate over weeks or months, especially if you have narrow canals or high humidity. If your ears feel full again soon after cleaning, reassess techniques or consult a clinician to rule out infection, perforation, or other conditions.
Tools & Materials
- Ear drops designed to soften earwax (otic drops)(Choose fragrance-free drops; follow package directions; avoid if you have a perforated eardrum)
- Bulb syringe(Clean, lukewarm water; use gentle pressure)
- Towel or clean cloth(Lay under the head and catch drips)
- Hand sanitizer or soap(Wash hands before touching ears)
- Timer or clock(Optional for timing softening and irrigation steps)
Steps
Estimated time: 20-30 minutes
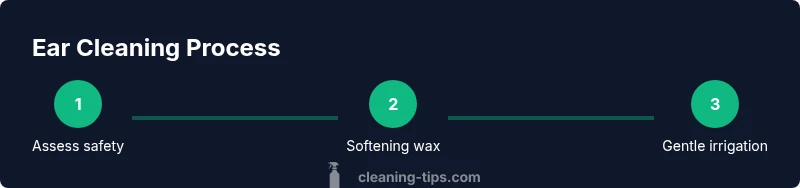
- 1
Check safety and gather supplies
Review safety cautions: do not perform if you have ear pain, drainage, fever, recent ear surgery, or a perforated eardrum. Gather ear drops, a bulb syringe, towel, and clean cloth.
Tip: Wash hands before starting and lay a towel within easy reach. - 2
Soften earwax with drops
Tilt your head, apply the recommended number of drops as directed, and stay in position for 5–10 minutes to let the drops soften the wax.
Tip: Follow exact timing and dosage on the product label; if unsure, ask a pharmacist or clinician. - 3
Gently rinse with warm water
Using a bulb syringe, gently instill a small amount of warm water along the outer ear and softly flush toward the opening of the ear canal—never spray directly at the eardrum.
Tip: Keep pressure light; stop immediately if you feel pain, dizziness, or sensation of fullness increasing. - 4
Dry and inspect outer ear
Tilt the head to drain water, pat the outer ear dry with a clean towel, and visually inspect for redness or irritation on the outer ear.
Tip: Do not insert the towel into the ear canal; only dry the visible exterior. - 5
Reassess and seek help if needed
Wait up to 24–48 hours to see if fullness returns. If pain, drainage, fever, or hearing loss persists, contact a clinician.
Tip: Avoid repeating irrigation in one day and seek professional care if you are unsure.
Questions & Answers
Can I use cotton swabs to clean my ears at home?
No. Inserting swabs can push wax deeper, scratch the canal, or damage the eardrum. Use safe, approved methods instead.
Swabs aren’t safe for ear cleaning and can cause harm.
What are safe at-home methods for earwax removal?
Safe methods include wax-softening drops and gentle irrigation when advised by a clinician. Avoid aggressive attempts that can injure the ear.
Gentle drops and careful rinsing, when advised, are safest.
What signs require a doctor’s visit?
Pain, drainage, fever, persistent hearing loss, or dizziness warrant professional evaluation.
Seek medical care if you have pain, drainage, or hearing loss.
Can ear candles or other home remedies help?
Most home remedies lack evidence and can be unsafe. Rely on clinically approved drops and professional guidance.
Most home remedies aren’t proven and could be unsafe.
How often should I clean my ears?
Do not establish a routine cleaning schedule; clean only as needed and with caution.
Clean only when you notice buildup and with care.
Is irrigation safe for everyone?
No—it's not suitable for people with a perforated eardrum, diabetes, or a history of ear surgery; consult a clinician.
Not everyone can irrigate; check with a clinician if unsure.
Watch Video
The Essentials
- Softening drops first, then cautious irrigation if advised
- Never insert objects into the ear canal
- Follow product directions and safety signs
- Seek care for persistent symptoms or pain
- Dry the outer ear thoroughly after cleaning