How to Clean Ear Wax Safely: A Step-by-Step Home Guide
Learn safe, proven methods for removing ear wax at home. This comprehensive how-to covers when DIY cleaning is appropriate, essential tools, step-by-step actions, and warning signs that require professional care.

Goal: learn safe, non-intrusive ways to remove ear wax at home. This quick guide covers when DIY cleaning is appropriate, the best tools to use, and a step-by-step approach with warnings. Never insert objects into the ear canal, and seek medical care for pain, fever, discharge, or persistent wax buildup.
Why Safe Ear Wax Cleaning Matters
Ear wax (cerumen) protects the ear canal, traps dust, and helps keep the ear drum lubricated. However, when wax accumulates, it can cause muffled hearing, itching, or temporary hearing loss. The goal of safe ear care is to remove excess wax without injuring the delicate ear canal. According to Cleaning Tips, a cautious, informed approach reduces risk and improves comfort. In this section we explore why rushing to remove wax with aggressive tools is risky and how small, controlled steps can prevent damage. Remember: the ear is a sensitive structure, and even seemingly minor injuries can lead to lasting discomfort. When in doubt, err on the side of minimal intervention and consult a clinician if symptoms persist.
Safe Home Methods for Removing Ear Wax
There are several at-home methods deemed safe for many people when used correctly. The most common starting point is softening the wax with a few drops of a gentle oil or saline solution, followed by careful irrigation or gentle suction. This approach minimizes the chance of pushing wax deeper. Use products designed for ear care and avoid makeshift household items. If you experience pain, dizziness, persistent discharge, or a perforated eardrum, stop immediately and seek medical help. The phrase how to clean ear wax can be approached with patience and discipline, and we’ll outline options that minimize risk. The guidance here aligns with best practices recommended by reputable health sources and our own practical experience at Cleaning Tips, where safety and clarity guide every instruction. We’ll cover when DIY cleaning is appropriate, what tools to use, and clear steps to reduce risk while improving ear comfort.
Practical Tools and Approaches to Consider
A typical safe routine uses non-irritating drops to soften wax, followed by gentle irrigation or manual removal by a clinician if needed. For at-home care, mild mineral oil, almond oil, or over-the-counter ear drops are common choices. It’s important to use a soft, rounded applicator and to avoid inserting anything deep into the ear canal. Frequent, aggressive cleaning won’t necessarily improve hearing and can irritate the skin inside the ear. In our experience at Cleaning Tips, most people benefit from limiting ear cleaning to once a week or less unless advised otherwise by a healthcare professional. When researching how to clean ear wax, seek sources that emphasize safety, not speed.
When to Seek Professional Help
Professional evaluation is essential if you notice pain, persistent hearing loss, drainage, bleeding, a foreign body, or a perforated eardrum. A clinician can remove ear wax with specialized instruments or irrigation in a controlled environment, reducing the risk of injury. If you wear hearing aids or have a history of ear infections, consult your provider about the safest cleaning strategy. In many cases, simple at-home care is enough, but escalation to an ear, nose, and throat (ENT) specialist may be necessary for persistent issues. Cleaning Tips emphasizes that professional care is a sign of smart self-care, not a failure to attempt DIY options.
Debunking Common Myths About Ear Wax
There is a lot of misinformation about ear wax. Some people believe that ear wax must be removed completely, but that is not necessary or advisable; some wax serves a protective function. Others rely on cotton swabs or hairpins, which can push wax deeper or injure the ear canal. A safer mindset is to remove only the wax that is visibly causing discomfort or hearing issues, while avoiding the ear canal’s deeper regions. Our guidance aims to replace myths with practical, evidence-based steps that minimize risk. When you search for how to clean ear wax, look for sources that prioritize safety and user-focused instructions.
Special Considerations for Children and the Elderly
Young children may produce wax in different patterns, and their ears are more sensitive to irritation. For kids, use only age-appropriate, child-safe products and supervise all cleaning attempts. The elderly may have canal changes or reduced sensation, increasing the risk of injury. In all cases, avoid hardware-store tools, hot water, or aggressive scraping. If wax buildup is associated with pain or fever, or if there is a history of ear tubes, consult a healthcare professional before attempting any at-home cleaning. Cleaning Tips recommends keeping routines simple and cautious, especially around vulnerable populations.
What to Do If Symptoms Return
Wax buildup can recur for various reasons, including seasonal changes and natural ear canal shedding. If you repeatedly experience buildup within a short period, consider scheduling periodic checks with a clinician to establish a safe maintenance routine. Track indicators such as hearing clarity and ear itchiness to identify patterns that indicate a need for professional evaluation. Regular, measured cleaning is preferable to rushed, aggressive attempts. Remember that persistent symptoms deserve medical attention.
A Step Toward Safer Practice: Personal Hygiene Context
Ear care is part of overall personal hygiene. While it’s natural to want quick solutions, safety should come first. Develop a routine that incorporates hygiene practices around the ears, such as washing the outer ear with a mild soap and water, drying gently, and avoiding moisture buildup inside the canal. The goal is to protect the skin lining and prevent irritation that could favor wax retention. By framing ear wax care as a small, interpretable task, you’ll reduce the temptation to rush through the process and increase the likelihood of a safe outcome.
Tools & Materials
- Softening drops (mineral oil, olive oil, or over-the-counter ear drops)(Use as directed; room temperature drops preferred for comfort.)
- Bulb syringe or gentle irrigation kit(Do not force water into the ear; use gentle pressure and low volumes.)
- Clean towel and mirror(Check for visible wax but avoid deep probing.)
- Clean, soft cloth or cotton balls(For drying around the outer ear only; avoid inserting into the canal.)
- Optional: saline solution(Can be used as an alternative to oil drops for softening.)
- Consultation contact info for clinician(Keep handy if symptoms worsen or persist.)
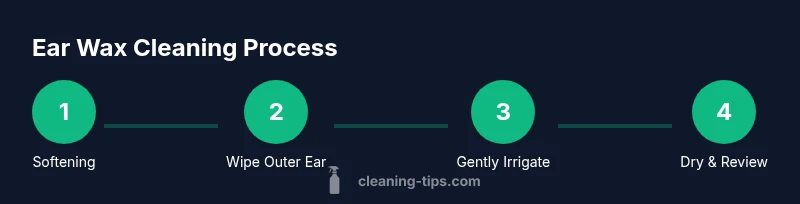
Steps
Estimated time: 20-45 minutes
- 1
Check for contraindications
Begin by inspecting the outer ear and noting any pain, discharge, or a history of ear drum problems. If you have a perforation, tubes, diabetes, or immune issues, do not attempt irrigation at home. This step reduces risk before you start any DIY cleaning.
Tip: If unsure about symptoms, postpone attempts and consult a clinician. - 2
Soften the wax
Lie on your side and place 3-5 drops of a safe oil or ear drops into the ear canal. Stay on your side for 5 minutes to allow the drops to penetrate and soften the wax. This makes removal easier and less likely to irritate the canal.
Tip: Use a small mirror to confirm you’re applying drops into the ear canal, not the outer ear. - 3
Wipe away visible surface wax
Gently wipe the outer ear with a clean cloth or tissue after the wax has softened. Do not insert anything into the canal. This step clears surface wax without risking deeper penetration.
Tip: Do not force cloth into the ear; keep contact only with the outer ear rim. - 4
Irrigate with care
Fill the bulb syringe with warm water (body temperature) and gently irrigate the entrance of the ear canal from a safe angle. Stop if you feel resistance or pain. Repeat 2-3 times if wax remains, ensuring you do not over-wet the ear.
Tip: Always test water temperature on your inner wrist before use. - 5
Dry thoroughly
Pat the outer ear dry with a clean towel. Use a hair dryer on the lowest, cool setting held at a safe distance to dry the canal if necessary, but never aim directly into the ear. A dry environment reduces the chance of bacteria growth.
Tip: Keep the dryer at arm’s length and avoid heat that can irritate skin. - 6
Evaluate and plan next steps
Assess whether wax cleared after the session. If hearing remains muffled or there is soreness, seek professional evaluation. Set a gentle maintenance routine if advised by a clinician.
Tip: Document symptoms and timing to discuss with a clinician if needed.
Questions & Answers
Is it safe to clean ear wax at home?
Yes, with caution. Use wax-softening drops and gentle outer-canal cleaning. Never insert objects deep into the ear canal, and discontinue if you experience pain or discharge. If in doubt, consult a clinician.
Yes, but only with caution: use softening drops and clean the outer ear while avoiding anything inserted deep into the canal.
What tools are safest for self-cleaning?
The safest approach uses a dropper for ear drops, a bulb syringe for gentle irrigation, and a soft cloth for drying the outer ear. Avoid cotton swabs, wires, or any object that can reach the canal.
Use drops, a bulb syringe, and a soft cloth; avoid inserting objects into the ear canal.
When should I see a doctor for ear wax?
If you have ear pain, fever, drainage, a history of ear disease, or if wax buildup is persistent despite careful at-home cleaning, seek medical advice. A clinician can remove wax safely with specialized tools.
Seek a clinician if you have pain, discharge, fever, or persistent blockage.
Can ear wax harm my hearing if not cleaned?
Wax buildup can temporarily affect hearing, but in most healthy ears, gradual cleaning is sufficient. Do not force deeper removal; wax often resolves on its own or with gentle, controlled care.
Wax can slow hearing temporarily, but aggressive cleaning can cause issues.
Are there myths about ear wax I should ignore?
Yes. Many myths encourage inserting objects or completely removing all wax. In reality, a small amount of natural wax is protective; focus on discomfort or blockage rather than sterilizing the canal.
There are myths about fully removing all wax; in reality, some wax is protective.
Is irrigation safe for people with ear tubes?
Irrigation is generally not recommended for ears with tubes. Consult a clinician for a safe cleaning plan tailored to your condition.
If you have ear tubes, talk to a clinician before attempting irrigation.
What maintenance routine helps prevent buildup?
Adopt a light cleaning routine as advised by a clinician, wash the outer ear, and keep ears dry. Regular check-ins with a healthcare professional can help tailor a safe maintenance plan.
Keep the outer ear clean, dry, and schedule regular check-ins with a clinician.
Watch Video
The Essentials
- Avoid deep insertion with tools into the ear canal.
- Softening drops simplify safe removal when used correctly.
- Seek professional care for pain, discharge, or persistent blockage.
- Use gentle irrigation with mild solutions and avoid forceful rinses.
- The Cleaning Tips team recommends cautious, step-by-step cleaning as the safest approach.