How to Clean for Norovirus: A Practical Guide for 2026
Learn a thorough, step-by-step approach to clean for norovirus. This guide covers containment, disinfectants, high-touch surfaces, laundry, and prevention to help keep your home healthy in 2026.

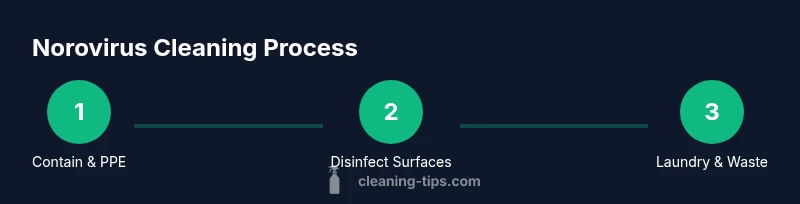
According to Cleaning Tips, you can safely clean for norovirus by following a clear, step-by-step routine that targets contaminated surfaces, isolates the area, and prevents spread. Start with protective gear, clean visible grime, then disinfect with an EPA-registered sanitizer, and finish with strict hand hygiene and laundered fabrics. This quick guide outlines the essential steps and checklists.
Why cleaning for norovirus matters
According to Cleaning Tips, norovirus is highly contagious and can spread via contaminated surfaces, objects, and person-to-person contact. Outbreaks can occur in homes, schools, and shared living spaces. Cleaning for norovirus isn't just about cleaning in the everyday sense; it requires specific steps to physically remove organic debris, then inactivate the virus with a disinfectant that is proven effective against norovirus. The first line of defense is isolation: keep the contaminated space separate from the rest of the home, limit traffic, and remove clutter that can harbor viral particles. Visual clues such as sticky residues or a faint odor may indicate the presence of contamination, but viruses can persist on many surfaces for hours to days, especially in damp areas or on porous materials. Following a standardized cleaning routine reduces the risk of recurring symptoms and helps protect vulnerable household members. The Cleaning Tips team notes that consistency matters: short, repeated cleanings with the right products are more effective than a single deep clean that misses hidden surfaces.
Safe approach and PPE to wear
Before starting any cleaning for norovirus, equip yourself with appropriate PPE. Wear disposable or washable gloves that fit snugly and a mask to protect against aerosols from cleaning, along with eye protection. If you are cleaning an area with heavy contamination, consider a disposable gown or apron. Keep a spare set of gloves for drop-in use and change them if you touch dirty surfaces outside of the contaminated area. Cleaning Tips recommends never reusing disposable PPE on the same outbreak area. After finishing, remove PPE carefully, bag it, and wash hands thoroughly with soap and water. Having a dedicated cleaning kit reduces cross-contamination and makes the process safer for you and others in the home.
Containment and space isolation
Isolate the affected room(s) and restrict access to prevent spread. Close doors, place a simple sign, and work from least contaminated to most contaminated surfaces to minimize cross-contamination. Remove soft furnishings if possible, or cover them with cleanable coverings. Avoid bringing other items into the space during cleaning. Ventilation helps disperse airborne particles; however, avoid dispersing aerosols by preventing aggressive spraying. Keep trash and cleaning waste contained until it can be bagged and disposed of in a sealed container.
Choosing and using disinfectants against norovirus
Norovirus is resilient on many surfaces, but EPA-registered disinfectants proven effective against norovirus can inactivate it when used as directed. Always read the product label for the correct dilution, contact time, and surfaces allowed. For non-porous surfaces like countertops and bathroom fixtures, a disinfectant with a 1-2 minute contact time is common, but always verify. If you prefer a bleach solution, prepare it safely according to label directions and use in well-ventilated areas. Do not mix cleaners that are incompatible; for example, never mix bleach with ammonia or acids. After application, keep the surface visibly wet for the specified duration to maximize effectiveness.
Cleaning sequence and high-touch surfaces
Begin with the least contaminated areas, and move toward high-touch zones. Prioritize high-touch surfaces: door handles, light switches, faucet handles, toilet flusher, remote controls, and kitchen counters. Use separate cloths for each surface type and change them frequently. Wipe in a consistent pattern (top to bottom, back to front) to avoid spreading contaminants. Allow cleaners to air-dry if the label permits, then wipe with a clean cloth if necessary. After disinfecting, wash hands immediately and avoid touching your face.
Kitchen surfaces and food-contact safety
Keep food areas separate from cleaning supplies; wash and sanitize cutting boards and utensils only after cleaning surfaces around them. Use soap and water to pre-clean any food-contact surfaces before applying disinfectants, ensuring no residue remains. Rinse with clean water if the product label requires it, and store food away from treated surfaces until dry. Consider using color-coded cloths and microfibers to prevent cross-contamination from kitchen usage to other areas.
Laundry and textiles handling after exposure
Contaminated towels, clothing, and linens should be handled carefully to prevent spreading the virus. Bag soiled textiles in a sealed bag if possible, then launder them separately in the hottest water setting available. Use regular household detergent, and dry on the highest heat safe for the fabric. Do not shake dirty laundry, which can aerosolize particles. Immediately wash your hands after handling contaminated fabrics and dispose of gloves properly.
Waste disposal and room ventilation
Place used cleaning materials, gloves, and disposable items in a sealed trash bag and double-bag if necessary. Tie the bags tightly and remove them from the space promptly; wash hands after disposal. Increase ventilation by opening windows or using exhaust fans during and after cleaning for at least 15-30 minutes if safe to do so; ensure you do not spread particles to other areas.
Building a simple prevention and maintenance plan
After cleaning, rebuild a routine that reduces future risk, including routine hand hygiene, wiping high-touch surfaces daily, and cleaning after any illness. Establish a simple checklist to track supplies (gloves, masks, disinfectant) and designate a cleaning cadence that suits your home size. Train household members on proper cleaning steps and safe storage. A small, consistent routine is more effective than sporadic deep cleans.
Tools & Materials
- Nitrile gloves(Use disposable gloves; change after finishing the contaminated area)
- Protective mask(Medical or N95 if dealing with heavy contamination)
- Goggles or face shield(Protect eyes from splashes)
- Disposable gown or apron(Optional for heavy contamination scenarios)
- EPA-registered disinfectant (norovirus-effective) or bleach solution(Follow label for dilution and contact time)
- Soap and clean water(For pre-cleaning and rinsing)
- Color-coded microfiber cloths(Prevent cross-contamination between areas)
- Scrub brush or non-abrasive pad(Remove stubborn residues on non-porous surfaces)
- Bucket(Carry cleaning solutions and rags)
- Trash bags (sealed, heavy-duty)(Double-bag if contaminated)
- Laundry detergent(Wash contaminated textiles in hot water when possible)
- Seal-able container for waste(Optional for long-term containment)
Steps
Estimated time: 1 hour 30 minutes
- 1
Put on PPE and isolate space
Wear gloves, mask, and eye protection before approaching the contaminated area. Close doors or create a barrier to limit access. This prevents further spread and protects household members.
Tip: Do not touch your face while wearing PPE; avoid cross-contaminating clean areas. - 2
Pre-clean visible soil
Wipe away visible soil and organic matter with soap and water or a mild cleaner. This step improves disinfectant effectiveness by removing debris first.
Tip: Use separate cloths for each surface type to prevent cross-contamination. - 3
Prepare disinfectant according to label
Dilute and mix the disinfectant exactly as directed by the product label. If using bleach, ensure ventilation and proper dilution.
Tip: Do not mix cleaners that could react; never mix bleach with ammonia. - 4
Apply disinfectant to high-touch surfaces
Cover door handles, switches, faucets, counters, and other high-touch areas with the disinfectant. Maintain the required contact time as stated on the label.
Tip: Avoid excessive spraying that could disperses particles into other rooms. - 5
Allow contact time and air-dry
Keep surfaces visibly wet for the label’s recommended minutes. Do not wipe off too soon; allow the chemical to work effectively.
Tip: If the surface dries quickly, reapply and maintain wetness for the full time. - 6
Rinse and wipe as needed
Some products require rinsing after disinfection; follow label directions. Use clean cloths for the final wipe-down to remove residue.
Tip: Rinse only if the label specifies; otherwise, air-dry is often acceptable. - 7
Launder contaminated textiles
Place soiled fabrics in hot water with detergent and dry on high heat if fabric permits. Do not shake textiles to avoid aerosolizing particles.
Tip: Handle textiles gently and wash hands after handling. - 8
Dispose of waste properly
Seal used cleaning materials and gloves in a bag; discard in an outside bin. Wash hands after disposal.
Tip: Double-bagging may be prudent for highly contaminated items. - 9
Ventilate and monitor
Ventilate the space to clear any lingering aerosols. Recheck surfaces after a few hours and maintain a routine cleaning cadence to prevent recurrence.
Tip: Keep a simple log of supplies and cleaning times for future outbreaks.
Questions & Answers
What is the first step if norovirus is suspected?
Isolate the area, restrict access, and don PPE before cleaning to reduce spread and protect household members.
First, seal off the area and put on protective gear before you start cleaning.
What surfaces should be cleaned first?
Prioritize high-touch surfaces such as door handles, switches, faucet handles, toilet flushers, and remote controls. Clean these areas before moving to less touched surfaces.
Focus on high-touch surfaces like doorknobs and switches first.
Which products are effective against norovirus?
Use an EPA-registered disinfectant proven effective against norovirus and follow the product label for dilution and contact time.
Choose an EPA-registered sanitizer proven to work against norovirus and follow the label.
Can I use household bleach for disinfection?
Yes, household bleach can be effective when diluted properly and used with good ventilation; always follow label directions.
Bleach works if you dilute it correctly and ventilate the area.
How should fabrics be handled after exposure?
Wash contaminated textiles in hot water with detergent and dry on the highest safe heat. Do not shake soiled fabrics.
Wash contaminated fabrics in hot water and dry on high heat; avoid shaking.
How long should surfaces stay wet with disinfectant?
Follow the product label for contact time; ensure surfaces stay wet for the recommended minutes.
Let the surface stay wet for the label's recommended minutes.
Watch Video
The Essentials
- Isolate and protect the space to prevent spread.
- Use EPA-registered disinfectants proven effective against norovirus.
- Follow label contact times and avoid cross-contamination.
- Handle laundry and waste carefully to minimize exposure.
- Maintain hand hygiene and a simple, repeatable cleaning routine.