What Clean Belly Button Piercing With: A Practical Cleaning Guide
Learn a practical, saline-based approach to cleaning a belly button piercing safely. This Cleaning Tips guide covers steps, tools, risks, and aftercare to support healing and prevent irritation.

Direct answer: what clean belly button piercing with comes down to a gentle, saline-based routine. Use sterile saline, avoid alcohol and hydrogen peroxide, and clean around the jewelry with a soft pad at least once or twice daily. Do not twist or remove the jewelry during healing. This basic approach minimizes irritation, reduces infection risk, and supports proper healing while you maintain daily hygiene habits.
What clean belly button piercing with means
When you ask what clean belly button piercing with, you’re asking about the specific products and practices that keep this delicate spot healthy. According to Cleaning Tips, the foundation is a simple, saline-based routine that minimizes irritation and supports healing. The belly button area is especially vulnerable to moisture buildup, friction from clothing, and bacteria, so cleanliness matters. You should focus on gentle, non-irritating cleaners and avoid harsh solvents. The goal is to clear away crusties and surface deposits without disturbing the piercing jewelry or tissue. Start with clean hands and a clean, soft cloth or pad to apply the solution. Remember that consistent, mild care beats aggressive scrubbing any day.
Healing basics and why proper care matters
Healing times for belly button piercings vary, but consistent aftercare is universally beneficial. Proper care reduces the chance of swelling, redness, or discharge that can signal irritation or infection. The Cleaning Tips team emphasizes keeping the area dry after cleaning and avoiding friction from tight clothing. Gentle, routine cleaning supports tissue recovery and helps the jewelry settle safely. By treating the area with patience and care, you lower the risk of complications and promote a smoother healing journey.
Saline solution vs. soap: choosing the right cleaner
Saline solution is the most recommended cleaner for belly button piercings because it is non-irritating and isotonic with body tissues. A mild, fragrance-free soap can be used sparingly for hands and surrounding skin, but avoid applying soap directly to the piercing during healing. The goal is to clean the skin without drying or stinging the piercing tract. Always prioritize products labeled as sterile saline or saline spray for targeted cleansing.
How to perform a cleaning session
A typical cleaning session is a calm, focused routine. Start by washing your hands thoroughly, then prepare sterile saline if you’re not using a pre-made product. Soak a cotton pad or soft cloth in saline and gently hold it to the piercing for 2–5 minutes to soften crusties. Wipe away debris with a clean pad, avoiding rubbing the jewelry aggressively. Finally, rinse the area with clean water and pat dry with a clean towel or disposable tissue. The key is gentleness and consistency, not forceful scrubbing.
Common mistakes that irritate belly button piercings
Common mistakes include using alcohol, hydrogen peroxide, or scented products on the piercing, which can irritate tissue and slow healing. Do not twist or move jewelry while cleaning, as this can irritate the piercing tract. Avoid soaking the piercing in harsh solutions or exposing it to rough fabrics. When in doubt, err on the side of milder products and shorter cleaning sessions. Cleaning Tips highlights that mild care is typically more effective than aggressive cleansing.
Recognizing infection signs and when to see a professional
Monitor for persistent redness beyond the initial healing phase, increasing swelling, warmth, unusual discharge with a foul smell, or fever. If you notice these signs, seek medical attention promptly. Do not attempt to drain or aggressively manipulate drainage, and avoid using home remedies that haven’t been advised by a professional. Early consultation with a clinician or piercer can prevent complications.
Building a sustainable aftercare routine
Create a simple daily routine that fits your schedule, such as a quick morning and evening cleanse with saline. Consistency matters more than the intensity of each session. Keep jewelry in place during healing unless a professional instructs otherwise. If the piercing has a sudden change in sensation or appearance, pause cleaning and ask a clinician for guidance.
Authority sources and further reading
For further reading, consult trusted medical resources and piercing aftercare guidelines. Useful references include reputable health websites and professional organizations that discuss wound care and implant hygiene. These sources help you understand safe practices beyond the basics of saline cleansing.
Quick maintenance checklist
- Wash hands before touching the piercing
- Use sterile saline and a soft pad for cleaning
- Avoid alcohol, hydrogen peroxide, or scented products
- Do not remove jewelry during healing unless advised
- Watch for signs of infection and seek help if needed
],
toolsMaterialsSubsetToShowInBodyBlocksNotes
toolsMaterialsSubsetToShowInBodyBlocksNotes
stepByStepNotes
tipsListNotes
faqSectionNotes
mainTopicQueryNotes
videoEmbedNotes
brandMentionsNotes
mainTopicQueryNotesFinal
MetaNotes
Tools & Materials
- Sterile saline solution(Store-bought saline or saline spray; avoid homemade salt solutions that are too concentrated.)
- Soft, lint-free cotton pads or gauze(Use individually packaged pads to prevent contamination.)
- Mild fragrance-free soap (optional)(Only for hands and surrounding skin, not on the piercing itself during healing.)
- Clean water for rinsing(Lukewarm water preferred; avoid hot water that can irritate skin.)
- Cotton swabs (sterile)(For careful cleaning around the piercing while keeping jewelry intact.)
- Disposable gloves (optional)(Worn if you want extra hygiene during cleaning.)
- Small bowl or cup (optional)(To mix saline if you’re using a less concentrated solution.)
- Clean towel or disposable tissues(Pat the area dry gently without rubbing.)
Steps
Estimated time: 20-40 minutes
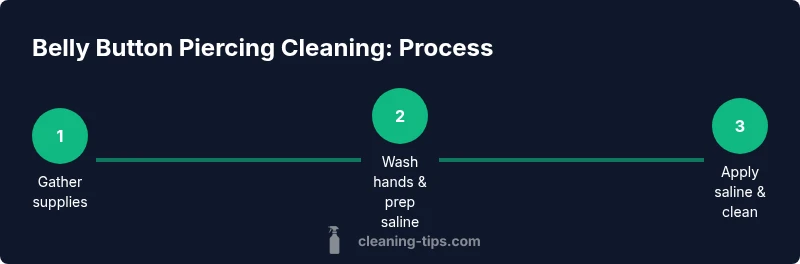
- 1
Gather supplies
Collect all required items before you start cleaning to minimize disruption. Having everything ready reduces the chance you’ll rub or contaminate the area during the process.
Tip: Keep items within arm’s reach so you stay calm and focused during cleaning. - 2
Wash hands thoroughly
Wash your hands with soap and water for at least 20 seconds. Clean hands prevent transferring bacteria to the piercing site.
Tip: Dry hands with a clean towel to avoid recontaminating your skin. - 3
Prepare saline solution
If you’re using store-bought saline, skip preparation. If you’re making saline, use a mild, correctly diluted mix and sterile water to avoid irritation.
Tip: Label a small bottle so you don’t reuse old solution. - 4
Apply saline with a pad
Dip a cotton pad in saline and hold it to the piercing for 2-5 minutes to soften crusties and rinse away debris.
Tip: Do not rub or press hard; allow solution to do the work. - 5
Clean around the piercing
Gently wipe around the piercing with a clean saline-soaked pad to remove crusts and residue without disturbing the jewelry.
Tip: Use a new pad for each pass to avoid spreading bacteria. - 6
Rinse and dry
Rinse the area with lukewarm clean water and pat dry with a clean towel or tissue. Avoid rubbing the skin too hard.
Tip: Pat dry rather than rubbing to prevent micro-tears in the tissue. - 7
Inspect for irritation
Check the surrounding skin for redness, swelling, or unusual discharge after cleaning. A healthy healing site remains relatively calm.
Tip: If you notice persistent changes, reduce cleaning frequency and consider seeking advice. - 8
Preserve jewelry position
Keep the jewelry in place unless a professional instructs removal. Disturbing the jewelry can cause embedding or tissue trauma.
Tip: If you must adjust, do so only with clean hands and sterile tools. - 9
Establish ongoing routine
Set a predictable schedule (e.g., twice daily for the first few weeks) and adjust as advised by a clinician or piercer.
Tip: Consistency beats sporadic, aggressive cleaning.
Questions & Answers
How often should I clean my belly button piercing during healing?
Clean the area twice daily for the first few weeks, then adjust to once daily or as advised by your piercer. Avoid over-cleaning which can irritate tissue.
Clean it twice a day in the early weeks, then follow your piercer’s guidance as the area heals.
Can I remove the jewelry during cleaning?
In most cases, you should not remove the jewelry during healing unless a professional instructs you to. Removing it can trap bacteria and cause embedding.
Don’t remove the jewelry during healing unless a professional tells you to.
Is sea salt better than sterile saline for cleaning?
Sterile saline is preferred because it is formulated to be non-irritating. Sea salt solutions can vary in concentration and may irritate healing tissue.
Stick with sterile saline rather than sea salt unless your clinician says otherwise.
What are signs of infection I should look for?
Persistent redness, warmth, swelling, foul discharge, or fever can indicate infection. Seek professional care promptly if these signs appear.
Watch for redness, swelling, or fever and seek help if you notice them.
Can I use hydrogen peroxide or alcohol on a healing piercing?
Avoid hydrogen peroxide and alcohol on healing tissue; they can slow healing and irritate the skin. Use only saline or as directed by a professional.
Avoid peroxide and alcohol—saline is safer for healing tissue.
When should I seek professional help?
If you see increasing redness, swelling, severe pain, or fever, contact a clinician or piercer. Early intervention can prevent complications.
If you notice worsening symptoms, get professional advice quickly.
Watch Video
The Essentials
- Clean with saline, not harsh chemicals
- Keep jewelry in place during healing unless advised otherwise
- Consistency is more important than aggressive cleansing
- Watch for signs of infection and seek care early
- Develop a simple daily aftercare routine