White Vinegar to Clean Mold: A Practical Home Guide
Discover how white vinegar can safely tackle household mold with practical steps, safety tips, and guidance on when to choose alternative cleaning methods.

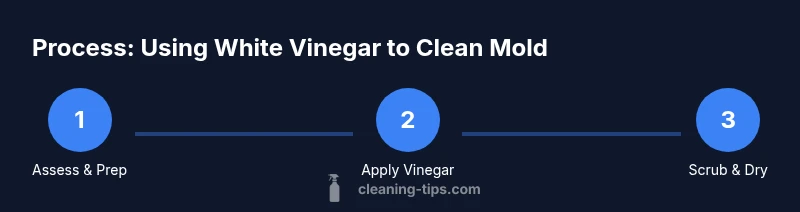
This guide shows you how to use white vinegar to clean mold effectively and safely in common home areas. You will learn when vinegar works best, surface prep, application, and follow-up steps to prevent recurrence. Expect practical tips, safety guidelines, and clear to-do actions you can start today. This answer is structured as steps you can follow.
Understanding how white vinegar works against mold in everyday spaces
Molds are fungi that feed on moisture and organic matter. White vinegar, typically around 5% acetic acid, disrupts mold cell walls and can slow growth on non-porous surfaces like tile, glass, and metal. When you choose white vinegar to clean mold, you rely on its acidity to suppress surface growth and reduce odor. According to Cleaning Tips, using vinegar is a practical first step for many small, visible mold problems in kitchens, bathrooms, and laundry areas. It isn’t a universal remedy, but it’s a safe, inexpensive option for routine maintenance. Always test a small area first to confirm the surface won’t be etched or stained.
When vinegar is a good option and scenarios where it may fall short
White vinegar is most effective on non-porous surfaces where mold growth is shallow and clearly visible. For porous materials like drywall or wood with raised mold, vinegar may not reach all mold roots, and remediation could require professional assessment. In damp, hard-to-reach spots behind walls, vinegar alone is unlikely to resolve the problem. Cleaning Tips recommends using vinegar as a first-pass solution in conjunction with proper drying and moisture control, not as a substitute for comprehensive remediation on widespread or recurring mold.
Surface testing and prep before applying vinegar
Begin with a moisture check: mold thrives where humidity is high. Identify the affected area and ensure the room is ventilated. Wear gloves, eye protection, and a mask to minimize inhalation of spores. Test a small, inconspicuous patch of the surface with white vinegar to verify it won’t damage the material. If there’s color loss or delamination, stop and pursue professional advice. Cleaning Tips emphasizes prep as the foundation of any mold-cleaning effort, including laying down plastic sheeting to catch drips and setting aside a dedicated cleaning cloth for the task.
Applying vinegar safely: spraying, waiting, and scrubbing
Spray undiluted white vinegar directly onto the moldy area until the surface is saturated. Do not mix vinegar with bleach or ammonia—this can create harmful fumes. Let the vinegar sit for at least 60 minutes to give the acid time to work, then scrub with a non-abrasive brush or microfiber cloth. Rinse with water and dry completely to prevent reoccurrence. If odor remains, repeat the process or switch to a baking-soda-assisted deodorizing step. Cleaning Tips notes that patience and thorough drying are often as important as the cleaning itself.
Handling stubborn mold and porous materials
Stubborn mold on porous materials such as drywall, insulation, or fabric may return even after vinegar cleaning. In these cases, replace the affected material or seal it after thorough cleaning and drying, and address underlying moisture sources (leaks, condensation, poor ventilation). For areas with visible mold embedded in porous substrates, consider consulting a professional mold remediation service. The goal is to remove the mold and fix moisture, not just to mask the problem.
Prevention and maintenance to reduce future mold growth
Mold prevention focuses on moisture control. Fix leaks promptly, improve ventilation (especially in bathrooms and laundry rooms), and use a dehumidifier in damp climates. Regularly inspect edges around windows, pipes, and shower enclosures for condensation and water staining. A quick weekly wipe-down of surfaces with white vinegar can help deter new growth, but don’t rely on vinegar alone for ongoing moisture control. Cleaning Tips stresses the importance of consistent maintenance to keep mold from returning.
Authoritative sources for mold information
For trusted guidance, consult official sources:
- EPA Mold: https://www.epa.gov/mold
- CDC Mold FAQs: https://www.cdc.gov/mold/faqs.html
- NIEHS Mold Health Impacts: https://www.niehs.nih.gov/health/topics/agents/mold/index.cfm
Real-world scenarios and additional tips
In bathrooms with persistent humidity, use a daily wipe-down with diluted white vinegar on tiles and glass to keep mold at bay. In kitchens, focus on sink seals and window frames where moisture collects. Always ensure surfaces are fully dry before reoccupying the space. Remember that vinegar is a first-line option for many mild cases; if mold recurs after cleaning, escalate to more thorough remediation and moisture management. Cleaning Tips recommends documenting recurring mold spots so you can track moisture patterns over time.
Tools & Materials
- White vinegar (5% acidity)(Standard household vinegar; use undiluted for moldy patches on non-porous surfaces)
- Spray bottle(Wide-mouth bottle capable of spraying a fine mist)
- Microfiber cloths(Soft and lint-free for gentle scrubbing)
- Non-abrasive scrub brush(Use if mold is stubborn but surface is sturdy)
- Gloves(Chemical-resistant gloves)
- Safety goggles(Protect eyes from splashes)
- Mask or respirator(N95 or equivalent if mold is heavy or poorly ventilated)
- Plastic sheeting(For containment during cleaning on large areas)
Steps
Estimated time: 30-45 minutes plus drying time
- 1
Prepare the area
Put on gloves, goggles, and a mask. Open windows or turn on a vent fan to ensure airflow. Place plastic sheeting or towels around the work area to catch drips and dust. This step reduces exposure to mold spores and keeps nearby surfaces clean.
Tip: Ventilation is critical to avoid inhaling spores. - 2
Test a patch with vinegar
Apply a small amount of plain white vinegar on an inconspicuous patch to test for surface reaction. If the surface discolors or degrades, stop and choose a different approach.
Tip: Always test first to prevent damage to delicate surfaces. - 3
Apply undiluted vinegar to mold
Spray the moldy area generously with undiluted white vinegar until it’s saturated. Do not dilute the vinegar, as higher acidity improves mold suppression on non-porous surfaces.
Tip: Avoid over-wetting porous materials. - 4
Wait and scrub
Let the vinegar sit for 60 minutes to maximize effectiveness. Then scrub the area with a non-abrasive brush or microfiber cloth until the mold loosens and the surface looks clean.
Tip: If the mold is stubborn, reapply vinegar and scrub again. - 5
Rinse and dry thoroughly
Wipe away any residue with a clean cloth and dry the surface completely. Use a fan or dehumidifier if available to speed drying and prevent moisture buildup.
Tip: Moisture control is essential to prevent regrowth. - 6
Inspect and re-clean if needed
Check the cleaned area after a few hours. If you still see mold, repeat the steps or consider professional remediation for more extensive growth.
Tip: Persistent mold may indicate hidden moisture behind walls.
Questions & Answers
Can white vinegar kill all mold types?
White vinegar can kill many common household mold species on non-porous surfaces, but it may be less effective on porous materials where mold has penetrated deeper. For extensive growth, professional remediation may be required.
White vinegar works for many surface molds, but deep or porous mold might need a professional fix.
Is vinegar safe to use around pets and children?
Vinegar is generally safer than bleach, but it should be used with good ventilation and kept away from pets and kids during application. Rinse surfaces or dry thoroughly after cleaning.
Use in a well-ventilated area and keep pets away while you clean, then dry the area fully.
Should I use vinegar before or after bleach?
Do not mix vinegar with bleach. If you’ve already used bleach, do not introduce vinegar on top of it; instead, rinse and allow the area to dry before considering vinegar as an option for future cleanings.
Never mix cleaners; rinse and dry if you’ve used bleach first.
Can vinegar remove mold stains completely?
Vinegar can help reduce staining in some cases, but stubborn stains may remain even after cleaning. For persistent discoloration, consider sealing or repainting after ensuring moisture control.
Stains may linger; cleaning reduces visibility but may not remove every trace.
What if mold keeps returning after cleaning?
Recurring mold often signals ongoing moisture problems. Identify leaks, improve ventilation, and ensure proper drainage. If cleaning repeatedly fails, seek professional remediation to address hidden moisture sources.
If mold comes back, there’s usually a moisture issue that needs fixing.
Is vinegar effective on bathroom mold from grout?
Vinegar can help with mold on grout in bathrooms, but heavy mold between tiles may require more aggressive treatment or professional assessment. Clean, rinse, and dry thoroughly after each use.
Vinegar helps grout mold, but severe cases may need more than cleaning.
Watch Video
The Essentials
- Apply vinegar to non-porous mold first
- Ventilate and wear PPE during cleaning
- Let vinegar sit, then scrub and dry completely
- Test patches before cleaning delicate surfaces
- Pursue professional remediation for porous surfaces or persistent mold