How to Clean Wall Mold: A Practical Guide
Learn practical steps to safely remove wall mold, prevent regrowth, and protect indoor air quality with vinegar, baking soda, and moisture-control strategies. This guide covers tools, step-by-step actions, safety, and prevention for homeowners and renters.

To clean wall mold safely, protect yourself with PPE, ventilate the area, then apply an appropriate cleaner (like vinegar) and scrub gently. Allow surfaces to dry completely and monitor for re-growth. This guide covers tools, step-by-step actions, and prevention to keep walls mold-free. Follow instructions, wear PPE, and never mix cleaners.
How to Clean Wall Mold: Causes and Types
How to clean wall mold starts with understanding what you’re dealing with. Wall mold is usually a byproduct of hidden moisture behind paint, drywall, or wallpaper. According to Cleaning Tips, most interior mold grows where humidity spikes or where water leaks occur, so initial steps focus on moisture identification and containment. There are different mold types you might see on walls, including mildew and more invasive colonies. For painted walls, surface stains may be cosmetic, but active growth beneath the coating requires cleaning and moisture control. The Cleaning Tips team found that quick, decisive action limits the spread of spores and reduces long-term damage. In any case, safety comes first: isolate the area, protect yourself, and ventilate well before you begin.
Health Risks and Safety Protocols
Mold exposure can irritate the skin, eyes, and lungs, especially for children, seniors, and people with respiratory conditions. Safety protocols emphasize PPE: use gloves, goggles, and a respirator or properly fitted mask, plus long sleeves and pants to minimize skin contact. Ventilate the space with open windows or an exhaust fan. Never mix cleaners, especially vinegar with bleach, as this can release dangerous gases. If you notice extensive growth (larger areas, porous surfaces, or ongoing moisture), consider pausing work and seeking professional help. Cleaning Tips recommends a conservative approach when mold covers porous surfaces like drywall.
Prevention Strategies to Reduce Future Mold Growth
The best mold cleanup often includes prevention. After you remove visible growth, address the moisture source: fix leaks, improve ventilation, and control indoor humidity. Simple habits—using exhaust fans in bathrooms and kitchens, directing poor drainage away from walls, and keeping indoor humidity below 50%—can dramatically reduce regrowth. Regular inspections after wet seasons help catch problems early. The goal is a dry, balanced environment where mold cannot take hold. Cleaning Tips emphasizes moisture management as the long-term defense against recurring mold.
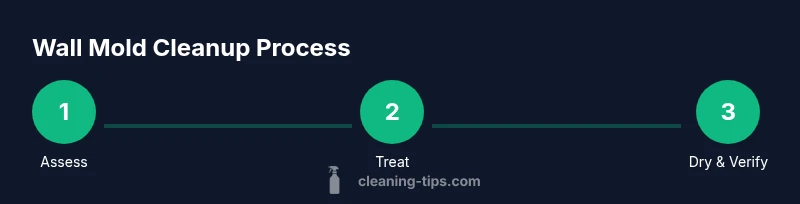
Step-by-Step Cleaning Process for Painted Walls (Narrative Overview)
A focused, consistent approach yields the best results on painted walls. Begin by isolating the room, opening windows, and wearing PPE. Test a small, inconspicuous patch of paint with your cleaner in advance to ensure there is no paint damage or discoloration. Apply cleaners gently to the moldy area, and avoid over-wetting the surface. Then scrub with a soft brush until visible mold and staining loosen, followed by a thorough rinse with clean water. Finally, dry the area completely and monitor for any signs of regrowth. This section provides a practical narrative that complements the step-by-step instructions that follow in the next block.
Special Surfaces, Odors, and Drying Tips
Porous surfaces like drywall or plaster may hold moisture more deeply than painted wood. On these materials, cleaners should be mild and non-bleaching to prevent damage. For stubborn odors, baking soda can help neutralize smells when used as a paste or sprinkled after cleaning. After scrubbing, use fans or dehumidifiers to accelerate drying. Do not rush the drying phase; incomplete drying invites quick regrowth. Keep pets and children away during the process, and ensure the area remains well-ventilated until completely dry.
Aftercare and Verification: Ensure Mold Is Gone and Won't Return
Once you’ve cleaned and dried the area, re-check after 24–48 hours to ensure there’s no new growth. Look for any damp spots, musty odors, or new staining, which indicate lingering moisture. If you find signs of regrowth, repeat the cleaning cycle focusing on moisture control and sealing any leaks. The long-term solution involves maintaining humidity control, repairing leaks promptly, and monitoring susceptible walls during wet seasons. The Cleaning Tips team emphasizes ongoing moisture management as the core defense against mold recurrence.
Tools & Materials
- Nitrile gloves(chemical resistant, long sleeves recommended)
- Safety goggles(eye protection)
- N95 respirator or equivalent(for mold spores)
- Disposable coveralls or old clothing(to protect skin and clothes)
- Microfiber cloths or disposable wipes(for wipe-down and drying)
- Soft brush or sponge(gentle scrubbing)
- Spray bottle(for cleaners)
- White distilled vinegar(undiluted or diluted 1:1 with water)
- Baking soda(for deodorizing and mild abrasion)
- Mild dish soap(for initial cleaning)
- Bucket with warm water(for rinsing)
- Hydrogen peroxide 3% (optional)(use on porous surfaces; test first)
- Sealant or primer (optional)(to seal treated areas after drying)
Steps
Estimated time: 60-90 minutes
- 1
Prepare the area and put on PPE
Ventilate the space, remove nearby items, and put on nitrile gloves, goggles, and a respirator. This minimizes exposure to mold spores and prevents spreading contamination to clean areas. Ensure children and pets are kept away during cleanup.
Tip: Open windows fully or run a exhaust fan for continuous airflow. - 2
Test cleaners on a hidden patch
Apply a small amount of vinegar or a mild cleaner to a hidden corner of the wall to check for any paint damage or discoloration. Wait a few minutes to observe any adverse reaction before proceeding.
Tip: If you notice paint softening, skip bleach and use gentler cleaners. - 3
Apply cleaner to the moldy area
Spray undiluted vinegar on the moldy patch or apply a light baking soda paste. Let it sit for 10–15 minutes to loosen organic material before scrubbing.
Tip: Avoid oversaturation; leave surface damp, not soaking wet. - 4
Scrub gently and rinse
Use a soft brush or sponge to scrub the area in circular motions until the mold loosens. Wipe away residue with a clean cloth and rinse with warm water.
Tip: Overlap strokes to prevent missed spots and reduce re-growth chances. - 5
Deodorize and dry
Make a baking soda paste for deodorizing stubborn odors, apply lightly, then wipe off after 10 minutes. Use a fan or dehumidifier to speed the drying process and keep the area dry.
Tip: Never leave damp surfaces unattended; moisture fuels regrowth. - 6
Verify dryness and consider sealing
Ensure the wall is completely dry before repainting or sealing. If the area is porous, consider applying a stain-blocking primer or sealant after it dries to reduce future moisture absorption.
Tip: Recheck after 24–48 hours for any re-emergence.
Questions & Answers
Can I use bleach to clean wall mold?
Bleach is not always appropriate for wall mold, especially on porous surfaces like drywall. It can degrade materials and release harmful fumes. Use milder cleaners first and consider professional help for extensive growth.
Bleach isn't always the best option for walls. Use milder cleaners first and get help if the mold covers a large area.
Is vinegar effective against mold?
White vinegar is a common, consumer-friendly option that can inhibit mold growth on non-porous surfaces. It may be less effective on porous materials; treat those areas carefully and dry completely.
Vinegar can help on non-porous surfaces, but porous walls may need additional steps and thorough drying.
How long does cleaning take before it's safe to re-enter?
Plan for proper ventilation and drying time, typically several hours, depending on humidity and airflow. Ensure the area is completely dry before painting or sealing.
Give it several hours to dry, and make sure it’s completely dry before repainting.
What safety precautions should I take?
Wear gloves, eye protection, and a respirator. Ventilate well and keep children and pets away during cleanup. Do not mix cleaners.
Protect yourself with PPE, ventilate, and keep kids away while you clean.
Should I repaint after cleaning?
If the area is fully dry and mold-free, repaint after applying a stain-blocking primer. If you reused cleaning agents, test paint compatibility first.
Only repaint after it’s completely dry and mold-free; use a primer if needed.
What if mold returns after cleaning?
Re-evaluate moisture sources and consider professional remediation for recurring mold. Consistent humidity control is key to preventing recurrence.
If mold comes back, check moisture sources and consider experts. Keep humidity low to prevent it.
Watch Video
The Essentials
- Protect yourself with PPE before inspecting mold.
- Moisture control is the core defense against mold recurrence.
- Vinegar and baking soda are effective, gentle cleaners for many surfaces.
- Test patches to avoid damage to paints or wallpaper.
- Dry thoroughly and recheck within 24–48 hours.