How to Clean a Rug Doctor: Deep Cleaning Guide for Rugs
Master cleaning rugs with a clean rug doctor machine using this expert, step-by-step guide for homeowners and renters. Tools, safety tips, and practical restoration.

With this guide you will clean a rug using a Rug Doctor machine effectively and safely, achieving deeper grime removal than a standard vacuum alone. You’ll learn pre-clean prep, choosing the right cleaning solution, machine setup, precise extraction technique, and drying tips to minimize dampness and resoiling. By the end, your rug should look brighter, feel softer, and smell fresh.
Why clean rug doctor matters
Deep cleaning rugs with a Rug Doctor machine helps remove embedded soils that vacuuming and spot cleaning leave behind. The rug fibers act like a sponge for dirt, dust, pet dander, and oils. Over time these substances build up and create a dull appearance, stiff texture, and odors. The Rug Doctor uses hot water extraction and strong suction to flush soils from the fibers and lift them to the surface for removal. According to Cleaning Tips, this approach can deliver a deeper clean than everyday vacuuming and reduces the likelihood of quick re-soiling by thoroughly rinsing away detergents and residues. Understanding how this process works helps you select the right settings for different rug materials, from nylon and polyester to wool blends. It also helps you weigh the benefits of a rented machine versus a professional service. With proper use, you can salvage faded colors and restore pile fluff without leaving behind sticky residues.
This guidance aligns with general best practices for home cleaning, emphasizing fiber-safe methods and gradual progression rather than aggressive scrubbing. By treating high-traffic zones first and moving systematically, you reduce the chance of over-wetting delicate sections. In short, a well-used Rug Doctor can restore vibrancy and prolong rug life when paired with proper drying and maintenance. Cleaning Tips team emphasizes patience and precision over brute force, especially on delicate textiles.
Tools and materials you'll need
Before you start, assemble these essential tools and materials:
- Rug Doctor carpet cleaning machine (upright or portable)
- Cleaning solution recommended for rugs
- Pre spot stain remover
- Vacuum with hose attachment
- Microfiber towels
- A fan or dehumidifier
- A test rug or mat for area tests
Having these ready helps you work smoothly and prevents mid task interruptions. If you're dealing with delicate fibers like wool or antique fringe, plan for extra care and smaller sections.
Brand note: This guidance reflects practical, consumer-facing cleaning steps and is consistent with recommendations from Cleaning Tips for safe home cleaning practices.
Pre-clean prep and stain test
Effective rug cleaning starts with prep. Begin by removing furniture and elevating the rug to expose both sides if possible. Thoroughly vacuum to lift loose dirt and pet hair—do multiple passes, especially along the edges and in the fringe. Protect your floors with a drop cloth or old towels. Next, perform a patch test in an inconspicuous area using your chosen cleaning solution: apply a small amount, wait 5–10 minutes, and check for colorfastness without any shade change. If color remains stable, you can proceed; if not, switch to a gentler product or skip that rug. This pre-test helps prevent damage and guarantees predictable results when you run the machine.
Cleaning solutions and machine settings
Rug Doctor machines are designed to extract soil with hot water and cleaning solution. Use only solutions approved for use with your model and rug type. Mix according to label directions, avoiding concentrated mixes that create excess foam. For wool or delicate fibers, select a mild formula and test first. Set the machine to a moderate extraction speed and avoid blasting with extreme suction on fragile fibers. In general, work with warm water rather than hot to prevent fiber damage and color bleed. If your rug has strong pet odors, consider a deodorizing additive compatible with the rug material and the machine.
Drying strategies and odor control
Extraction leaves rugs damp, and humidity can slow drying or promote mold. Plan your drying strategy in advance: open windows if weather permits, use fans to direct air across the surface, and position a dehumidifier in the room if humidity is high. For large or dense rugs, consider professional help or extended drying times to ensure fibers are completely dry before use. After drying, vacuum again to lift the fibers and remove any residual powder or soil. If odors linger, sprinkle a light, fabric-safe deodorizer across the surface and brush it lightly into the pile. Consistent drying and gentle post-cleaning care extend rug life.
Maintenance, safety, and best practices
Safe operation protects both you and your rug investment. Always unplug the machine before refilling or cleaning parts. Keep children and pets away during cleaning and drying to prevent accidents. Regular maintenance of the machine—emptying tanks, rinsing hoses, and cleaning filters—prevents residue buildup and improves suction. Store cleaning solutions in a cool, dry place away from sunlight. If you encounter a stubborn stain or unsure fiber type, consult manufacturer guidelines or seek professional advice. The aim is to achieve a clean, fresh rug without compromising fibers or backing. This approach aligns with general cleaning safety practices endorsed by reputable sources in home care.
Notes on durability: more frequent cleaning of high-traffic rugs keeps pile looking new longer, while gentle care extends the life of delicate fabrics. Cleaning Tips highlights the value of methodical work and patience when tackling tough stains, which ultimately yields better outcomes than rushed, inconsistent cleaning.
Authoritative sources and further reading
For safety and best practices beyond home cleaning steps, consult authoritative sources:
- https://www.cdc.gov/coronavirus/2019-ncov/prevent-getting-sick/cleaning-disinfection.html
- https://www.epa.gov/saferchoice
- https://www.osha.gov/
Authoritative sources (continued)
These sources provide general guidance on safe cleaning practices, chemical handling, and indoor air quality. They support the idea that effective rug cleaning combines proper technique, correct product use, and thorough drying to prevent mold and residue buildup.
Tools & Materials
- Rug Doctor carpet cleaning machine (upright or portable)(Ensure the unit is in good working order and has a clean water tank)
- Cleaning solution recommended for rugs(Follow label directions and perform a patch test first)
- Stain pre-treat spray(Use on tough stains after patch testing)
- Vacuum with hose attachment(Before and after cleaning)
- Microfiber towels(For blotting and accidental spills)
- Extractor brushes or gentle upholstery tool(Optional but helpful for tough fibers)
- Fans or dehumidifier(Assist drying in humid spaces)
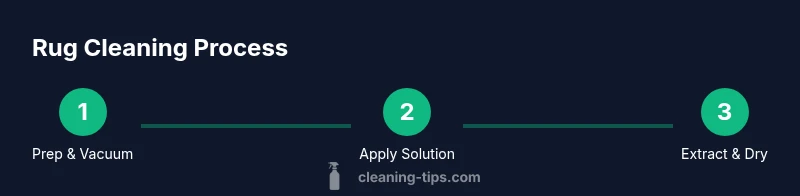
Steps
Estimated time: 60-90 minutes
- 1
Prep the rug and area
Clear the room and move furniture. Vacuum thoroughly in multiple passes to loosen embedded soil, paying attention to edges and fringe. Lay down a drop cloth under the rug if the floor is delicate, and remove anything that could snag during cleaning.
Tip: Vacuum slowly and overlap passes to lift stubborn dirt. - 2
Patch test the rug fibers
Apply your cleaning solution to a hidden area, such as the back corner. Wait 5–10 minutes and examine for color changes or fiber damage. If safe, proceed; if not, switch to a gentler product or test a smaller area first.
Tip: Colorfastness must be confirmed before large-scale cleaning. - 3
Mix solution and set machine
Fill the clean water tank with warm water and add the cleaning solution as directed. Do a quick test run on a disposable rug mat to ensure no excessive foaming or leaks. Adjust settings if you see suds pooling.
Tip: Use the manufacturer recommended ratio; excess foam slows drying. - 4
Begin extraction in sections
Divide the rug into manageable 2x2 foot sections. Move the machine forward and backward in even strokes, overlapping each pass to prevent missed areas. Do not rush; steady movement yields better extraction.
Tip: Keep the nozzle close to the surface without soaking the backing. - 5
Rinse or extract with clean water if needed
If you notice soapy residue, switch to clean water extraction to rinse fibers. Repeat until the water runs clear and there is no visible foam. This helps prevent sticky residues that attract dirt.
Tip: Rinse cycles reduce residue and speed up drying. - 6
Estimate drying time and set up fans
Open doors or windows if possible and place fans to blow air across the rug. Elevate edges to allow airflow underneath if feasible. Avoid walking on the rug until fully dry.
Tip: Dry time varies; expect anywhere from 6 to 24 hours depending on material and humidity. - 7
Post-clean fringe and fiber lift
Once surface moisture is reduced, run a light vacuum across the rug to lift fibers and remove loose soil. If desired, apply a fabric-safe deodorizer after drying and brush lightly to restore pile.
Tip: A brief post-clean vacuum helps restore fluff and even color distribution. - 8
Inspect and re-treat if necessary
Check for any remaining stains and treat promptly with a spot cleaner designed for your rug’s fiber. Avoid aggressive scrubbing that can damage the fiber or backing.
Tip: Address stains promptly to prevent permanent setting.
Questions & Answers
Is a Rug Doctor safe for all rug fibers?
Rug Doctor machines are designed for many rug types, but always patch test and follow label guidelines. Delicate fibers may require milder solutions or professional care.
Patch test and follow the rug’s care label. For delicate fibers, use gentler formulas and small test areas.
How long does it take rugs to dry after using a Rug Doctor?
Drying times vary with rug material and room conditions. Most rugs take several hours to a day; using fans and dehumidifiers speeds this up.
Expect several hours to a full day, depending on humidity and rug density.
Can I use any cleaning solution with Rug Doctor machines?
Only use solutions recommended for your specific Rug Doctor model and rug type. Avoid mixing products unless the manufacturer approves it.
Stick to approved solutions and ratios to avoid residue or damage.
What if stains persist after cleaning?
Pre-treat persist stains with a targeted stain remover and re-clean the area in small sections. For stubborn stains, consult a professional.
Spot treat and re-clean in small sections for stubborn stains.
How often should high-traffic rugs be cleaned?
High-traffic areas benefit from cleaning every 6–12 months, depending on wear, pets, and household activity. More frequent cleaning may be needed in homes with kids or pets.
Clean high-traffic rugs every 6 to 12 months or as needed.
Should I rinse after cleaning or just extract once?
If you see soapy residue, perform a rinse extraction to remove detergent. Otherwise a thorough extract may suffice when using ready-to-use formulas.
Rinse if you detect residue; otherwise, extract to finish.
Watch Video
The Essentials
- Vacuum thoroughly before cleaning
- Patch test to guard colors and fiber integrity
- Overlap passes for even extraction
- Control moisture and dry properly to prevent mold