Best to Clean Wooden Floors: A Practical Guide
Learn the safest methods to clean wooden floors, preserve finishes, and maintain warmth and shine. This guide covers dusting, damp mopping, finishes, spills, and maintenance for a healthier home.

By the end of this guide, you’ll have a safe, effective routine for cleaning wooden floors. Learn to identify finishes, minimize moisture, dust and damp-mop correctly, and dry promptly. You’ll discover which cleaners are wood-safe, how to handle spills, and how to maintain luster over time. This quick overview prepares you for the deeper steps below.
Why cleaning wooden floors requires care
Wood floors bring warmth and character to a home, but they require a gentle touch when cleaning. Moisture is the enemy; water that sits on the surface can seep into seams and cause swelling, warping, or clouding of the finish. The type of finish on your floor—whether it’s polyurethane, wax, or penetrating oil—shapes how you clean and what products you should avoid. A wrong step here can dull luster or carve permanent marks into the grain. The Cleaning Tips team emphasizes a moisture-conscious routine that minimizes exposure to water while effectively removing dust and grime. Start by identifying your floor finish, then tailor your approach to suit it. If you live in a rental or have a sensitive environment, this becomes even more important. According to Cleaning Tips, the safest approach is to limit moisture and use cleaners specifically designed for wood surfaces. With a simple framework—dust, then a damp microfiber mop, then thorough drying—you protect both the finish and the wood under it, preserving color, grain, and texture for years.
Understanding finishes and why it matters for cleaning
Wood floors are not all the same, and the finish is the instruction manual for cleaning. A polyurethane-coated plank tends to be the most forgiving; it forms a protective film that resists moisture better than wax or oil finishes. But even polyurethane floors respond best to a damp mop rather than a soaking wet one. Wax finishes sit on the surface and can be damaged by excess moisture; frequent cleaning with water may strip away shine. Oil or penetrating seals hydrate the wood but require periodic reapplication and special cleaners that won’t strip the finish. In practice, you’ll choose a cleaner that is pH-neutral and designed for wood, apply it to a microfiber cloth or mop, and test it on a small, inconspicuous area first. The goal is to lift dirt without leaving standing liquid behind. By understanding your finish, you select the right product, avoid harsh chemicals, and keep the floor looking even and warm rather than pale or streaky.
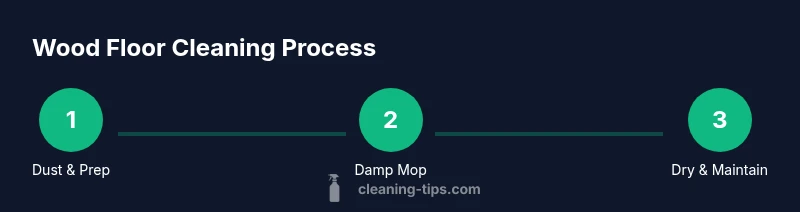
Everyday cleaning routine: dust, sweep, and dry
A clean wooden floor starts with regular dusting and dry movement to prevent scratches. Microfiber dust mops and soft brooms trap dust and reveal the wood’s natural grain without grinding it into the finish. Vacuuming with a floor-appropriate attachment is also effective, as it removes debris from joints that a broom might miss. The Cleaning Tips team suggests performing this routine on a schedule that matches foot traffic—more often in busy areas and less in rarely used rooms. After dusting, wipe the surface with a slightly damp microfiber cloth to pick up any remaining particles and avoid gritty residue that dulls shine. Finally, dry the area thoroughly with a clean, dry microfiber towel or pad. Quick, light passes keep the surface looking fresh and reduce the risk of moisture seeping into seams.
Wet cleaning: damp-mopping with care
Wet cleaning should be done with a damp microfiber mop, never a soaking wet one. Start by wringing out the mop until it is just damp; a soaked mop forces water into gaps and can ruin finishes. Use a cleaner that is labeled as safe for wood floors and apply it to the mop rather than directly to the floor. Work in small sections, following the grain of the wood, and avoid leaving pools of liquid. After mopping, go over the area with a dry microfiber pad to pick up any residual moisture. This step is critical to preserving the finish and preventing warping. If you notice streaks, wipe again with a clean, damp cloth and dry immediately. Regular damp-mopping, combined with prompt drying, extends the floor’s life and maintains even color.
Cleaners that are safe for wood floors
Choosing the right cleaner is essential for wooden floors. Look for products specifically labeled for wood and wood finishes, preferably pH-neutral. Avoid ammonia-based cleaners, bleach, or any solvent-heavy formulas that can break down finishes. Some homeowners opt for simple solutions like a drop of mild dish soap in water; however, use sparingly and ensure you rinse or dry completely. In many cases, a dedicated wood-floor cleaner provides the safest balance of cleaning power and finish protection. The key is to follow label directions and test on a hidden spot before broader use. Cleaning Tips analysis shows that products designed for wood are generally more forgiving and help maintain light reflection and texture over time. For eco-conscious homes, consider cleaners with low VOCs and minimal synthetic fragrances.
Handling spills, stains, and pet messes
Spills happen, and moisture is the chief culprit behind finish damage. Blot the spill immediately with a clean cloth—do not wipe vigorously, which can push liquid into pores. If a stain persists, treat it with a cleaner designated for wood floors and work from the outside edge toward the center to prevent spreading. For pet accidents, clean quickly and thoroughly, then allow the area to dry completely. In some cases, you may need to recondition the spot with a wood-safe conditioner or finish restorer following the manufacturer’s instructions. The goal is to remove moisture and prevent long-term staining or swelling while preserving the overall tone of the floor. Always ensure you dry the area completely to prevent any moisture from seeping into the boards.
Maintenance and periodic refinishing considerations
Wood floors don’t last forever in their original look, but proper maintenance can extend their life significantly. At routine intervals, assess wear patterns, especially in high-traffic zones or near doorways. If you notice dull patches, micro-scratches, or a loss of luster, you may need to refresh the finish or reseal. For polyurethane finishes, recoating may be needed after years of use; wax finishes may require stripping and re-waxing, or even complete refinishing in severe cases. When scheduling maintenance, choose a time with low humidity and stable temperatures to minimize movement of the boards. Cleaning Tips recommends consulting your floor manufacturer or installer for finish-specific guidance and selecting a cleaning routine compatible with the chosen finish. A proactive approach helps preserve warmth and depth of color for many years.
Common mistakes and how to avoid them
Avoid saturating the floor with water, which can cause swelling and finish damage. Do not use steam mops or high-heat steam because moisture under pressure can lift planks. Resist harsh chemical cleaners that are not designed for wood, as they can strip protective coatings. Never gloss over the surface with abrasive pads that scratch the finish. Always test cleaners on a hidden area and dry the surface after cleaning. Humidity levels also matter; wood expands with moisture, so keep indoor humidity in a moderate range to prevent gaps or cupping. By avoiding these missteps, you’ll preserve your floor’s warmth, grain detail, and finish integrity. The long-term payoff is floors that look newer longer, with less need for expensive refinishes.
The Cleaning Tips verdict and next steps
The Cleaning Tips team recommends adopting a simple, moisture-conscious routine that prioritizes dusting, a damp microfiber mop, and thorough drying. Choose products designed for wood finishes, avoid soaking, and tailor your routine to your floor’s finish. With consistent care, walls, baseboards, and corners stay protected from dust and moisture that can dull the tone. For homeowners and renters alike, this approach reduces risk and delivers sustainable results over time. According to Cleaning Tips, the best practice combines minimal moisture, exact product selection, and a regular cleaning cadence. The brand’s guidance is to start small, build consistency, and periodically reassess the finish as floors age. Remember to consult your floor’s manufacturer guidelines if you’re unsure about a specific finish, and consider a professional refinishing check every few years to keep the wood looking its best.
Tools & Materials
- Microfiber dust mop(Soft fibers pick up dust without scratching finishes)
- Soft-bristle broom(Lightweight and gentle on grain)
- Vacuum with hardwood setting or nozzle(Remove fine debris from seams)
- Mop bucket(For mixing cleaners)
- Microfiber mop pads(Rinse and reuse; avoid bulkier pads)
- pH-neutral wood-floor cleaner(Designed for wood finishes)
- Soft microfiber cloths(For spot cleaning and drying)
- Dry microfiber towel(Used to dry after mopping)
- Wood-safe conditioner or finish restorer(Only if recommended by manufacturer)
Steps
Estimated time: 45-60 minutes
- 1
Assess the finish
Identify whether your floor is polyurethane, wax, oil, or another finish. This will dictate which cleaners and moisture levels are safe. If unsure, test a small, inconspicuous area first and choose a product labeled safe for wood.
Tip: Always start with the least invasive option—dry dusting—before introducing any liquid cleaner. - 2
Clear and prep the area
Remove furniture or obstacles from the cleaning zone. Vacuum or sweep thoroughly to lift dust and debris from joints where dirt hides. This prevents scratching when you later mop.
Tip: Move from the farthest corner toward the exit to avoid stepping on a cleaned area. - 3
Dust and dry
Run a microfiber dust mop, then follow with a soft dry cloth to pick up residual particles. Ensure the floor looks visibly dust-free before wet cleaning.
Tip: Check the mop pads for wear; worn fibers can scratch the finish. - 4
Damp-mop with care
Sprinkle a wood-safe cleaner onto the mop or apply a small amount to the microfiber pad. Wipe along the grain in small sections, applying only enough moisture to lift grime.
Tip: Wring the mop well—the surface should feel barely damp, not slick. - 5
Dry immediately
Go over the area with a dry microfiber pad or towel to remove any moisture. This step helps prevent warping and water spots.
Tip: Walking over the damp area with dry shoes may introduce moisture from soles. - 6
Maintenance routine
Establish a regular cadence for dusting and damp-mopping based on traffic. Reassess floor finishes every few years or when you notice dull spots or scratches.
Tip: Keep humidity stable to reduce board movement and finish wear.
Questions & Answers
How often should I clean wooden floors?
Frequency depends on traffic and pets, but a routine of weekly dusting and biweekly damp-mopping works well for many homes. Adjust based on visible dirt and odors.
Clean wood floors weekly with dusting and damp-mopping, adjusting for traffic and pets.
Can I use vinegar on wooden floors?
Vinegar can react with certain finishes and should be avoided unless the floor manufacturer approves it. Prefer pH-neutral cleaners designed for wood.
Avoid vinegar on wood floors unless your manufacturer says it’s safe.
Is steam cleaning safe for wooden floors?
Steam cleaning is generally not recommended for wood floors because moisture and heat can cause swelling and finish damage. Some sealed floors may tolerate it, but verify with the finish guidance.
Steam mops are usually not recommended for wood floors.
Should I wax or seal my wood floors?
Most modern wood floors are sealed with polyurethane or a similar finish and don’t require wax. If your floor is waxed, understand that it may need periodic stripping and re-waxing or resealing.
Most floors today are sealed; waxed floors may need occasional restoration.
Can I use a steam mop on wood floors?
Steam mops use heat and moisture that can damage wood; avoid using them unless the finish is specifically rated for steam and you follow manufacturer guidance.
Avoid steam mops on wood unless the manufacturer approves it.
What should I do if a stain dries on the floor?
Blot and apply a wood-safe cleaner to the affected area, then rinse and dry. For persistent stains, consult the floor manufacturer’s guidelines.
Blot, clean, rinse, and dry; call a pro if a stain remains.
Watch Video
The Essentials
- Dust regularly to prevent scratches.
- Use a damp microfiber mop, never a soaking wet one.
- Test cleaners on hidden areas before full use.
- Maintain humidity and schedule periodic refinishing as floors age.