Clean a c car: A Practical How-To Guide
Learn step-by-step how to clean a c car with practical, eco-friendly methods. This Cleaning Tips guide covers exterior and interior care, tools, safety, and maintenance for a healthier, fresh vehicle.

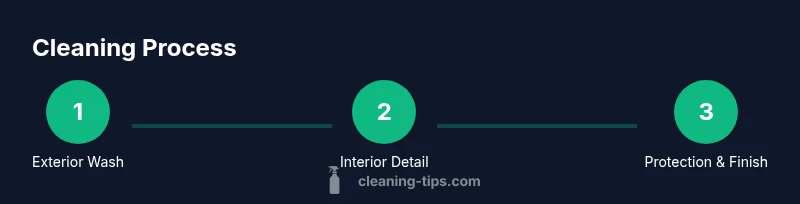
In this guide you will learn to clean a c car thoroughly, covering exterior washing, interior refresh, stain removal, and protective finishing. Gather microfiber towels, mild car shampoo, a vacuum, and a few brushes, then follow the step-by-step process for a healthier, more enjoyable ride. Your session can be quick or thorough depending on time.
Why clean a c car matters
Regular cleaning goes beyond aesthetics. When you clean a c car, you reduce the buildup of grime, prevent mold and mildew in damp corners, and maintain the vehicle's resale value. The Cleaning Tips team notes that a clean car interior minimizes allergens and improves air quality inside the cabin. Exterior washing protects the paint from dirt, salts, and UV damage. In this guide, you'll learn a practical, step-by-step approach to cleaning a c car using common tools and eco-friendly products. Start by setting a plan for the session; even a quick 30-minute wipe-down can make a big difference in appearance and hygiene. According to Cleaning Tips, a thoughtful cleaning routine saves time and extends the life of your car's surfaces.
Quick planning before you start
Before you grab a sponge, decide on the scope: exterior refresh, interior detail, or both. Create a simple checklist, choose a shaded area, and gather the right tools. According to Cleaning Tips, planning reduces back-and-forth and helps you work efficiently. For a thorough clean a c car, separate the exterior and interior tasks to avoid cross-contamination and ensure surfaces are dry before applying protectants. The goal is consistent results with fewer re-dos, and that mindset comes from following a deliberate plan.
Exterior cleaning basics
Exterior cleaning begins with a two-bucket method: one for soapy water and one for rinsing. Use a dedicated wash mitt to lift grime without scratching paint. Start at the top of the vehicle and work downward to prevent re-contaminating cleaned areas. Rinse thoroughly and dry with a clean microfiber towel to avoid water spots. Don’t forget the wheels—clean tires and rims with a separate brush and a wheel-specific cleaner to avoid depositing brake dust onto paint. When done, inspect for missed spots and treat stubborn areas with a light touch and a softer cloth. A well-executed exterior clean enhances curb appeal and protects the finish over time, which is a core principle of Cleaning Tips.
Interior cleaning essentials
Begin with a thorough dry dusting of all surfaces to remove loose debris. Vacuum seats, carpets, and mats, paying attention to seams and crevices where dirt hides. Wipe dashboards, door panels, and consoles with a microfiber cloth lightly dampened with a mild cleaner. Clean glass surfaces last to avoid streaks. For safety, keep cleaners away from electronic controls and avoid over-wetting fabric sections. A clean interior reduces odors and improves driving comfort, a point emphasized by Cleaning Tips teams when advising routine care.
Upholstery and carpet care
Fabric seats and carpets benefit from pretreatment of stains with a gentle stain remover. For stubborn spots, apply a small amount of cleaner to an inconspicuous area first to check for colorfastness. Use a soft-bristled brush to lift embedded dirt before vacuuming again. Leather and vinyl require conditioner after cleaning to prevent drying and cracking. Always test cleaners on a hidden patch before full application. Regular deep-clean sessions keep upholstery looking fresh and extend the life of interior components. The Cleaning Tips guidance emphasizes using non-abrasive tools and pH-balanced cleaners for best results.
Safe products and pro tips
Choose eco-friendly, car-specific cleaners when possible. Dilute concentrates as directed and avoid ammonia-based glass cleaners on tinted windows. When in doubt, opt for water-based formulas that are gentle on surfaces. Pro tips include using two microfiber cloths per surface—one for dirt removal and one for final polish—to minimize streaks. Always perform a small test before applying cleaners to dashboards or leather. Ventilate the car by opening doors or windows during cleaning to maintain air quality. The aim is effective cleaning with low environmental impact, a philosophy promoted by Cleaning Tips.
Special surfaces: leather, vinyl, and fabric care
Leather requires a pH-balanced cleaner and a conditioner to restore suppleness and prevent cracking. Vinyl surfaces respond well to a mild cleaner and a soft brush to lift grime from pores. Fabric seats benefit from a suction-based cleaner or steam treatment if you have access to a vehicle-safe steamer. Always avoid harsh solvents that can damage materials or fade colors. For fabric, blot stains rather than rubbing to prevent pile distortion. Proper care preserves texture and appearance and aligns with eco-friendly Cleaning Tips recommendations.
Maintenance and prevention
Establish a routine: quick exterior wipe-downs after every drive and a deeper interior clean monthly. Use seat covers or mats to protect carpets from soil and spills. Treat spills immediately with blotting and a mild cleaner to prevent staining. Consider a ceramic or polymer protection spray on the paint to improve water shedding and reduce washing frequency. Regular maintenance reduces the effort required for each cleaning session and keeps the car looking newer longer, a strategy consistently advised by Cleaning Tips.
AUTHORITY SOURCES
For readers who want to verify best practices, here are reputable resources on cleaning and household safety:
- https://www.epa.gov/iaq
- https://www.cdc.gov/healthyhomes/cleaning.html
- https://www.consumer.ftc.gov/articles/how-clean-your-home
Tools & Materials
- Microfiber towels(Lint-free, multiple colors for different surfaces)
- Mild car shampoo or eco-friendly soap(Use dedicated car shampoo; avoid household dish soap)
- Two buckets (two-bucket wash)(One for soap, one for rinse)
- Wash mitt or sponge(Prefer microfiber; gentle on paint)
- Wheel brush and separate sponge/cloth(Rim-specific cleaner helps avoid paint damage)
- Vacuum cleaner with crevice tool(Attach narrow nozzle for seams)
- All-purpose cleaner (car-safe)(Dilute as instructed)
- Glass cleaner (ammonia-free)(For windshield and windows)
- Interior brush set (soft bristles)(Useful for dashboards and vents)
- Leather conditioner (if applicable)(Follow product directions)
Steps
Estimated time: 90-120 minutes
- 1
Prepare workspace and materials
Park in shade and gather all tools. Remove trash, loose items, and floor mats. This prep reduces interruptions and ensures you have everything you need within reach.
Tip: Lay out towels in a clean area to prevent dirt transfer. - 2
Rinse exterior and wheels
Lightly rinse the car to remove loose dirt. Start with wheels to prevent grime from spreading to paint. Use a separate brush for wheels to avoid cross-contamination.
Tip: Rinse from top down to avoid dirt running onto clean areas. - 3
Wash exterior panels
Use the two-bucket method: one for soapy water, one for rinse. Gently wash in a circular or straight-line pattern, then rinse thoroughly.
Tip: Wash in sections and dry with a microfiber towel to prevent water spots. - 4
Dry exterior thoroughly
After washing, dry the surface with a clean microfiber towel or chamois. This prevents water spots and helps you spot any remaining dirt.
Tip: Keep towels separate for paint and glass to avoid streaks. - 5
Vacuum interior and remove mats
Vacuum seats, carpets, mats, and floor crevices. Shake out mats or machine wash if possible. This step removes most of the debris before deeper cleaning.
Tip: Use a crevice tool for tight gaps and under seats. - 6
Dust and wipe interior surfaces
Wipe the dashboard, center console, and door panels with a microfiber cloth lightly dampened with cleaner. Work from top to bottom to avoid re-soiling.
Tip: Avoid oversaturating surfaces near electronics. - 7
Clean glass and dashboards windows
Spray a dedicated glass cleaner on a microfiber cloth and wipe all interior glass surfaces. Use a light touch to prevent streaks.
Tip: Roll the cloth rather than back-and-forth scrubbing for best results. - 8
Treat upholstery and carpets
Apply stain remover to spots, blot gently, and use a soft brush to lift embedded dirt. Vacuum again as needed.
Tip: Test stain remover on hidden area first if colorfastness is unsure. - 9
Condition leather and protect surfaces
Apply leather conditioner to leather surfaces after cleaning and allow to absorb. For vinyl or plastic, use a protectant to maintain finish.
Tip: Follow product directions and test in a small area first.
Questions & Answers
What does it take to clean a c car effectively?
An effective clean covers exterior washing, interior dusting, stain removal, and surface protection. Use car-safe cleaners, microfiber tools, and a patient approach to avoid damage.
An effective clean covers the exterior, interior, and protection. Use car-safe cleaners and microfiber tools for best results.
How often should you perform a basic clean?
Aim for a light wipe-down weekly and a deeper interior and exterior clean every 4–6 weeks, depending on usage and environment. This cadence helps maintain appearance and longevity.
Light weekly wipe-downs and a deeper clean every month or so keeps your car looking fresh.
Can I use dish soap for car cleaning?
Dish soap isn’t ideal for cars; it can strip protective coatings. Use a pH-balanced car shampoo designed for automotive finishes.
Dish soap can damage coatings; use car shampoo instead.
Are steam cleaners safe on car upholstery?
Steam can be effective on fabric, but test first and avoid excessive moisture near electrical components. Let surfaces dry completely before driving.
Steam can help fabrics, but test first and dry thoroughly before driving.
Should I wax after cleaning the car?
Waxing after a thorough clean protects the paint and enhances water beading. Follow with regular wash intervals to maintain the finish.
Yes, wax after cleaning to protect the finish.
What is a quick routine to keep the car tidy between deep cleans?
Keep a small bag with microfiber towels and a spray bottle in the trunk for quick spot cleaning. Do a weekly wipe-down of high-touch surfaces to prevent buildup.
Carry a kit for quick spot cleaning and do a weekly wipe-down.
Watch Video
The Essentials
- Plan a cleaning session before you start
- Use separate tools for exterior and interior to prevent cross-contamination
- Prioritize drying to prevent water damage and spots
- Test cleaners on hidden areas first
- Regular maintenance saves time and preserves finish