How to Clean a Hardwood Floor: Safe, Effective Cleaning Guide
Learn how to clean a hardwood floor safely and effectively. This guide covers dry cleaning, damp mopping, spot treatment, and lasting care for a beautiful floor.

By the end of this guide, you’ll be able to clean a hardwood floor safely and effectively, minimizing moisture and avoiding harsh chemicals. You’ll learn a dry-cleaning routine to remove dust, a damp-mop method with a pH-neutral cleaner, how to treat spots without soaking seams, and practical maintenance tips to protect the finish over time.
Why Clean Hardwood Floors Matter
Keeping hardwood floors clean isn't just about aesthetics—regular maintenance preserves the wood's finish, prevents grime from building up in tiny crevices, and extends the life of the floor. A dusty surface can trap moisture and lead to warping or dulling of the seal over time. The Cleaning Tips team emphasizes that consistent, gentle cleaning protects indoor air quality by removing irritants that settle into the finish and travel through the home. For most homes, a simple routine—daily quick dusting, weekly sweeping, and periodic damp mopping—delivers the best balance between cleanliness and finish longevity. When you clean with care, you avoid the costly consequences of over-wetting, harsh chemicals, or abrasive tools that can scratch or oversaturate the wood. Keep a consistent routine and tailor it to how much foot traffic your space receives. In addition to cleanliness, regular cleaning reduces allergens and keeps pets from tracking dirt around the house. A well-kept floor supports a healthier living environment.
Safety First: What Not To Do
Before you reach for a mop, understand common mistakes that damage hardwood floors. Never use steam cleaners or high-alkaline cleaners on finished wood, as they can exhaust the finish or push moisture into seams. Avoid soaking mops or allowing puddles to sit on surface wood, because excess moisture is the enemy of wood floors. Do not use abrasive scrub pads, ammonia-based cleaners, or waxes unless your manufacturer explicitly approves them. Scratches and dull spots are easier to prevent than fix, so choose tools with soft bristles and a clean microfiber pad. Always test any cleaner in a small, inconspicuous area to verify it won’t discolor or warp the floor. If you’re unsure, stick with a simple, pH-neutral cleaner and follow the manufacturer’s care guidelines.
Daily and Weekly Cleaning Routine
A practical routine balances daily dust control with weekly maintenance. Start each day with a quick dry dusting to pick up pet hair, dirt, and sand that can act like sandpaper. Use a microfiber broom or a dust mop and work in the direction of the wood grain to minimize scratches. At least once per week, perform a gentle sweep with a soft-bristled broom or vacuum with a hardwood floor setting, ensuring you remove debris from edges and under furniture. After dusting, assess whether the floor shows sticky residue or fine grime; if so, prepare a damp-mop solution using a pH-neutral cleaner diluted as directed. Remember, moisture is the enemy; always wring the mop until barely damp and use long, even strokes. This routine helps protect luster and reduces the need for aggressive cleaning later.
Damp Mopping the Right Way
Moisture management is essential for hardwood floors. Begin by dampening a microfiber mop with a wooden-suitable cleaner solution or a mix recommended by the cleaner's label. Wring thoroughly so the pad is just damp, not wet, then mop in a smooth, even pattern along the grain. Rinse the pad frequently to avoid spreading dirt and re-wetting the floor. Avoid dragging water into baseboards or gaps. After mopping, go over the floor with a clean, dry microfiber cloth or towel to remove any remaining moisture in tight spots. If your floor has a water-based finish, test any cleaner in an inconspicuous area first to ensure it won’t strip or dull the finish.
Spot Cleaning and Stains
Spots and spills require prompt attention. Blot liquid spills immediately with a clean microfiber cloth to prevent penetration into the wood. For sticky residues, use a damp cloth with a small amount of pH-neutral cleaner; avoid scrubbing that can scratch the surface. For tougher stains, consult the floor’s manufacturer guidelines—some finishes tolerate mild stain removers, while others require specialized products. Always avoid sharp tools that can gouge boards. When finished, dry the area thoroughly to prevent moisture from seeping into joints.
Seasonal Maintenance and Finishing
Every season, inspect the floor for scratches, wear, and moisture damage. Use a manufacturer-approved conditioner or polish if recommended, but avoid waxes unless specified for your finish. Check caulk lines and baseboards for moisture intrusion and address any leaks promptly. If you notice uneven sheen, reapply the recommended finish according to the product instructions or consult a flooring professional. By maintaining humidity levels in the home (ideally between 30-50%), you reduce expansion and contraction that can lead to gaps and cracks.
Troubleshooting Common Issues
Wood floors can reveal a few recurring issues. If the finish looks dull, re-clean with a mild cleaner and buff with a dry cloth. If you notice water rings or warping, halt cleaning and ventilate the space; excessive moisture may be at fault. If scratches appear, consider using a floor-safe filler or touch-up kit recommended by the manufacturer. Finally, if you’re dealing with pet-related odors, pair cleaning with proper ventilation and an indoor air-quality consideration.
Tools & Materials
- Soft-bristle broom(for daily dry dusting and preventing scratches)
- Microfiber dust mop(effective for debris and fine dust)
- Vacuum cleaner with hardwood setting(use gently around edges and under furniture)
- Mop bucket(optional if using spray bottle or pre-mixed solution)
- Microfiber mop head(damp but not soaking)
- Ph-neutral hardwood floor cleaner(choose product labeled safe for wood)
- Water(for dilution if needed)
- Dry microfiber towels(for drying and buffing after mopping)
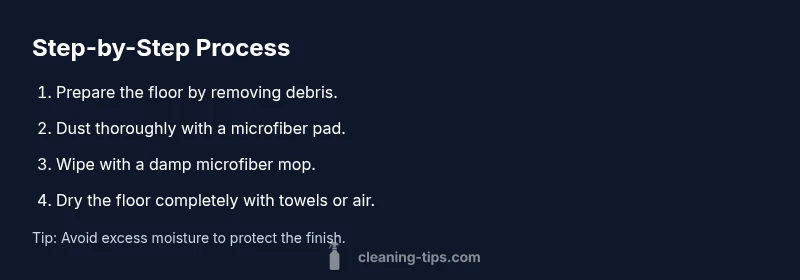
Steps
Estimated time: 30-45 minutes
- 1
Clear the area and prep the floor
Move furniture and small items away from the cleaning zone. Remove area rugs that could trap dirt or become slippery when wet. Sweep or vacuum thoroughly to remove loose debris that could scratch the finish. Set aside rugs and valuables in a dry area and ensure good lighting so you can see every corner.
Tip: Planning the path helps avoid re-cleaning the same spots. - 2
Dry dust and sweep
Use a soft-bristle broom or microfiber dust mop to collect dust, hair, and grit. Work in the direction of the wood grain to minimize scratches, and pay attention to edges and under furniture where dust hides.
Tip: Dusting first prevents mud from forming during mopping. - 3
Test cleaner in a small area
Dilute your cleaner according to the label and apply to a hidden spot to confirm it won’t affect the finish. If the test area looks fine after a few minutes, you can proceed to cleaning the rest of the floor.
Tip: Testing avoids costly finish damage. - 4
Mop with damp microfiber
Dampen the microfiber mop, then wring until barely damp. Mop in even strokes along the grain, starting from the far corner and gradually working toward the exit. Rinse the mop head as needed to keep dirt from spreading.
Tip: Never saturate the wood; excess moisture can seep into seams. - 5
Dry the floor thoroughly
After mopping, go over the surface with dry microfiber towels to remove any remaining moisture. Alternatively, allow air-drying with good ventilation if a towel isn’t practical for every area.
Tip: Promote faster drying with a fan or opened windows. - 6
Inspect and protect
Check for any residue or uneven spots and re-clean if necessary. Buff the surface with a dry cloth to restore shine, and apply manufacturer-approved protection if recommended for your finish.
Tip: Avoid waxes or polishes not designed for your floor.
Questions & Answers
Can I use vinegar on hardwood floors?
Vinegar is acidic and can dull or damage some finishes. Test first in a hidden area and prefer a pH-neutral cleaner.
Vinegar can damage finishes, so test first and choose a pH-neutral cleaner.
Is steam cleaning safe for hardwood floors?
Steam cleaners introduce excess moisture that can seep into seams and warp wood. Avoid steam mops on most hardwood floors.
Steam cleaning can cause warping, so avoid steam mops on most hardwood floors.
How often should I clean hardwood floors?
Dust and sweep regularly; damp-mop as needed when buildup shows; deep cleaning can be done periodically depending on traffic.
Clean regularly and damp-mop as needed; deep clean based on traffic and wear.
What should I do about pet messes on wood floors?
Wipe spills promptly with a damp cloth and use a mild cleaner; avoid harsh chemicals near pets. Dry thoroughly to prevent moisture damage.
Wipe up pet messes quickly and dry the area well to protect the finish.
Should I wax or seal hardwood floors after cleaning?
Most modern hardwood finishes don’t require wax. Follow manufacturer instructions for resealing or refinishing, and avoid products not approved for your finish.
Usually no wax needed; check the finish and follow manufacturer guidance.
Watch Video
The Essentials
- Dust regularly to prevent buildup
- Use a damp microfiber mop, not soaking wet
- Choose a pH-neutral cleaner for wood finishes
- Dry the floor completely after cleaning