Clean House Outside: Outdoor Cleaning Guide for Homeowners
Learn safe, practical outdoor cleaning for your home exterior. This guide covers siding, decks, gutters, and patios with step-by-step instructions and eco-friendly tips.

You will learn to clean the outside of your home safely and effectively. This guide covers siding, decks, gutters, and patios, plus a simple routine and essential tools to protect your property and landscape.
Why Exterior Cleaning Matters
Keeping the outside of your home clean isn't just about curb appeal; it protects the structure from moisture, mold, mildew, and pollutants that can cause deterioration over time. Dirt and organic growth on siding, decks, and gutters can trap moisture, stain surfaces, and invite pests. Regular exterior cleaning helps identify issues early, such as cracked caulking, loose shingles, or failing sealant, so you can address them before they become costly repairs. In addition, a clean exterior reduces allergen buildup around doors and windows, contributing to a healthier outdoor living space. For homeowners, the phrase 'clean house outside' isn’t vanity—it’s practical maintenance that extends the life of siding, stone, and wood trim. According to Cleaning Tips, setting a simple routine for exterior cleaning can dramatically improve longevity and reduce the odds of water intrusion after storms. Start with a quick survey: walk the perimeter, note disturbed areas, and decide which surfaces need the most attention first, such as shaded siding or a frequently muddy deck.
Planning Your Outdoor Cleaning Schedule
An effective outdoors cleaning routine starts with a plan you can actually follow. Decide which surfaces to tackle first, establish safe cleaning temperatures, and set a realistic cadence. For example, you might schedule the siding and gutters in one weekend and reserve another session for decks and patios. Weather plays a big role: avoid cleaning on windy, rainy, or freezing days, and pick the mild, dry parts of spring, summer, and fall. Cleaning Tips analysis shows that a quarterly exterior cleaning plan reduces buildup, decreases staining, and saves time by preventing multiple heavy cleanings. Mark a calendar with reminders for pre-winter checks, post-winter touch-ups, and seasonal sealant refreshers if your home uses painted wood or masonry. Consider a lightweight maintenance sweep every 6–8 weeks; shorter intervals prevent dirt from hardening into stubborn stains. Finally, build a simple checklist: surface type, cleaner, protection needed, and any safety notes for that area. A thoughtful plan makes the project manageable rather than overwhelming.
Surface-Specific Cleaning: Siding, Decks, Patios, and Gutters
Each exterior surface has its own best practices. Siding materials like vinyl, wood, or fiber cement respond differently to cleaners and water pressure. Start by testing a small, inconspicuous area with the cleaner you plan to use; if color fades or stains bleed, switch formulas or dilute further. Decks and patios built from wood or composite boards benefit from a gentle scrub and a rinse that removes soap residue, which can attract dirt if left behind. Gutters require a careful approach: remove loose debris with gloves, then rinse from the bottom up to prevent overflow and to see where clogs remain. For stone surfaces, avoid high-pressure jets that can erode joints or grout. In all cases, avoid mixing cleaners that create harmful fumes, and protect nearby plants by spraying away from foliage or covering them with plastic sheets. Remember to work from the top down on vertical surfaces to prevent re-soiling, and always rinse thoroughly to prevent soap films that attract more dirt. By understanding surface-specific needs, you’ll achieve a uniform, long-lasting clean that supports a healthy exterior.
Tools, Materials, and Safety Essentials
Before you start, gather the right tools to keep the job efficient and safe. Essentials include: gloves, sturdy brushes, a garden hose with a spray nozzle, a mild cleaner appropriate for the surface, a ladder for high areas, eye protection, and a dry workspace for staging materials. Optional but helpful items include a pressure washer (set to a low PSI for delicate surfaces), an extension wand, tarps to protect landscaping, and non-scratch pads for delicate finishes. For safer work around landscaping, wear closed-toe shoes with good traction and avoid wet, slippery surfaces. Keep a spray bottle with a plant-safe cleaner for quick touch-ups on shrubs or planters. Plan your workflow to minimize repeated movements, which reduces fatigue and the risk of slips. If you’re cleaning in hot sun, take short breaks, stay hydrated, and don’t rush the work. By keeping the right tools organized and ready, you reduce setup time and improve your results.
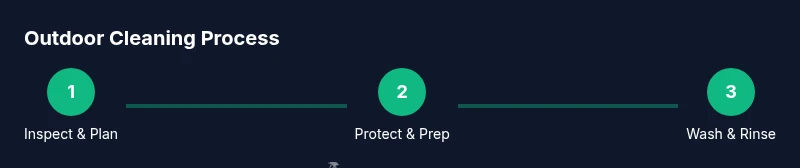
Step-by-Step Routine Overview
Below is a high-level routine you can adapt to your home’s exterior. This section is a preview of the full step-by-step process found later in the guide. First, assess the area and gather supplies, then protect plants and furnishings, pre-treat stains, wash surfaces in sections, rinse thoroughly, and finally dry and inspect. Working top to bottom and left to right helps maintain a consistent look and prevents re-soiling. Keep safety in mind: never lean on unstable rails, and avoid cleaning in wet or windy weather. For best results, run through the routine for each surface type separately, using the appropriate cleaner and brush. This approach minimizes oversights and ensures a uniform finish across siding, decks, patios, and gutters. If you want a time estimate, plan for about 60–120 minutes for a typical single-story exterior, with more time for larger homes or heavily soiled areas. A deliberate routine reduces the likelihood of missed spots and messy rework.
Seasonal Maintenance and Pro Tips
Seasonal maintenance keeps the exterior feeling fresh and reduces the workload over time. In spring, focus on removing pollen, algae, and spring storms debris; in autumn, clear leaves and prepare surfaces for winter. Pro tips include testing cleaners on hidden areas, staging plants, and using eco-friendly products when possible. Clean house outside is easier when you address underlying issues such as mildew growth and faded caulking promptly. If you notice staining that doesn’t come off with a mild cleaner, consider a mild professional-grade product on a small area to test for colorfastness. After cleaning, apply protective measures like sealants on wood or water-repellent finishes on masonry where appropriate. The goal is a durable, low-maintenance exterior that withstands weather. Cleaning Tips emphasizes that a consistent schedule reduces the chances of moisture intrusion and reduces the chance of pest habitation around accessible eaves and gutters. With a simple plan, you’ll keep outdoor spaces inviting and safe throughout the year.
Common Mistakes and How to Avoid Them
Many homeowners make avoidable mistakes when cleaning the exterior. Common errors include using high-pressure water on wood or delicate siding, skipping plant protection, failing to test cleaners for color-fastness, and rinsing unevenly, which leaves soap residues that attract more dirt. Another frequent misstep is cleaning under direct sun, which can dry cleaners too quickly and cause streaking. To avoid these issues, always test cleaners on a small patch, start with a mild solution, and rinse from top to bottom. Protect plants by covering them or relocating pots, and avoid cleaning on windy days that cause debris to blow around. When cleaning gutters, ensure the ladder is stable and avoid leaning over the edge. By anticipating these pitfalls and planning accordingly, you’ll avoid costly damage and achieve a smoother, more consistent finish across your home’s exterior.
Eco-Friendly Approaches and Water-Saving Tricks
Environmentally friendly cleaning reduces chemical runoff and saves water while delivering great results. Use simple cleaners such as mild soap, white vinegar, or baking soda for many surfaces; test any cleaner first and avoid mixing products. Rinse surfaces with a spray nozzle set to a gentle stream and apply water only where needed. Collect runoff with tarps or a catch bucket when possible, and reuse rinse water on older stones or plant beds if appropriate. Dry to finish and prevent water spots, especially on glass or vinyl surfaces. The Cleaning Tips team encourages homeowners to adopt methods that reduce chemical exposure to families and pets while maintaining effectiveness. With mindful planning, outdoor cleaning can be both powerful and gentle on the environment.
Quick Home-Scan: What to Inspect After Cleaning
After you finish, walk the perimeter and look for any missed spots, detergent residue, or standing water in low spots. Check joints around windows and doors for signs of wear and apply sealing if needed. Inspect gutters for residual debris and reattach any loose fittings. This final sweep helps ensure you have achieved a thorough, durable clean rather than a temporary wash. Document areas that need occasional maintenance, such as areas with moss growth or high-traffic stone paths. A quick post-clean assessment keeps the exterior in shape and helps you plan the next maintenance window.
Tools & Materials
- Gloves (nitrile or rubber)(Keep hands dry; choose chemical-resistant if using cleaners)
- Stiff-bristled brushes(Mix of deck brush and siding brush)
- Mild detergent or cleaner appropriate for surfaces(pH-neutral for plants; avoid bleach on wood)
- Garden hose with spray nozzle(Set to a gentle spray for siding; avoid high pressure on shingles)
- Pressure washer (optional, 1200-1800 PSI)(Use with care on wood; keep nozzle at least 12 inches away)
- Extension wand(For gutters and high areas)
- Ladder (sturdy, rated for load)(Always have a spotter)
- Eye protection(Safety goggles)
- Tarps or plastic sheeting(Protect plants and soil)
- Plastic scrub pads or non-scratch pads(For delicate surfaces)
- Rubber-soled shoes(Stable footing outdoors)
Steps
Estimated time: 60-120 minutes
- 1
Assess the area and gather supplies
Survey your home’s exterior to identify surfaces, stains, and hazards. Assemble cleaners, brushes, a ladder, hoses, and protective gear before you start to avoid mid-task trips. This preparation minimizes trips back to the shed and keeps the project moving.
Tip: Create a quick surface map and collect items in a caddy so you don’t wander back and forth. - 2
Protect surrounding areas and plants
Move potted plants away from work zones, cover shrubs with breathable tarps, and lay drop cloths to catch runoff. Remove outdoor furniture from the path of cleaning and clear walkways to prevent accidents. This step keeps your landscaping safe and makes cleanup easier.
Tip: Use a windbreak of plastic sheeting to shield delicate plants from splashes. - 3
Pre-treat stains and high-traffic areas
Apply a milder cleaner to tough stains on siding or deck boards and let it dwell for a few minutes. Gentle agitation with a brush helps lift grime without damaging finishes. Pre-treating reduces the effort required during washing and promotes even results.
Tip: Test any cleaner on a hidden patch first to ensure color-fastness. - 4
Wash surfaces in sections
Work in manageable sections, starting from the top and moving downward. Keep the spray at the recommended distance to avoid damage and ensure thorough rinsing to remove soap residues. Use a circular or back-and-forth motion to lift dirt efficiently.
Tip: Overlap passes slightly to avoid streaks and ensure complete coverage. - 5
Rinse thoroughly and check for missed spots
Rinse each section until water runs clear and no soap film remains. Inspect under good light for missed spots or residue, and re-clean those areas if necessary. A thorough rinse prevents re-soiling and ensures uniform appearance.
Tip: Rinse from the top down again after any touch-ups. - 6
Dry surfaces and inspect for damage
Allow surfaces to air-dry completely, then inspect for any swelling, cracks, or peeled coatings. If you notice damage, schedule maintenance or repainting before the moisture worsens. Store tools safely and clean up the work area.
Tip: Take photos for future maintenance planning and color-matching if needed.
Questions & Answers
What is the best season to clean the exterior of a house?
Any mild-weather day works, but spring or fall avoids extreme heat and moisture. Plan a dry, cool period and monitor forecasts to prevent sudden rain during cleaning.
Spring or fall is ideal for exterior cleaning because temperatures are mild and surfaces dry quickly.
Can I use a pressure washer on all exterior surfaces?
Pressure washers are useful on sturdy surfaces like concrete, brick, and some siding. Do not use high pressure on wood, stucco, or painted surfaces that may peel; keep nozzle at a safe distance.
A pressure washer helps on hard surfaces, but avoid wood and aged surfaces.
Is bleach or chlorine safe for siding or decks?
Bleach can discolor or damage some materials. Use oxygen-based cleaners on most surfaces and follow manufacturer guidance. Rinse thoroughly and avoid mixing with ammonia or acids.
Bleach can ruin colors, so use safer cleaners and test first.
How often should gutters be cleaned?
Clean gutters at least twice a year, typically in spring and fall, or after heavy storms. Use a sturdy ladder, gloves, and watch for fall hazards.
Gutters should be cleaned twice a year or after big storms.
Do I need to protect plants when cleaning outside?
Yes. Cover or relocate delicate plants, and use low-pressure rinsing away from foliage. Water plants before cleaning to reduce dust and stress.
Yes—move plants or cover them when cleaning, and rinse away from foliage.
What should I do after cleaning outdoor surfaces?
Let surfaces dry completely, inspect for missed spots, and consider sealing or protecting surfaces if recommended. Store cleaning tools properly.
Let everything dry, check for missed spots, and store tools safely.
Watch Video
The Essentials
- Plan before you spray to avoid damage
- Test cleaners on hidden areas first
- Work top-to-bottom for a uniform finish
- Protect plants and landscaping during cleaning
- Inspect after cleaning for missed spots