Exterior House Clean: A Step-by-Step Guide
Learn how to safely and effectively clean the exterior of your home. This guide covers surface types, eco-friendly cleaners, essential tools, a detailed step-by-step process, safety tips, and maintenance for long-lasting curb appeal.

Cleaning the exterior of your house removes dirt, mold, and algae while protecting siding and boosting curb appeal. You’ll need basic safety gear, a hose with spray nozzle, soft brushes, and mild cleaners. This guide covers prep and weather considerations, surface-specific methods, tool choices, and ongoing maintenance to keep your home looking its best year-round.
Why exterior house clean matters
Exterior house clean is more than a cosmetic chore. Regular cleaning removes dirt, mildew, algae, and insect residues that can trap moisture and degrade surfaces. A clean exterior reflects well on homeowners and protects investments like paint, siding, brick, and trim. The Cleaning Tips team emphasizes that a proactive approach reduces long-term repair costs and preserves curb appeal, especially in damp climates. Plan to clean after dry periods and before heavy pollen seasons; drying times vary by material and weather, so choose a window with mild temperatures and low wind. When done correctly, exterior cleaning can reveal minor issues like cracked caulking or small paint chips that deserve attention before they worsen. This block lays the groundwork for a safe, effective exterior house clean by outlining goals, surface awareness, and a realistic plan.
Safety and planning considerations
Safety comes first when tackling exterior house clean. Working at height, near power outlets, or around plant beds requires careful planning. Wear non-slip footwear, gloves, eye protection, and hearing protection if using a powered cleaner. Always use a spotter when using ladders, and never stand on the top rung. Check weather forecasts; avoid cleaning during rain or extreme heat, and ensure surfaces are dry before applying cleaners. Before you begin, walk the perimeter to identify fragile areas such as old caulking, loose paint, or cracked masonry. Set up barriers for kids and pets, and shield nearby plants with drop cloths or plastic sheeting. Store cleaners out of reach of children and never mix chemical products. A well-planned approach minimizes accidents and ensures a safer, more efficient exterior house clean.
Surface types and cleaning approaches
Exterior surfaces vary, and a one-size-fits-all method can cause damage. For vinyl siding, use a gentle detergent solution and a wide spray at low pressure to avoid nicks. Wood siding benefits from a soft brush and a milder solution to prevent grain raising; never use harsh solvents that can discolor or warp wood. Brick and stucco tolerate slightly stronger cleaners but require careful rinsing to avoid efflorescence. For concrete porches or stone, apply a diluted detergent and scrub with a stiff-bristle brush. Always test a small inconspicuous area first and rinse thoroughly from top to bottom. If your home features mixed materials, treat each surface according to its tolerance. When in doubt, default to milder solutions and lower pressure to preserve surface integrity.
Eco-friendly cleaners and stain removal options
Using eco-friendly cleaners reduces chemical exposure for your family and the environment. A mild detergent with warm water is often enough for light dirt, while baking soda can help lift organic stains without harsh solvents. White vinegar is useful for mildew on vinyl and stone, but avoid bleach on colored surfaces; never mix cleaners. For tougher stains on brick or masonry, consider a phosphate-free cleaner and a soft brush. Always pre-wet surfaces, work in sections, and rinse thoroughly to prevent residue. If you plan to reuse water or collect runoff, set up a simple containment strategy to protect your landscaping. This approach keeps exterior house clean tasks safer and more sustainable over the long term.
Tools, equipment, and prep materials
To execute a safe exterior house clean, gather essential tools and materials first. A sturdy ladder, a garden hose with a spray nozzle, a soft-bristle brush, and a bucket for detergent solution are foundational. If you own a pressure washer, use it only on durable surfaces and with a wide nozzle to avoid damage. Protective gear such as gloves, goggles, and hearing protection reduces risk. Plastic sheeting or drop cloths help protect plants and outdoor furniture, while a sponge or microfiber cloth is handy for windows. Keep a separate container of clean water for rinsing and ensure wastewater does not flow toward storm drains. Proper preparation saves time and reduces the chance of accidental surface damage.
Step-by-step overview at a glance
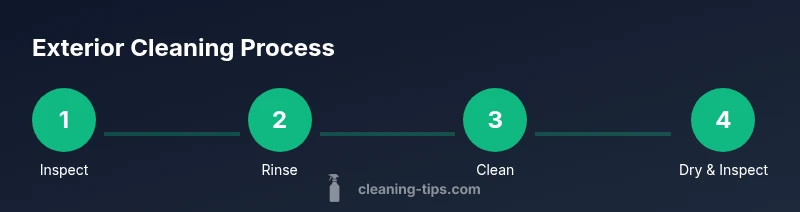
Note: This section outlines the high-level flow you’ll follow in the detailed steps below. Step 1 is to inspect and prep the exterior; Step 2 to protect surroundings; Step 3 to rinse; Step 4 to apply cleaner; Step 5 to scrub; Step 6 to rinse again; Step 7 to dry and inspect; Step 8 touch-ups if needed. The sequence minimizes surface stress and ensures consistent results. It also helps you manage time and drying intervals. Refer to the dedicated STEP-BY-STEP section for exact instructions and tips per surface type.
Common mistakes and how to avoid them
Rushing the process increases risk of damage. Overly aggressive pressure on siding or masonry can create gouges; using hot water on certain surfaces can cause warp or discoloration. Skipping patch tests or cleaning in windy conditions leads to streaks and uneven results. Failing to protect plants and electrical outlets invites damage or cleanup headaches. Finally, neglecting to dry surfaces after rinsing invites mildew return. By avoiding these mistakes, you’ll achieve a durable, long-lasting exterior house clean.
Maintenance tips to keep the exterior looking fresh
Implement a light, seasonal sweep to remove leaves, algae spores, and dirt before it build-ups. Consider a quick annual rinse to prevent staining; use a milder approach on sensitive materials. Clean gutters and downspouts to prevent water overflow that can stain siding and foundation. Monitor for signs of moisture intrusion and address promptly. Regular inspection helps catch issues early and extend the life of paint and siding. A proactive maintenance routine aligns with Cleaning Tips recommendations and helps you achieve a consistently clean exterior.
Authority sources and learning
Consult authoritative sources for safety and maintenance best practices. For working at heights and power tool use, OSHA provides guidelines; for environmental and home maintenance information, EPA offers relevant material; for region-specific maintenance and surface care, university extension programs—such as Penn State Extension—provide practical, field-tested advice. These sources help tailor exterior house clean tasks to your home’s materials and climate, improving outcomes and reducing risk. For more practical ideas and product suggestions, you can also reference Cleaning Tips articles and guides.
AUTHORITY SOURCES:
- OSHA: https://www.osha.gov/
- EPA: https://www.epa.gov/
- Penn State Extension: https://extension.psu.edu/
Tools & Materials
- Ladder (extension or step)(Stable, rated for your height; ensure feet are dry and level)
- Garden hose with spray nozzle(Adjust spray pattern for rinse and pre-wet sections)
- Pressure washer(Use only on durable siding and with appropriate nozzle; set low psi)
- Soft-bristle scrub brush(4-6 inch brush for siding panels)
- Buckets of mild detergent solution(Use phosphate-free, mild cleaners; avoid bleach on colored surfaces)
- Squeegee and microfiber cloths(For windows and glass surfaces)
- Plastic sheeting, drop cloths(Protect plants and outdoor furniture)
- Safety gear (gloves, goggles, hearing protection)(Eye and skin protection; slip-resistant footwear)
Steps
Estimated time: 4-6 hours
- 1
Inspect exterior and plan
Walk the perimeter of the house and note areas with mildew, peeling paint, cracks, or loose siding. Identify access points and plan which surfaces require milder cleaners. Establish a realistic timeline and a weather window to ensure surfaces dry fully after cleaning.
Tip: Walk the route with a buddy to spot hazards you might miss. - 2
Protect surrounding areas
Cover plants, flower beds, outlets, and decorative items with drop cloths or plastic to shield them from cleaners and rinse water. Move outdoor furniture away from the work zone. Post a dry work area to minimize trips or slips on wet surfaces.
Tip: Use lightweight, breathable drop cloths to avoid moisture buildup beneath covers. - 3
Rinse to remove loose dirt
Begin at the top and work downward with a broad spray to wash off loose dust, pollen, and cobwebs. This step reduces the amount of cleaning solution needed and prevents dirty water from soaking already-clean areas.
Tip: Keep the spray at a safe distance to avoid splashing yourself. - 4
Apply cleaner to sections
Dilute a mild detergent solution according to the product label and apply in manageable sections. Start at the highest point and work downward to control runoff. Do not over-wet vulnerable areas to prevent water intrusion behind siding.
Tip: Work in 3–4 foot squares to stay organized and thorough. - 5
Scrub stained areas
Use a soft-bristle brush on stubborn spots like mildew, mold, or algae. For tougher stains, apply a bit more cleaner and gently scrub in a circular motion. Avoid aggressive scrubbing that can damage surfaces.
Tip: Test one spot first to confirm surface tolerance. - 6
Rinse thoroughly
Rinse each section from top to bottom, ensuring all cleaner and debris are washed away. Overlapping passes help prevent streaks and soap residue. Watch for runoff that may collect near foundations or lead to staining.
Tip: Finish with a final long rinse to ensure complete removal. - 7
Dry and inspect for touch-ups
Allow surfaces to air-dry completely and inspect for missed spots or uneven staining. Re-treat only affected areas with appropriate cleaner and rinse again. Ensure any moisture in joints is dried to prevent mildew regrowth.
Tip: If weather is humid, consider a ventilation plan to speed drying. - 8
Cleanup and secure tools
Rinse and store brushes, hoses, and cleaners properly. Remove drop cloths and return outdoor items to their place. Document any issues observed during cleaning for future maintenance.
Tip: Label containers and clean up spills promptly to prevent slips.
Questions & Answers
What is the best method for vinyl siding?
For vinyl siding, start with a gentle rinse, apply a mild detergent solution with a soft brush, and rinse from top to bottom. Avoid high-pressure settings that can damage panels.
Vinyl siding cleans best with a light rinse, a mild cleaner, and a soft brush—keep the pressure low.
Is pressure washing safe on wood siding?
Pressure washing wood siding can be risky. Use low pressure, a wide nozzle, and keep the wand moving to prevent gouging or splintering.
Wood siding can be damaged by high pressure; use gentle pressure and keep the wand moving.
How often should exterior cleaning be done?
Most homes benefit from exterior cleaning every 1–2 years, depending on climate, nearby trees, and siding material.
Most homes do exterior cleaning every one to two years, more often in humid climates.
Can I mix vinegar with bleach for exterior cleaning?
Do not mix vinegar with bleach; it creates dangerous chlorine gas. Use vinegar or other cleaners separately.
Do not mix cleaners. Vinegar and bleach together release harmful gas.
What safety gear is essential?
Wear gloves, eye protection, non-slip shoes, and, if using a ladder, a spotter for added safety.
Wear gloves and eye protection; use a ladder with a buddy nearby.
Watch Video
The Essentials
- Plan around dry, mild weather for best drying.
- Choose surface-appropriate cleaners and avoid harsh chemicals.
- Protect plants and electrical fixtures before cleaning.
- Inspect after cleaning to catch small issues early.