How to Clean Mold with Vinegar: A Practical Guide
Learn how to clean mold safely using vinegar on non-porous surfaces, with a step-by-step method, safety tips, and prevention strategies for a healthier home.

You can clean mold with white vinegar as a practical first step for many household mold cleanups. According to Cleaning Tips, undiluted white vinegar (5% acidity) helps inhibit mold growth on non-porous surfaces and is safer than harsher chemicals for casual use. Test a small area first and ventilate the room while you work.
Why clean mold vinegar works and what it is
Mold is a type of fungi that thrives in damp, dark environments. It can appear as fuzzy patches on walls, grout, tile, or ceilings. For many common, small-scale mold issues, clean mold vinegar offers a practical, affordable, and eco-friendly option. The key is understanding how vinegar works. White distilled vinegar contains about 5% acetic acid, which can disrupt the cell walls of some mold species and inhibit further growth on non-porous surfaces like ceramic, glass, metal, and sealed countertops. This makes vinegar a sensible first step for mild outbreaks in kitchens and bathrooms. As Cleaning Tips notes in its analysis, this method is not a universal cure for every mold problem, but it can reduce spores and visible growth when used consistently and safely. Before you start, ensure you’re not dealing with a large, active infestation or porous materials that require professional remediation. Remember: vinegar is not a sterilizer, and some molds may require alternative or additional treatments.
For readers new to mold cleanup, think of vinegar as a mild, natural tool that can help you regain a cleaner surface. If you’re cleaning a surface that regularly collects moisture, address the underlying humidity source at the same time. In many homes, mold returns not because the cleaning failed, but because the moisture problem persists. In the next sections, you’ll learn when to choose vinegar, how to prepare, and how to finish the job safely.
Safety first: protecting you while you clean
Ventilation and personal protective equipment (PPE) are not optional extras; they are essential for safe mold cleanup. Wear gloves (nitrile or rubber), protective eyewear, and a mask rated for particulates when working with mold. Work in a well-ventilated area by opening windows and turning on exhaust fans to avoid inhaling mold spores. Do not mix vinegar with bleach or ammonia; combining cleaners can release toxic gases. If you have asthma or a mold allergy, consider delaying if the area is heavily infested. Keep children and pets out of the cleanup zone. After you finish, wash your hands thoroughly and launder contaminated fabrics separately from other laundry. This safety mindset aligns with best practices emphasized in Cleaning Tips' guidance and keeps your home healthier in the long run.
When vinegar is a good option (and when to seek alternatives)
Vinegar is most effective on non-porous surfaces where mold has not deeply penetrated materials. For small patches on tile, glass, enamel, or metal, undiluted vinegar can often remove the stain and inhibit growth. However, porous materials such as drywall, fabric, or wood can absorb moisture and harbor hidden growth; in these cases, vinegar alone may be insufficient. For porous surfaces, you may need to seal, replace, or treat with a different approach (e.g., hydrogen peroxide on some surfaces, or a professional remediation for extensive damage). Cleaning Tips’ analysis notes that the effectiveness depends on mold type and surface, so use vinegar as a first step and reassess after cleaning. If the mold keeps returning, you may be facing hidden moisture or a larger infestation that needs professional attention.
Preparing to clean: testing surfaces and setting up
Start with a small test area to ensure the surface tolerates vinegar without damage. This is especially important on painted walls, natural stone, or polished finishes that acids can etch. Remove nearby items, cover floors with a disposable cloth or old towels, and lay out your PPE. Fill a spray bottle with undiluted white vinegar and a clean sponge or soft brush ready for gentle scrubbing. If you detect a strong odor, open a window or use a fan to improve air circulation. After testing, proceed to clean in a well-lit area so you can see the mold clearly and avoid missing spots. Testing helps you avoid unintended damage and gives you a clearer plan for the rest of the cleanup.
Step-by-step cleaning with vinegar on non-porous surfaces (high level guidance)
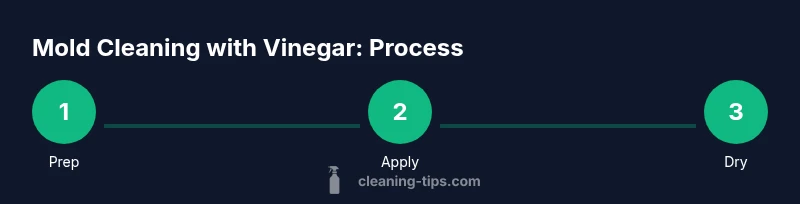
Apply vinegar liberally to the moldy area, ensuring full coverage. Let it sit for at least 60 minutes to allow the acid to interact with the mold. Gently scrub with a soft brush or sponge to lift the mold from the surface. Rinse with water and dry thoroughly to reduce the chance of rapid regrowth. Repeat if needed and follow with a final wipe-down using a clean cloth. Finally, store your cleaning tools separately and dry the area completely. These steps provide a structured approach while keeping the process accessible for beginners.
Dealing with stubborn mold and porous surfaces
When mold resists vinegar on porous materials like drywall, wallpaper, or fabric, you may need alternative methods. Hydrogen peroxide can be an option on certain surfaces, but test first since it can discolor fabrics and some paints. Baking soda paste can aid deodorization and light scrubbing. For extensive or recurring mold growth, especially behind walls or in HVAC systems, professional remediation is often the safest path. If you opt to proceed with aggressive cleaning, ensure the environment remains ventilated and that you remove and replace affected porous materials if they cannot be properly sanitized.
Ultimately, vinegar is a useful first step in many mold scenarios, but it is not a universal solution. The goal is to remove the visible growth, limit spore dispersion, and address moisture to prevent recurrence. In cases of uncertain mold type or large affected areas, seek expert guidance from a mold remediation professional.
Maintenance and prevention after cleaning
Mold regimes are most likely to reappear when moisture returns. Invest in moisture control by using dehumidifiers, fixing leaks, and improving ventilation in bathrooms, kitchens, basements, and laundry rooms. Consider applying a mold-resistant paint or sealant to high-risk areas after cleaning to create a barrier. Regular inspections—every few months—help catch early signs of moisture and mold before they become bigger problems. By combining cleaning with prevention, you reduce the likelihood of mold returning and promote a healthier home environment.
Tools & Materials
- White distilled vinegar (5% acidity)(Undiluted for strong mold inhibition on non-porous surfaces)
- Spray bottle(Fine-mist spray for even coverage)
- Soft brush or sponge(Non-abrasive to avoid scratching surfaces)
- Gloves (nitrile or rubber)(Protect skin from acidity and mold)
- Goggles or protective glasses(Optional but recommended for splashes)
- Face mask (N95 or equivalent)(Helps limit inhalation of spores)
- Towels or rags(For soaking up moisture and drying)
- Baking soda (optional)(Deodorizing and light scrubbing aid)
- Sealant/grout cleaner (optional)(After cleaning, to seal grout and pores)
- Chlorine bleach or hydrogen peroxide (optional)(Do not mix with vinegar; use only if surface-safe)
Steps
Estimated time: 30-60 minutes
- 1
Prep and protect the area
Open windows and run a fan. Put on gloves, goggles, and a mask. Clear the area of belongings that could be damaged by moisture or splashes. This reduces exposure and keeps cleanup efficient.
Tip: Ventilation is non-negotiable for mold work. - 2
Test a small area
Spray a hidden spot with vinegar and wait 5-10 minutes to check for adverse reactions like discoloration. If there’s no damage, you can continue cleaning the visible mold patches.
Tip: Always spot-test on inconspicuous surfaces first. - 3
Apply vinegar to the mold
Generously apply undiluted vinegar to the moldy area until fully saturated. Avoid pooling; a light mist is ideal to cover but not oversaturate.
Tip: Direct application helps maximize contact time. - 4
Scrub gently to lift mold
Use a soft brush or sponge to scrub the area in gentle circular motions. Work from the outer edges toward the center to prevent spreading spores.
Tip: Don’t scrub so hard you damage paint or grout. - 5
Let vinegar sit and reapply if needed
Allow the vinegar to sit for at least 60 minutes. If mold remains visible, reapply and scrub again lightly.
Tip: Patience improves mold removal on stubborn patches. - 6
Rinse and dry thoroughly
Wipe the area with a clean, damp cloth to remove residual vinegar and mold debris. Dry completely with a towel or allow air to circulate until completely dry.
Tip: Moisture control is key to preventing regrowth. - 7
Inspect tools and area for residual mold
Check the cleaned surface for any remaining spots. Sanitize cloths and brushes after use and store them dry to avoid harboring spores.
Tip: Proper tool hygiene reduces cross-contamination.
Questions & Answers
Can vinegar kill mold?
Vinegar can kill many types of mold on non-porous surfaces, but it may not be effective for all species or porous materials. Use it as a first step and reassess after cleaning.
Vinegar can kill many mold types on non-porous surfaces, but it isn’t a universal solution. Start with vinegar and check if you still see mold after cleaning.
Is vinegar safe to use in bathrooms and kitchens?
Generally yes, but avoid using on natural stone or surfaces that can be etched by acid. Always test first and ensure good ventilation during use.
Vinegar is usually safe in bathrooms and kitchens, but test on sensitive surfaces first and keep the area ventilated.
Should I mix vinegar with baking soda?
Mixing vinegar with baking soda creates fizz and does not significantly improve mold removal. Use vinegar alone on non-porous areas, or apply baking soda separately if deodorizing.
Mixing vinegar and baking soda isn’t necessary for mold cleanup and can reduce effectiveness on some surfaces.
How long should vinegar sit on mold?
Let undiluted vinegar sit on mold for about 60 minutes before scrubbing. Longer contact helps with stubborn patches on non-porous surfaces.
Let vinegar sit for about an hour, then scrub and rinse.
Can mold come back after cleaning with vinegar?
Mold can return if moisture persists. Fix leaks, improve ventilation, and reduce humidity to prevent recurrence after cleaning.
Yes, mold can come back if moisture isn’t controlled, so address humidity and leaks.
Watch Video
The Essentials
- Test a small area before full cleaning
- Use undiluted vinegar on non-porous surfaces for best results
- Rinse and dry completely to prevent regrowth
- If mold persists on porous materials, seek professional help