Best to Clean Vinyl Floors: A Practical Guide
Discover safe, effective methods to clean vinyl floors using mild cleaners, proper techniques, and maintenance tips for lasting shine in homes and rentals.

To clean vinyl floors effectively, start with dry dusting or sweeping to remove grit, then mop with a mild, pH-neutral cleaner and warm water. Avoid ammonia, bleach, or wax-based products that can dull the surface. Wring the mop well, rinse as needed, and dry promptly to prevent water spots and streaks.
Why vinyl floors require careful cleaning
Vinyl floors are popular for their resilience and ease of maintenance, but they still benefit from a thoughtful cleaning approach. When people ask what is the best to clean vinyl floors, they often underestimate how much grit hides in seams and under cabinets. A routine that starts with dry removal and uses gentle cleaners protects the color, pattern, and wear layer over time.
First, understand the surface. Vinyl comes in two common formats: sheet vinyl and vinyl plank. Both have a clear protective wear layer, but sheet vinyl can trap moisture at seams if water sits too long. The longevity of the finish depends on keeping grit off the surface and avoiding harsh solvents. Moisture and heat are enemies of vinyl, so avoid soaking the floor and high heat from steam mops or heaters.
To choose the right approach, check the manufacturer’s instructions when available. If not, a two-step baseline works well for most homes: dry dusting to remove dirt, followed by a light damp mop with a pH-neutral cleaner. This approach minimizes residue and protects color. A microfiber mop is particularly effective because it traps dust rather than pushing it around. Stability comes from consistency: clean small areas regularly rather than deep-cleaning rarely. By keeping the floor surface clean and dry, you reduce wear and extend the life of the wear layer.
What you need: tools and cleaners
Before you begin, gather the right tools and cleaners. The goal is to clean effectively without saturating the floor or leaving sticky residue. With vinyl, less is more: a light hand and a good microfiber mop produce better results than heavy solutions.
Essential tools:
- Broom or dust mop — required — Daily dusting to remove surface grit and prevent scratches.
- Microfiber mop — required — Soft fibers pick up fine dust and dirt; avoid string mops that push dirt around.
- Bucket or spray bottle — required — For mixing cleaning solution or applying solution to a section.
- pH-neutral cleaner — required — Choose a product labeled safe for vinyl flooring.
- Warm water — required — For dilution and rinsing; avoid extreme temperatures.
- Microfiber cloths — optional — For drying and spot cleaning; helps prevent water spots.
- Optional natural options — Small amounts of white vinegar can help deodorize when diluted; Test first.
- Gloves — optional — Protect hands if cleaning longer.
Note: Always test cleaners in an inconspicuous area first to ensure no adverse reaction. Having the right tools makes the routine smoother and reduces the risk of damage.
Cleaning chemistry and products that work
The safest approach is a neutral or mildly alkaline cleaner with a pH around 6–8. Harsh solvents, ammonia, bleach, wax-based products, and cleaners marketed for hardwood can dull the wear layer or create residues that attract more dirt. For stubborn spots, a paste of baking soda and water applied gently can help lift grime without scratching the surface. After cleaning, rinse lightly with clean water and wipe dry to prevent streaks. If you prefer natural options, a small amount of diluted white vinegar can assist with deodorizing, but always test first and never mix vinegar with bleach. The goal is to maintain the floor’s finish while avoiding residue buildup that dulls color over time.
Cleaning routine overview: a safe, repeatable process
A reliable routine blends dry and damp steps to keep vinyl floors looking new. Start with a routine that suits your space: daily dry dusting to prevent grit from scratching the wear layer, followed by a weekly damp mop with a neutral cleaner. In high-traffic areas, increase frequency to prevent grime buildup. Work in small sections, overlapping slightly to ensure even coverage. After mopping, go over each area with a dry microfiber cloth to remove any remaining moisture and prevent water spots. If you notice dulling or discoloration, reduce moisture and switch to a cleaner formulated for vinyl without wax or silicone additives.
This approach minimizes wear, avoids over-wetting seams, and keeps floors looking bright and even. Cleaning Tips supports this method as a baseline practice for homes and rentals, emphasizing gentleness, consistency, and proper drying to preserve the wear layer over time.
Spot cleaning and stain removal strategies
Stains and spills require prompt attention to prevent set-in marks. For fresh spills, wipe immediately with a damp cloth and dry. For tougher spots, create a mild cleaning solution with a neutral cleaner and water, apply to the stain, and blot rather than scrub to avoid scratching the surface. A baking soda paste can help with grease or scuff marks—apply, let sit briefly, then wipe away with a damp cloth. Avoid abrasive pads or harsh solvents that can damage the top layer. For ink or marker stains, a dab of isopropyl alcohol on a clean cloth can lift the mark, but always test first in an inconspicuous area.
Remember: the goal is to lift the stain without weakening the protective wear layer. Persistent issues may require professional advice or a manufacturer-recommended product.
Maintenance and prevention for longevity
Prevention is cheaper than restoration. Place doormats at entrances, remove shoes, and keep pet nails trimmed to minimize scratches. Place felt pads under furniture legs and avoid dragging heavy items across the floor. Protect vinyl from direct sun to prevent fading by using blinds or UV-blocking window films, and rotate rugs to prevent uneven wear. Clean spills promptly, and avoid carpet or rug shampoos that can leave residues on vinyl. Regularly refreshing with a light mopping will extend the life of the wear layer and preserve color and pattern fidelity.
Renters vs homeowners: practical considerations
Renters often face stricter maintenance expectations and the need to avoid damage that could affect security deposits. A routine that uses low-moisture cleaning and removable area rugs under heavy furniture can help. Homeowners may invest in higher-quality vinyl with thicker wear layers and can opt for more frequent maintenance or professional refinishing if needed. In both cases, follow the manufacturer’s guidelines and use only cleaners labeled safe for vinyl floors. A consistent routine that avoids excess moisture and harsh chemicals is the common denominator for long-lasting results.
Tools & Materials
- Broom or dust mop(Daily dusting to remove surface grit and prevent scratches)
- Microfiber mop(Soft fibers to trap dust; avoid rough pads that can dull the finish)
- Bucket or spray bottle(For mixing cleaner or applying solution to sections)
- pH-neutral cleaner(Choose a product labeled vegan or vinyl-safe; avoid wax-based formulas)
- Warm water(For dilution and rinsing; avoid extreme temperatures)
- Microfiber cloths(For drying and spot cleaning; reduces streaks)
- White vinegar (optional)(For deodorizing when diluted; test first)
- Gloves(Protect hands during longer cleaning sessions)
Steps
Estimated time: 25-40 minutes
- 1
Clear area and prep
Remove furniture and obstacles from the space. This prevents accidental damage and gives you a clear path for cleaning. Gather materials you’ll need and ensure the room is well lit.
Tip: Moving large objects first saves time and avoids rework. - 2
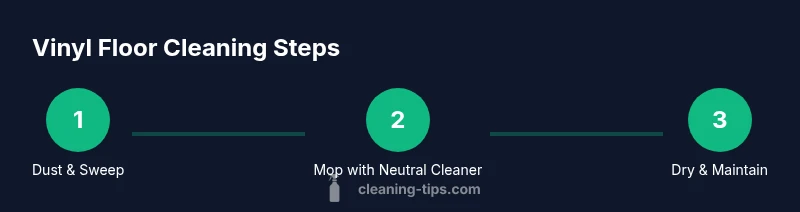
Dust and sweep
Use a broom or dust mop to remove loose dirt, grit, and pet hair. Work from one corner to the opposite side to cover the entire area without tracking debris back.
Tip: A quick pass with a dry microfiber cloth after sweeping captures remaining particles. - 3
Prepare cleaning solution
In a bucket or spray bottle, mix a small amount of pH-neutral cleaner with warm water according to the product label. If you’re using a ready-to-use cleaner, skip dilution.
Tip: Never mix cleaners with bleach or ammonia; the combination can release harmful fumes or damage the wear layer. - 4
Mop the floor
Dampen the mop with the cleaning solution and mop in straight, overlapping passes. Rinse the mop frequently to avoid redepositing dirt.
Tip: Wring the mop well to prevent soaking; excess moisture can seep into seams. - 5
Rinse and dry
If your cleaner isn’t rinsed off, go over the floor with a clean, damp mop to remove residue. Finish by drying with a microfiber cloth or towel to prevent water spots.
Tip: Drying promptly reduces streaks and prevents moisture from penetrating seams. - 6
Spot treat stains
Apply a mild cleaner to stubborn stains, let it sit briefly, then wipe away with a cloth. For tough spots, use a small amount of baking soda paste and wipe clean.
Tip: Always test any spot treatment in an inconspicuous area first.
Questions & Answers
What cleaners are safe for vinyl floors?
Safe cleaners for vinyl floors are typically pH-neutral and labeled as vinyl-safe. Avoid ammonia, bleach, and wax-based products. Always test on a small area first.
Safe cleaners for vinyl floors are pH-neutral and vinyl-safe; avoid ammonia, bleach, and wax-based products. Test in a small area first.
Can I use vinegar on vinyl floors?
Yes, you can use diluted vinegar for deodorizing. Use it sparingly and always test first to ensure no adverse reaction with your floor.
Vinegar can be used diluted for deodorizing, but test first and use sparingly.
Is a steam mop safe for vinyl floors?
Steam mops are generally not recommended for vinyl floors because heat and moisture can warp or separate the wear layer.
Steam mops are usually not recommended for vinyl floors due to heat and moisture risks.
How often should I clean vinyl floors?
Dust daily and perform a damp mop weekly in low-traffic areas; increase frequency in busy entryways or homes with pets.
Dust daily and damp mop weekly; increase frequency where traffic is higher.
What should I avoid when cleaning vinyl floors?
Avoid harsh solvents, wax-based cleaners, and abrasive pads. Do not saturate the floor with water and never mix cleaners with bleach.
Avoid harsh solvents, wax-based products, and abrasive pads. Don’t saturate the floor.
How do I remove tough stains from vinyl floors?
Spot treat with a mild cleaner, blot rather than scrub, and consider a baking soda paste for stubborn marks. Always test first.
Spot treat with mild cleaner, blot, and test first before tougher methods.
Watch Video
The Essentials
- Sweep first to remove grit.
- Use neutral cleaners and wrung mops.
- Dry thoroughly to prevent water spots.
- Spot treat stains promptly to prevent set-in marks.