Ear Wax Clean: Safe DIY Ear Care Guide for Home
Discover safe, step-by-step methods to clean ear wax at home. This guide covers approved tools, when DIY cleaning is not advised, and tips to prevent irritation.

Learn how to clean ear wax safely at home using a gentle, stepwise approach. This guide covers when DIY cleaning is appropriate, the right tools, and clear safety precautions to minimize risk. Follow the steps to improve comfort and hearing without injuring the ear canal.
Why ear wax clean matters
Ear wax, or cerumen, is produced in the outer ear and serves protective purposes by trapping dust, debris, and microbes. It also helps moisturize the ear canal. According to Cleaning Tips, a balanced approach to ear wax hygiene supports comfortable hearing and healthy ears. The Cleaning Tips team notes that most people can manage mild buildup at home with careful, non-invasive methods. Yet, wax can accumulate unevenly, causing muffled hearing, itchiness, fullness, or a temporary sense of fullness. Over-cleaning or using inappropriate tools can push wax deeper toward the eardrum, potentially causing irritation or injury. The goal of ear wax clean is not to remove all wax but to remove enough to relieve symptoms while preserving the wax’s protective role. If you have questions about your specific ears or a history of ear problems, consult a healthcare professional.
How ear wax forms and what can go wrong if you over-clean
Cerumen is produced by glands in the ear canal and mixes with shed skin cells to form a waxy substance that travels outward as you move your jaw. Normal, gentle cleaning aims to remove only the outer, visible wax. Inserting objects or aggressive squeezing can compact wax, push it toward the eardrum, or abrade the skin of the ear canal. Both over-cleaning and using the wrong tools increase the risk of irritation, infection, or temporary hearing changes. People with narrow canals, active ear infections, or a history of ear surgery should be especially cautious. If you notice persistent fullness, pain, drainage, or fever, seek medical advice promptly. This section lays the groundwork for safe at-home techniques that respect the ear’s natural cleaning process.
Safe at-home methods: what works and what doesn't
Many people can manage mild buildup at home with simple, non-invasive steps. The most reliable approach is to soften wax with a few drops of mineral oil, saline, or over-the-counter ear drops for several minutes, then rinse gently with warm water using a bulb syringe. Avoid inserting cotton swabs, hairpins, or other objects into the ear canal; these can cram wax further into the ear or injure the skin. Dry the outer ear after rinsing to prevent moisture-related irritation. If you have tubes, a history of perforation, or a compromised immune system, do not attempt DIY cleaning. If discomfort persists after a single attempt, wait a day or two before trying again, or seek professional guidance. Remember, being patient and gentle is the key to safety.
Step-by-step at-home method overview
Begin with a clean workspace and gather your supplies. Tilt your head to the side and lie on a comfortable surface. Use warm, not hot, water and apply a few drops of your chosen softening agent into the outer ear canal, staying clear of the eardrum. After a few minutes, gently rinse the canal with a bulb syringe until the water runs clear. Dry the outer ear with a soft towel and avoid further probing. If you do not achieve relief after one attempt, wait 24 hours before trying again and reconsider professional evaluation if symptoms persist.
When to seek professional care
Don’t attempt DIY cleaning if you have ear pain, discharge, fever, or a history of ear surgery or tubes. If you experience sudden hearing loss, persistent fullness after cleaning, or signs of infection, contact a clinician promptly. Regular ear checkups can help prevent significant buildup and ensure safe care for people with diabetes, immune issues, or skin conditions affecting the ears. A healthcare professional can use specialized tools to remove stubborn wax safely and without injury.
Maintenance and prevention tips
To minimize future buildup, clean only as needed and avoid inserting objects into the ear canal. Use ear drops as directed to soften and loosen wax, maintain gentle daily hygiene around the outer ear, and keep ears dry after swimming or sweating. Regular self-checks with a mirror and a quick shake of the head can help you notice changes early. If you’re ever unsure about technique or feel uncomfortable at any step, stop and seek professional guidance.
Tools & Materials
- Bulb syringe ear irrigation kit(soft rubber bulb with a gentle nozzle, use only on the outer canal)
- Saline solution or mineral oil ear drops(used to soften wax and ease removal)
- Soft towel or disposable wipes(to catch runoff and keep area clean)
- Gloves (optional)(for cleanliness and comfort)
Steps
Estimated time: 45-60 minutes
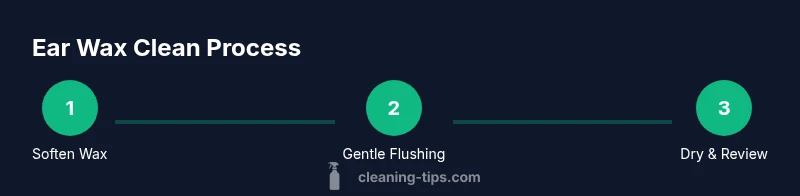
- 1
Soften the wax
Place a few drops of saline solution or mineral oil into the outer ear canal and keep the head tilted for about 5-10 minutes. This softens the wax so it is easier to remove without scraping the canal. Refrain from forcing any solution deeper than the outer canal.
Tip: Warm the drops to body temperature to reduce dizziness. - 2
Position for safe access
Lie on your side or tilt your head so the treated ear faces upward. Place a towel underneath to catch any runoff and keep the workspace clean. Never insert the syringe nozzle deeply toward the eardrum.
Tip: Keep your shoulders relaxed to avoid tension that can affect the canal. - 3
Gently rinse with bulb syringe
Fill the bulb syringe with warm water and gently flush the outer canal by directing the spray away from the eardrum. Stop immediately if you feel pain or sono discomfort, and never force the flow.
Tip: Use a small amount of water at a time and pause if you feel resistance. - 4
Dry the outer ear
Pat the outer ear dry with a soft towel. Allow the ear to air-dry for a moment before resuming activity. Do not insert cotton swabs or other objects to dry the deep canal.
Tip: Keep the head tilted for a minute to help drainage. - 5
Assess and wait
Check if the fullness or muffled hearing has improved. If not, wait at least 24 hours before attempting another mild cleaning. Refrain from repeating too soon to avoid irritation.
Tip: If symptoms persist beyond a couple of days, seek professional evaluation. - 6
Know when to stop
If you experience sharp pain, dizziness, fever, drainage, or any worsening condition, stop immediately. Do not continue cleaning and seek medical advice.
Tip: Persisting symptoms may indicate an infection or a more complex issue.
Questions & Answers
Is it safe to clean ear wax at home?
For many people, mild buildup can be managed with gentle at-home methods. However, risk of injury exists if techniques are forceful or improperly applied, especially in ears with medical history.
Yes, mild buildup can be managed safely at home when using gentle methods and avoiding deep insertion.
What tools are safest for DIY ear wax cleaning?
A bulb syringe, saline or mineral oil drops, and a soft towel are the safest basic tools. Avoid cotton swabs or sharp objects that push wax inward.
Use a bulb syringe with gentle drops and never insert sharp items.
How often should I clean my ears?
Clean only when you notice symptoms like fullness or muffled hearing. Do not perform frequent or daily cleanings.
Clean only when needed and give ears time to recover between attempts.
Can DIY cleaning cause hearing loss?
Improper technique can irritate or injure the ear canal or eardrum. Following gentle steps and stopping if pain occurs reduces risk.
Yes, improper technique can risk injury; proceed slowly and stop if uncomfortable.
What are signs I should see a professional?
Severe pain, fever, ongoing fullness, or drainage after cleaning are signs to seek professional care.
Seek professional care if pain or discharge continues after cleaning.
Can children clean their ears at home?
It is generally advised to avoid DIY cleaning for children and consult a pediatrician if needed.
For kids, consult a clinician rather than attempting home cleaning.
Watch Video
The Essentials
- Use gentle, non-invasive methods.
- Do not insert sharp objects into the ear canal.
- If symptoms persist, seek professional care.
- Limit DIY cleaning to outer-ear areas only.