How to Clean a Garage Floor: A Practical Step-by-Step Guide
Learn a practical, step-by-step method to clean garage floors—remove debris, degrease stains, scrub with appropriate cleaners, rinse thoroughly, dry completely, and seal for lasting protection.

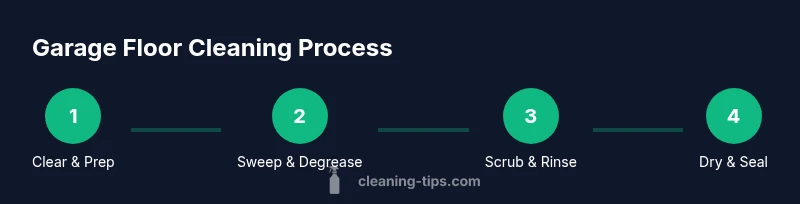
To clean a garage floor, start with a thorough sweep to remove debris, followed by targeted degreasing for oil spots. Scrub with a concrete-safe cleaner, using a stiff brush for stubborn stains. Rinse thoroughly, then let the surface dry completely. For protection, apply a sealer or epoxy coating to slow future stains and simplify maintenance.
Assess Your Garage Floor: Types & Stains
If you’re wondering how do you clean garage floor, start by assessing the concrete surface and the stains you’re facing. Is the floor bare concrete, sealed, or painted? Are you dealing with fresh spills or years of grime? Identify stain types—oil or grease, rust, tire marks, water stains, mold, or paint remnants—because the cleaning approach changes with each. Bare concrete accepts stronger degreasers, while sealed or painted floors require milder cleaners to avoid damage. For painted floors, test cleaner on a hidden spot first. If you detect mold or mildew, prioritize ventilation and use a mild disinfectant. A quick survey of the floor helps determine the cleaner strength, brush type, and whether sealing afterward is worth the extra effort.
Gather the Right Tools and Cleaning Solutions
A well-prepared toolbox makes garage floor cleaning more efficient and safer. Gather a stiff-bristle broom, a degreasing cleaner, a concrete-safe cleaner, a scrub brush, a bucket, a mop or sponge, and a garden hose or rinse nozzle. Have absorbent materials on hand for fresh spills, plus protective gloves and safety goggles. A fan or open windows improves ventilation, and a penetrating sealer or epoxy coating provides long-term protection after cleaning. For eco-friendly options, consider vinegar-baking-soda for light soils, though heavy grease will still require a dedicated degreaser. Label containers clearly, and keep pets and kids away from the work area during cleaning to reduce exposure.
Prep and Safety: Ventilation, PPE, and Workspace Setup
Safety and airflow matter when cleaning a garage floor. Open doors and windows, turn on a fan, and avoid mixing cleaners in confined spaces. Put on gloves and goggles, and consider a respirator if you’re using strong degreasers. Move vehicles and other items out of the way, cover nearby walls or storage with drop cloths, and disconnect or power down any nearby tools. Place a dry towel nearby to blot spills and a shallow pan to capture dirty rinse water. By establishing a dedicated zone for washing, you reduce accidents and make the cleanup more predictable.
Debris Removal and Pre-Clean Prep
Begin with a thorough sweep to remove loose grit, dust, and debris. Use a stiff broom to push dirt toward a central area, then pick up debris with a dustpan or shop vacuum. Clear oil- and tire-related residues with absorbent material; sprinkle cat litter or baking soda on the stain to absorb excess oil before scrubbing. Remove any loose paint chips or rust flaking. This pre-clean step reduces the amount of cleaner you’ll need and helps prevent staining from trapped grit.
Degreasing and Spot Treatments
For oil stains and heavy grease, apply a concrete degreaser directly to the spot and let it dwell for 5–10 minutes. Then scrub with a stiff brush or pad, working in small circles to lift the film. For stubborn patches, reapply and agitate longer, or repeat the process with a more potent cleaner. Rinse the area after treatment and check if the stain faded; repeat if necessary. Be mindful of the floor’s finish, and avoid overly harsh products on sealed or painted surfaces.
Scrubbing Techniques and Tools for Concrete
After applying cleaner, use a scrub brush or deck brush to agitate the surface. For larger areas, a push broom can help you cover ground quickly. Use circular or back-and-forth motions, applying steady pressure to lift embedded dirt without gouging the concrete. For textured floors, focus on the high-traffic zones and repeat scrubbing on stubborn patches. Rinse to remove loosened soil and cleaner residue, re-checking for remaining stains before drying.
Rinsing, Drying, and Surface Readiness
Rinse the floor thoroughly with clean water, ensuring all cleaner residue is washed away. Use a hose or spray nozzle to reach corners and slopes. Allow the surface to air-dry completely; you can speed this up with a fan or a few towels laid flat. Inspect for any remaining stains and blot, repeat, or spot-clean as needed. A completely dry surface ensures uniform sealing and reduces slip hazards.
Sealing, Coatings, and Ongoing Maintenance
Sealants and coatings protect garage floors from future staining and simplify maintenance. Choose a penetrating sealer for a natural look, or an epoxy coating for a tougher, chemical-resistant surface. Apply according to product directions, usually in thin, even coats, and avoid puddling. Allow the sealant to cure according to the manufacturer’s instructions, and plan periodic maintenance: reapply sealant when water no longer beads or when stains begin to linger again. Regular cleaning with gentle cleaners extends the life of the coating.
Troubleshooting Common Issues and Pro Tips
Even with careful prep, you may encounter stubborn stains, coating issues, or moisture concerns. If stains reappear after sealing, revisit oil spots with a fresh degreaser and allow longer dwell time before scrubbing. If the floor remains slippery, ensure it’s properly dried and avoid applying sealant to damp surfaces. For cracked concrete, fill cracks with an appropriate filler before sealing. Always test a small area before applying any new product and consult product labels for safety guidance.
Tools & Materials
- stiff-bristle broom(for sweeping and grit removal)
- degreasing cleaner(for oil stains and heavy grime)
- concrete-safe cleaner(ph-neutral detergent for general scrubbing)
- stiff scrub brush(for persistent stains)
- bucket(to mix cleaners or hold water)
- mop or sponge(for rinsing and drying)
- garden hose or rinse nozzle(thorough rinsing)
- absorbent material (cat litter, baking soda, or commercial absorbent)(spill cleanup and oil absorption)
- protective gloves(skin protection)
- safety goggles(eye protection)
- ventilation fan or open windows(ventilate fumes)
- sealant or epoxy coating(for long-term protection)
- towels or rags(drying and blotting)
- rubber boots(optional for wet work)
Steps
Estimated time: 2-4 hours
- 1
Clear the Area and Prep
Remove vehicles and move items away from the work zone. Set up a dry workspace by protecting nearby surfaces and ensuring power cords are out of the way. This step reduces obstacles and prevents accidental spills.
Tip: Take 'before' photos to track staining and cleanup progress. - 2
Sweep and Remove Debris
Thoroughly sweep the entire area, pushing dirt toward a central spot for easy collection. Use a dustpan or shop vacuum to remove grit. Eliminating loose debris improves cleaner efficiency.
Tip: Work from the far corners toward the center to avoid re-soiling already-cleaned areas. - 3
Pretreat Oil Stains
Apply degreaser directly to oil stains and let it dwell 5–10 minutes. This loosens the grease so that scrubbing can lift it. Do not let the cleaner dry on the surface.
Tip: If stains are fresh, blot excess oil with absorbent before applying cleaner. - 4
Apply Cleaner and Scrub Stains
Mix cleaner according to label directions and scrub stains with a stiff brush, using circular motions. For large areas, divide the floor into sections to maintain consistent cleaning. Rinse to evaluate stain removal.
Tip: Use a deck brush for larger patches to maximize surface contact. - 5
Rinse Thoroughly and Inspect
Rinse the entire area with clean water, ensuring no cleaner residue remains. Inspect for remaining stains or streaks and spot-clean as needed. A clean, residue-free surface is essential before sealing.
Tip: Look for wet spots that reveal lingering soil when they dry. - 6
Dry Completely Before Sealing
Allow the floor to air-dry completely; speed up with fans or towels. A damp surface will interfere with sealant adhesion and curing.
Tip: Check corners and slopes where water tends to pool. - 7
Apply Sealant or Epoxy Coating
Apply a thin, even coat of sealer or epoxy according to product directions. Avoid puddling and maintain uniform coverage. Let the coating cure as recommended before light foot traffic.
Tip: Use a roller for even application and avoid overworking the coating. - 8
Cure Time and Maintenance Plan
Wait for full cure per product directions before exposing to traffic or vehicles. Establish a regular cleaning routine and re-seal when necessary based on wear and water beading tests.
Tip: Note the cure time on the product label and plan around it.
Questions & Answers
What is the best cleaner for oil stains on a concrete garage floor?
A concrete degreaser or heavy-duty detergent is most effective for oil stains. Apply, dwell, then scrub and rinse; repeat if needed. For very stubborn stains, consider a poultice or specialized stain remover.
Use a concrete degreaser, let it work, then scrub and rinse; repeat as needed.
Can I seal my garage floor after cleaning?
Yes. Wait for the floor to dry completely, then apply a penetrating sealer or epoxy coating according to product directions. Allow proper cure time before using the space.
Yes—wait until dry, then seal as directed and allow to cure.
Is it safe to use a pressure washer on a garage floor?
A low-pressure setting can help remove loose dirt, but avoid high pressure near edges or coatings. Use a wide spray and keep a safe distance to prevent damage.
You can use a pressure washer on low pressure, but be careful near coatings.
How long does sealing take to cure?
Cure time varies by product and conditions. Most sealants require at least 24 hours before light traffic, and longer before vehicles are allowed on the surface.
Most sealants cure in about a day; avoid traffic until fully cured.
What should I do about cracks in the concrete?
Clean the cracks and fill with an appropriate crack filler or epoxy. For active or large cracks, consult a professional for structural assessment.
Fill cracks with concrete filler and monitor for changes.
How often should I clean and seal my garage floor?
Deep cleaning and sealing cadence depends on use. Do a thorough clean yearly and re-seal when water stops beading or stains linger after cleaning.
Do a deep clean yearly and re-seal as needed.
Watch Video
The Essentials
- Plan first, then execute for best results.
- Match cleaners to stain types for efficiency.
- Allow complete drying before sealing to ensure adhesion.
- Sealants protect and simplify future cleaning.
- Maintain a simple, seasonal cleaning routine.