How to Clean Without Water: A Practical Guide
Learn practical, step-by-step waterless cleaning techniques using microfiber, safe sprays, and smart routines to refresh surfaces without water. Perfect for busy households seeking a healthier, faster cleaning approach.

According to Cleaning Tips, waterless cleaning lets you refresh most surfaces without water by using microfiber cloths, dry brushes, and approved sprays. This method relies on friction, precision, and minimal product use to lift dirt and oils. Start with a test patch, choose the right cloth and cleaner, and work in small sections for consistent, residue-free results. It’s a practical, time-saving approach for busy homes.
Introduction to Waterless Cleaning
Waterless cleaning offers a practical alternative to traditional mopping and rinsing. By focusing on friction, selective cleaning agents, and high-quality fabrics, you can refresh surfaces without introducing a drop of liquid. This approach shines in kitchens, bathrooms, living areas, and on frequently touched items like light switches and remotes. According to Cleaning Tips, waterless methods can dramatically reduce mess and time spent during weekly upkeep. The Cleaning Tips team found that consistent dry-cleaning routines keep high-traffic zones bright between damp moppings, while reducing residue and water usage. The key is to start small, test on inconspicuous areas, and build a routine that fits your space and materials. This guide covers fundamentals, practical techniques, and safety considerations for successful dry cleaning.
Core Principles of Dry Cleaning
Dry cleaning is not a substitute for wet cleaning in every scenario. It relies on four core principles: use friction with the right tools, apply cleaners sparingly, move from top to bottom to avoid recontamination, and finish with a buff to restore shine. Choose microfiber cloths engineered to lift dirt rather than smear it. Avoid abrasive scrubs that can scratch finishes. When you must use cleaners, apply a light mist to the cloth—not directly onto surfaces—to control saturation. The aim is clean, not wet, and to minimize streaks. By following these principles, you’ll achieve reliable results across multiple surfaces without water. In this article, you’ll find practical examples, product guidance, and safety notes to help you implement these ideas at home.
Surfaces and Materials Suitable for Waterless Cleaning
Not every surface is ideal for dry methods, but many common household materials respond well to waterless care. Glass doors, sealed countertops, metal fixtures, smooth laminates, and most plastics can be refreshed with microfiber and gentle sprays. Wood veneers and certain stone surfaces require extra caution—always test first and follow manufacturer guidelines. Based on Cleaning Tips analysis, the most forgiving materials for waterless cleaning are non-porous and sealed finishes; porous or unfinished textures may require a damp wipe or specialized product. Always start with a patch test in a hidden area, then broaden the approach if results are satisfactory. This ensures you preserve the finish while achieving a bright, clean appearance.
Tools, Materials, and Setup
A small, focused toolkit makes waterless cleaning efficient. You’ll want a few essentials: microfiber cloths, a spray bottle with a fine mist, and a gentle waterless cleaner or homemade solution designed for dry use. A soft brush or microfiber mitt helps reach crevices, while a vacuum with a brush attachment can lift dust before dry wiping. Keep a designated color-coded cloth for different surfaces to avoid cross-contamination. Store cleaners away from kids and pets in a cool, dry place. When in doubt, test in an inconspicuous spot and consult product labels for surface compatibility. Cleaning Tips recommends keeping a simple routine that you can repeat weekly for consistent results.
The Waterless Cleaning Routine: A Practical Approach
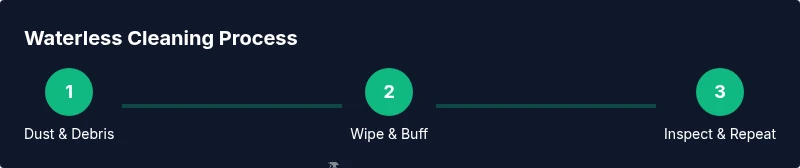
Begin with a quick dusting to remove loose debris. Then, apply a light mist to your microfiber cloth and wipe from top to bottom, using circular motions on flat surfaces and straight strokes on edges. For high-touch areas like light switches or remote controls, focus on the most touched spots first, then move outward. Buff with a dry, clean cloth to restore luster and remove any streaks. If a surface begins to smear, switch to a fresh cloth and re-wipe with a different technique tailored to texture. This routine minimizes moisture while maintaining a clean, inviting space.
Stain Removal Without Water
Waterless methods can handle many stains when approached carefully. For light, oily residues, a tiny amount of cleaner on a microfiber cloth can lift the stain as you buff. For stubborn marks, use a slightly dampened cloth if the surface tolerates moisture, then immediately dry with a separate cloth to prevent ring formation. Avoid harsh abrasives or solvent-based products on delicate finishes. For glass and mirrors, a dedicated glass cleaner spray in a fine mist can reduce streaks when combined with a microfiber drying cloth. Always perform a patch test and stop if the stain persists or if the finish shows signs of damage.
Dust, Pet Hair, and Allergens
Dry cleaning excels at removing dust and hair from smooth surfaces. Run a microfiber cloth in long, even strokes to trap particles rather than smear them. For upholstery and fabric-covered surfaces, a dry brush or lint roller can help lift hair before a light wipe with a clean cloth. Vacuuming with a brush attachment beforehand can dramatically reduce the amount of debris that needs attention. Regular dry-cleaning routines reduce allergen buildup and keep living spaces feeling fresh between damp cleans. If you have severe allergies, consider pairing waterless methods with periodic wet cleaning as recommended by surface manufacturers.
Safety, Storage, and Ventilation
Always read product labels and use cleaners in a well-ventilated area. Store liquids out of reach of children and pets, in their original containers with sealed caps. Wear gloves if you have sensitive skin or are using cleaners with fragrance or solvents. Avoid mixing cleaners, especially vinegar with ammonia-based products, as this can create hazardous fumes. If a cleaner splashes, wipe it up immediately with a dry cloth to prevent residue buildup. Proper storage and ventilation reduce risk while enabling you to maintain a clean, healthy home environment.
Maintenance: When to Reintroduce Water
Waterless cleaning is excellent for quick refreshes, but occasional damp cleaning may still be necessary for sticky residues, heavy soils, or grout lines. If you notice persistent grime or a surface starts to show water marks when dry-cleaned, consider light damp wiping with an appropriate cleaner, followed by thorough drying. Create a seasonal schedule that combines waterless routines with periodic damp cleaning, ensuring surfaces stay hygienic without relying on water for every task. The goal is balanced care that preserves finishes and minimizes moisture exposure over time.
Common Mistakes and How to Avoid Them
One common error is over-wetting cloths or surfaces, which defeats the purpose of waterless cleaning. Avoid cross-contamination by using color-coded cloths for different zones and surfaces. Another pitfall is neglecting test patches—always verify compatibility first. Finally, skipping the buff step can leave dull spots or streaks; finish with a clean, dry cloth for best results. By anticipating these issues and following a simple, repeatable routine, you’ll experience more consistent outcomes and less residue buildup over time.
Quick-Start Checklist for Your Waterless Session
- Gather microfiber cloths and a spray bottle. 2) Test cleaner on a hidden area. 3) Dust with a dry cloth or vacuum. 4) Wipe surfaces from top to bottom with light pressure. 5) Buff each area with a clean, dry cloth. 6) Reassess surfaces and repeat as needed. 7) Store supplies safely and label containers. 8) Schedule regular sessions to maintain a fresh, moisture-free home.
toolsMaterialsMetaCleanUpZTNULLRationale(null)??null}
stepByStepCarousel_placeholder_to_be_replaced_by_actual_steps_DO_NOT_ADD
Tools & Materials
- Microfiber cloths(Soft, lint-free; multiple colors recommended to avoid cross-contamination)
- Spray bottle with adjustable nozzle(Fine mist; 16 oz size recommended for control over application)
- Waterless cleaning spray or gentle cleaner(Choose non-abrasive formulas; avoid ammonia on stone or wood finishes)
- Vacuum with brush attachment(Pre-dust surfaces and remove hair with the nozzle)
- Soft brush or microfiber mitt(Reach crevices and delicate surfaces without scratching)
- Baking soda(Gentle abrasive for non-porous surfaces in small amounts)
- White vinegar(Dilute for general use; avoid on natural stone and certain finishes)
Steps
Estimated time: 45-60 minutes
- 1
Prepare workspace and patch test
Clear the area and remove loose debris. Test your cleaner in an inconspicuous spot to confirm compatibility and avoid damage. If there is any adverse reaction, switch to a gentler product and re-test after drying.
Tip: Always start with the gentlest option and observe for 24 hours for any adverse effect. - 2
Dust and debulk safely
Use a dry microfiber cloth to lift dust from high surfaces first, then work downward. Vacuum large debris from upholstery or crevices to minimize how much you’ll need to wipe later.
Tip: Dust before damp or spray cleaning to prevent smearing and increase efficiency. - 3
Apply cleaner sparingly
Mist the cloth lightly or apply cleaner to a small area of the cloth, not directly on the surface. Wipe in smooth, even strokes to lift dirt without saturating the surface.
Tip: Less liquid equals less risk of streaks and residue. - 4
Buff to finish
Finish with a dry, clean cloth to buff surfaces and remove any remaining streaks. For glass and mirrors, use a lint-free cloth and a quick, cross-hatch motion to maximize shine.
Tip: Buffing helps restore sheen and prevents water spots from forming if any moisture was used. - 5
Tackle stubborn spots
For oily or sticky spots, apply a tiny amount of cleaner to a cloth and gently work the stain in from the outside edge toward the center.
Tip: Avoid scrubbing hard; friction plus a mild cleaner is usually enough. - 6
Store and maintain
Wipe cloths clean, let them air-dry, and store tools in a dry area. Plan a short weekly waterless session to keep spaces fresh between damp cleans.
Tip: Label cloths by surface type to save time during future cleanings.
Questions & Answers
Can I clean granite countertops without water?
Granite and other natural stone require caution. Use a pH-neutral cleaner or a stone-safe spray and a soft cloth, then dry thoroughly. Always avoid acidic substances like vinegar on unsealed stone.
Yes, but choose stone-safe cleaners and dry thoroughly to prevent etching.
Is waterless cleaning effective for pet hair and dust?
Yes. Dry wiping with microfiber attracts and lifts hair and dust efficiently. For fabrics, a dry brush or lint roller helps before a quick wipe.
Absolutely, microfiber lifts pet hair effectively when used with a light touch.
What surfaces should never be cleaned without water?
Unsealed wood, porous stone, and certain laminated finishes may scratch or discolor if treated dry. Always test first and consult manufacturer guidelines.
Avoid dry cleaning on porous or unsealed surfaces without testing first.
Can waterless cleaning disinfect surfaces?
Some waterless cleaners contain disinfecting agents suitable for high-touch areas. Check product labels for claims and follow contact time recommendations.
Some products disinfect; read labels for proper use and contact time.
How often should I use waterless cleaning?
Use waterless cleaning as a quick refresh between damp cleans. A weekly or bi-weekly session works for most homes, with damp deep-cleaning every few weeks as needed.
Use waterless cleaning regularly to maintain freshness between deeper cleans.
Can waterless cleaning replace all damp cleaning?
No. Waterless methods complement damp cleaning and are ideal for quick refreshes. Reserve damp cleaning for heavy soils, grout, or stubborn stains.
It complements damp cleaning, not a full replacement for deep cleaning.
Watch Video
The Essentials
- Test patches before full use
- Dry cleaning saves time and water
- Use microfiber and light products for best results
- Buff to finish and avoid cross-contamination
- Schedule regular waterless sessions for consistency