How to Start Cleaning a Messy House: Step-by-Step Guide
Learn how to start cleaning a messy house with a practical, room-by-room plan. Gather essential supplies, set timers, and declutter fast to restore order without burnout.

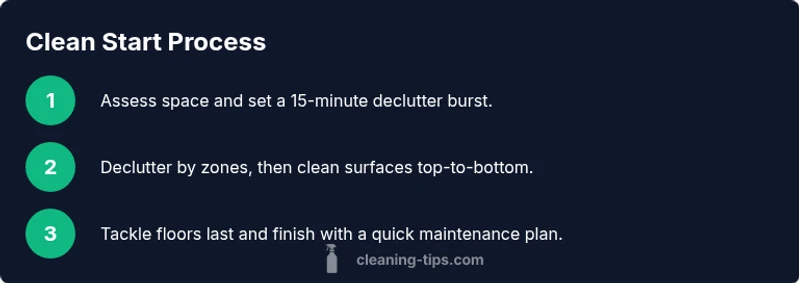
This guide shows you how to get started cleaning a messy house. You’ll survey each room quickly, gather the right tools, and implement a simple, step-by-step plan. Start with a 15-minute declutter burst, designate zones, and progress room by room to regain control without burnout. See our detailed steps.
Start with a rapid assessment and clear goal
A messy house can feel overwhelming, but the quickest path to momentum is a rapid space scan followed by a clear, realistic goal for what you want to accomplish in the next 60 minutes. Walk through each room, note the dominant problem (clutter, dust, spills, laundry), and decide which areas to tackle first based on traffic and impact. By framing the task as a series of short, solvable chunks, you preserve energy and prevent paralysis. As Cleaning Tips emphasizes, begin with a high-visibility win to build confidence and set the tone for the rest of the cleaning session. Keep your eyes open for items that belong elsewhere so you can assign quick resettling tasks.
Build a plan that fits your home and energy
Your strategy should be realistic, not heroic. Create a rough plan that assigns 3–4 zones to focus on in this session, with a time limit for each. If you live in a multi-bedroom home, you might designate the living area, kitchen, one bedroom, and a bathroom as your initial targets. Write the plan where you can refer to it during the process. The goal is to move more than you think you can, but in small, repeatable steps. Cleaning Tips’ approach is to outline concrete actions (declutter, wipe, sweep, organize) and then repeat them in cycles until the space feels calmer.
Gather essential supplies before you start
Having the right tools within arm’s reach reduces friction. Assemble a compact kit with garbage bags, microfiber cloths, an all-purpose cleaner, a broom and dustpan, a vacuum or mop, gloves, a spray bottle, and a designate trash/recycling bin. Place this kit in a central location so you don’t waste time chasing supplies. If you’re short on space, use a rolling tote to keep everything together. This upfront prep is a small investment that pays off in speed and efficiency.
Declutter by zones: quick wins first
Zone-driven decluttering means you tackle one area at a time, clearing surfaces and putting items back in their homes. Start with zones that everyone uses, like the foyer, living room, or kitchen counters. As you clear, decide what to keep, donate, reuse, or discard. Use labeled boxes or bags to separate items quickly, and avoid rearranging furniture unless it serves a much-needed purpose. The goal is to reduce visual noise so you can see what truly needs cleaning.
Tackle visible surfaces and floors before microscopic cleanups
Prioritize the easy wins: wipe down surfaces, sweep or vacuum floors, and address obvious stains. Once clutter is removed, you can clean more thoroughly without constantly stepping over items. Work top-to-bottom and left-to-right to create a rhythm. If you’re overwhelmed, set a timer for 15 minutes and push through as many surfaces as possible; you’ll be surprised by how much you accomplish.
Deep-clean rooms in a practical order
After the initial declutter, move to a deeper clean in a practical sequence: living areas first, then kitchen counters and appliances, followed by bathrooms, and finally bedrooms. In each room, start with high surfaces, then work downward to floors. Keep your cleaning concentrated in the areas that show the most wear or grime. A consistent routine reduces the likelihood of relapse into clutter.
Kitchen and bathrooms: high-traffic, high-impact areas
These spaces usually drive the perception of cleanliness. Focus on the sink, countertops, and stovetop in the kitchen, then the toilet, sink, and shower in bathrooms. Wipe down fixtures, polish metal surfaces, and sanitize handles. For surfaces with heavy grime, use a more potent cleaner or a vinegar-based solution, then rinse. This approach minimizes mess-transfer and pays immediate dividends in how the space feels.
Living areas, bedrooms, and textiles: finish with comfort
Dust surfaces, vacuum or mop floors, and refresh textiles like throw pillows and curtains. Rotate cushions to distribute wear evenly. Launder or air out fabrics that trap odors, and consider a simple deodorizing spray. While aesthetics matter, the goal is a comfortable, livable space. Celebrate small wins as you move from room to room—progress boosts motivation to continue.
Create a simple maintenance routine to prevent re-clutter
The best cleanup is the cleanup you won’t have to redo soon. Establish a 10–15 minute daily reset: put items back after use, wipe down surfaces, and handle mail or laundry in dedicated small pockets of time. Schedule a 1-hour weekly refresh, expanding or contracting as needed. A routine makes a messy house easier to manage and helps you stay ahead of chaos.
Safety, sustainability, and mindful improvement
Prioritize safety: use masks or gloves if you’re sensitive to dust, ventilate spaces while cleaning, and store cleaners securely out of reach of children and pets. Consider eco-friendly products or reusable cloths to reduce waste. By treating cleaning as a sustainable habit rather than a one-off event, you maintain a healthier home and a calmer mind.
Review and adjust: close the loop on your initial session
At the end of the session, assess what worked and what didn’t. Note which zones consistently stay tidy and which tended to re-clutter. Adjust your daily 10–15 minute reset or weekly plan accordingly. A brief reflection helps you tailor future sessions for greater efficiency and lasting results. Cleaning Tips suggests keeping a simple checklist to track progress and celebrate milestones.
Tools & Materials
- Trash bags (15-20 gallon)(Multiple bags for decluttered items)
- Microfiber cleaning cloths(Lint-free, reusable)
- All-purpose cleaner(Choose a formula you like)
- Spray bottle(Filled with your cleaner mixture)
- Broom and dustpan(For hard floors and corners)
- Vacuum or mop(Depends on floor type)
- Gloves (optional but recommended)(Protect hands from grime)
- Labels or boxes for sorting(Keep items organized during declutter)
- Laundry hamper or basket(Sorts fabrics and textiles)
- Step timer (phone or kitchen timer)(To pace decluttering bursts)
Steps
Estimated time: 90-150 minutes
- 1
Conduct a quick space scan
Walk through each room and identify the major clutter zones, sticky spots, and high-traffic areas. Decide which zones will receive priority in this session and note any safety hazards. This upfront assessment saves time later by focusing energy where it matters most.
Tip: Keep a small notepad handy to mark priorities. - 2
Gather and organize your tools
Collect all cleaning supplies into a single, portable kit. Having everything in one place reduces trips to cabinets and keeps momentum intact. Confirm you have enough trash bags and a working timer.
Tip: Place the kit in the center of the space you’ll start in. - 3
Declutter by zone in 15-minute bursts
Set a timer for 15 minutes and tackle the most cluttered zone first. Remove obvious trash, sort items by keep/donate/relocate, and place items back in their homes when possible.
Tip: Working in short sprints prevents fatigue. - 4
Clear surfaces before cleaning deeper
Wipe down counters, shelves, and tabletops. Clear visible grime first, then address corners or hard-to-reach areas. This reduces dirt transfer when you later mop or vacuum.
Tip: Use a damp microfiber cloth for most surfaces. - 5
Tackle floors last in each zone
After surfaces are clean, sweep or vacuum to collect dust and debris. Finish with mopping if you have hard floors. Floors carry a lot of dirt and set the tone for room tidiness.
Tip: Work from farthest corner toward the door. - 6
Deep-clean the kitchen and bathrooms
Focus on sinks, countertops, and fixtures. Remove grime from faucets and handles, wipe appliance surfaces, and disinfect high-touch areas. A clean set of bathrooms is a visible signal of overall cleanliness.
Tip: Rinse with a microfiber cloth to avoid streaks. - 7
Refresh textiles and soft surfaces
Launder or air out cushions, throws, and curtains if possible. Vacuum fabric surfaces to remove dust mites and allergens. This step significantly improves air quality and comfort.
Tip: Rotate cushions to distribute wear evenly. - 8
Implement a simple maintenance plan
Schedule daily 10–15 minute resets and a weekly 60–90 minute deeper clean. Consistency beats occasional marathon sessions. Small, regular efforts prevent future overwhelm.
Tip: Set calendar reminders for the weekly reset. - 9
Check safety and finish with a quick review
Ensure floors are dry to prevent slips, electrical outlets are clear, and cleaners are stored safely. Do a quick walk-through to verify you didn’t miss obvious spots.
Tip: Test a few high-traffic areas to confirm readiness. - 10
Celebrate progress and adjust as needed
Acknowledge what you accomplished to sustain motivation. If certain zones tend to revert, adjust your routine or timing to fit your real life better.
Tip: Small wins build long-term habits.
Questions & Answers
What is the first step I should take when my house feels chaotic?
Start with a quick scan of each room to identify the top clutter zones and safety hazards. Set a single, realistic goal for this session and assemble your cleaning kit before you begin.
Begin with a quick room scan to identify clutter and hazards, then set a clear goal and gather your kit.
How long should I spend on a single decluttering burst?
Aim for 15-minute bursts to stay focused and prevent fatigue. If you finish early, continue with another zone for a total of 30–45 minutes in the first pass.
Try 15-minute bursts and extend to 30 to 45 minutes for your first pass if you’re feeling energized.
What if I don’t have access to all cleaning supplies?
Use what you have. Substitute with vinegar-water for many surfaces and reuse microfiber cloths. Focus on decluttering and basic surface cleaning first, then add extra supplies as you can.
If you’re short on supplies, substitute with common cleaners and focus on decluttering first.
How can I prevent clutter from building up again quickly?
Create a daily 10–15 minute reset and a weekly 60–90 minute deep-clean session. Put items back in their homes immediately and sort mail daily to avoid pileups.
Do a quick daily reset and a weekly deep clean to keep clutter at bay.
Is it okay to ask for help with cleaning a messy house?
Yes. Enlist a friend or family member for a joint decluttering session. Teamwork speeds up the process and makes it less exhausting.
Absolutely—a partner can help you stay motivated and finish faster.
How do I sustain motivation after the initial cleanup?
Set micro-goals, celebrate small wins, and track progress with a simple checklist. Regular affirmation of progress reinforces good habits.
Keep a simple progress checklist and celebrate completing each zone.
Watch Video
The Essentials
- Scan first, plan second
- Declutter in zones for momentum
- Tackle high-traffic areas early
- Maintain with short daily resets