How to Make Cleaning Solution with Vinegar
Learn to create a simple vinegar-based cleaning solution with safe dilutions, surface guidance, storage tips, and safety warnings from Cleaning Tips for a healthier home.

You’ll learn how to make a simple vinegar-based cleaning solution and use it safely on common household surfaces. This quick guide covers safe dilutions, where vinegar works best, and when not to use it. You’ll also get storage tips, how to avoid mixing with bleach, and practical cleaning tips from Cleaning Tips.
Why Vinegar Is a Popular Cleaning Agent
Vinegar has a long history as a household cleaner, thanks to its acidity and low cost. According to Cleaning Tips, vinegar is a versatile cleaner for glass, chrome, ceramic, and many sealed surfaces. Its acetic acid helps dissolve mineral deposits, cut through soap scum, and leave a streak-free shine when used properly. This section explains why vinegar is a go-to option for homeowners who want an affordable, eco-friendly approach to routine maintenance. We’ll discuss the science behind acetic acid, common dilution practices, and how to combine vinegar with water to optimize cleaning power without harming surfaces. We’ll also address how vinegar compares to store-bought cleaners in terms of environmental impact and user experience. The takeaway is that vinegar excels in everyday cleaning tasks with minimal risk when used as directed, aligning with Cleaning Tips’ guidance on safe, practical home care. We also acknowledge that cleaning choices should fit your home, budget, and values, while prioritizing safety and effectiveness.
For reference, Cleaning Tips analysis emphasizes that vinegar can be a handy first-line cleaner for many surfaces, but it is not a universal disinfectant. Always follow label guidance and consider surface material before application. This nuanced view helps homeowners balance cost, eco-friendliness, and results.
Safe Dilutions and Mixing Rules
Vinegar is most effective when diluted with water. A common starting point is a 1:1 ratio (one part vinegar to one part water) for general cleaning tasks like countertops and glass. For lighter cleaning, a 1:2 ratio (vinegar to water) can be sufficient, while tougher grime may benefit from a 1:1 mixture with a touch more agitation. Always use measuring tools to ensure consistency and avoid overly concentrated solutions on sensitive surfaces. Important safety notes: never mix vinegar with bleach or ammonia, as dangerous gases can form. Label bottles clearly and keep diluted solutions away from heat or child access. As Cleaning Tips notes, perform a patch test on an inconspicuous area before wider use to prevent damage and ensure compatibility with finishes. Dilution is the key to balancing cleaning power with surface safety.
In practice, you’ll often find that simple dilutions yield reliable results for everyday tasks, while more stubborn soils may require milder concentrations or alternative cleaners. Remember to test and adjust depending on the surface—this aligns with Cleaning Tips’ emphasis on practical, adoptable cleaning routines. When in doubt, start with the gentlest option and work up only if needed.
Additionally, if you want to enhance cleaning power on greasy surfaces, a small amount of mild dish soap can be added tucked into a separate bottle or mixed carefully in a separate container before filling the spray bottle, ensuring compatibility with your spray mechanism and avoiding suds in the nozzle.
Surfaces That Benefit from Vinegar (and those to avoid)
Vinegar is well-suited for many non-porous surfaces. Glass, chrome fixtures, ceramic tiles, stainless steel, and sealed countertops generally respond well to vinegar-based solutions. The acidity helps cut through mineral deposits, soap scum, and fingerprints, leaving a bright, clean appearance when wiped with a microfiber cloth. For best results, spray and let the solution sit briefly before wiping to maximize contact with soils.Typically, vinegar works well on windows, mirrors, and stainless steel appliances, delivering a brilliant finish with minimal streaking when used with a lint-free cloth.
However, vinegar should not be used on certain surfaces. Natural stone like marble, limestone, or some granite finishes can be etched by acid. Some hardwood finishes and waxed surfaces may also be sensitive to acidic cleaners. Always test a small area first, and consult manufacturer recommendations if you’re unsure. Avoid mixing vinegar with other cleaners beyond simple soap and water, as this can alter results or create residue. This nuanced approach helps you leverage vinegar’s strengths while protecting vulnerable surfaces.
How to Make a Basic Vinegar Cleaning Solution
You don’t need fancy equipment to create an effective vinegar cleaner. Start with a clean spray bottle and a measuring cup. A standard formulation is 1 part white vinegar to 1 part water for most surfaces, with an optional 1–2 drops of mild dish soap for grease. If you’re cautious, first mix small quantities to test the scent and surface reaction. Fill the bottle, label it with the dilution ratio, and store it away from heat and direct sunlight. Always shake gently before each use to re-mix any settled components. This basic recipe provides a reliable baseline for quick, eco-friendly cleaning with minimal expense.
If you’re cleaning larger surfaces or bathrooms, you might prefer a stronger 1:1 mix for faster soil removal. For delicate surfaces like glass or polished metal, consider a milder 1:2 ratio to reduce streaks and maintain shine. The key is to start mild, test, and adjust based on your results and the surface you’re cleaning. With practice, you’ll tailor dilutions to your household tasks and satisfaction.
Using Vinegar for Everyday Cleaning Tasks
Vinegar is a versatile ally for daily housekeeping. Use it to wipe down countertops, clean glass surfaces, descale kettles, remove mineral deposits from showerheads, and refresh stainless steel appliances. When tackling soap scum on bathroom tiles, a spray with a 1:1 dilution can help loosen grime before scrubbing. For coffee makers and teapots, vinegar can help remove mineral buildup; run a diluted cycle with water afterwards to rinse away any remaining vinegar aroma. Always finish with a thorough rinse or wipe to avoid residue. Ventilate the room during and after cleaning to speed up the dissipation of the vinegar smell.
Keep expectations realistic: vinegar won’t eliminate all bacteria or fully disinfect surfaces unless used with approved disinfectants when appropriate. For general germ reduction, it’s still a practical, affordable cleaner for everyday messes and routine maintenance. This approach aligns with Cleaning Tips’ emphasis on accessible, effective home care that stays within safe practice bounds.
Storage, Freshness, and Longevity
Store your vinegar-based cleaner in a labeled bottle at room temperature away from direct sunlight. The solution remains effective for weeks, though you may notice a faint odor as it sits. To maintain best results, prepare smaller batches more frequently to avoid degradation of performance and to ensure you’re always using fresh product. Keep the bottle away from children and pets to prevent accidental ingestion. If you add soap, keep the mixture separate if you’ll be using it over extended periods, and only mix soap when you’re ready to use it. Label the bottle with the dilution ratio and the date of preparation to track freshness and consistency.
A practical habit is to keep a quick-reference card with your most common dilutions next to your cleaning supplies. This reduces guesswork and encourages consistent results across tasks, reinforcing the idea that small, deliberate steps beat improvised solutions. Cleaning Tips consistently champions straightforward routines that fit real-home workflows.
Common Pitfalls and Safety Tips
Even a simple vinegar cleaner has potential downsides if misused. Common mistakes include using straight vinegar on all surfaces, which can damage certain finishes; mixing vinegar with bleach or ammonia, which releases toxic gases; and creating overly strong formulas that can irritate skin or eyes. Always dilute appropriately, wear gloves if you have sensitive skin, and keep surfaces well-ventilated during cleaning. Do not use vinegar on porous stone countertops or bare wood finishes unless the manufacturer specifically approves it. If you must descale appliances like kettles or coffee makers, a short vinegar soaking followed by a thorough rinse usually suffices. Finally, do not store vinegar in containers previously used for strong cleaners to avoid cross-contamination. By adhering to these guidelines, you’ll enjoy safer, more effective cleaning results while protecting your home and health.
Cleaning Tips Team Recommendations
The Cleaning Tips team recommends using vinegar as part of a practical, eco-friendly cleaning toolkit. Use the right dilution, test new surfaces first, and avoid mixing vinegar with bleach. For routine cleaning, the 1:1 or 1:2 ratios cover the majority of tasks, with soap added only when grease is involved. Pair vinegar with microfiber cloths and dedicated spray bottles to maximize efficiency and minimize streaks. Remember that vinegar is a strong acid; treat it with respect, especially around sensitive surfaces and finishes, and adjust your approach based on your home’s needs. Cleaning Tips’s verdict is to blend simplicity with care—vinegar can be a powerful ally when used thoughtfully and safely.
Tools & Materials
- White vinegar (5% acidity)(Standard household vinegar; avoid flavored or aged varieties.)
- Distilled water(For diluting vinegar to safe levels.)
- Spray bottle (e.g., 16 oz)(Opaque or clear; clear helps monitor residue.)
- Measuring cup (milliliters)(For accurate dilution ratios.)
- Funnel(Useful when transferring liquids to the spray bottle.)
- Microfiber cloths(For streak-free cleaning and residue removal.)
- Rubber gloves(Protect sensitive skin, especially with frequent use.)
- Labeling tape or marker(Label bottle with dilution ratio and date.)
Steps
Estimated time: 15-20 minutes
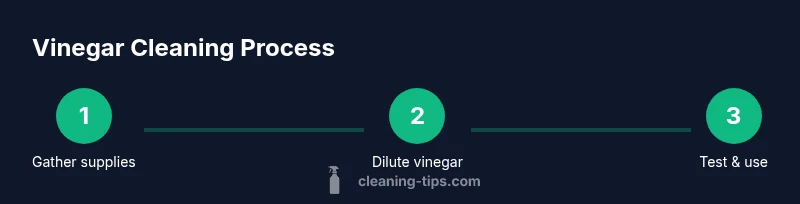
- 1
Gather supplies and prepare workspace
Set up a clean area with your bottle, vinegar, water, and optional soap. Label the bottle before mixing to prevent cross-use with other cleaners. This step helps ensure safety and accuracy.
Tip: Wear gloves if you have sensitive skin; ensure good ventilation. - 2
Dilute the vinegar
Combine vinegar and water in a 1:1 ratio for general cleaning. For lighter tasks, try 1:2; for tougher grime, you may revert to 1:1 with more agitation. Use measuring tools for accuracy.
Tip: Keep a written record of your dilution ratios for consistency. - 3
Optionally add dish soap for grease
Add 1–2 drops of mild dish soap to the bottle for greasy surfaces. Avoid large amounts of soap in spray bottles to prevent clogging and residue.
Tip: Test on a small area first to ensure no slippery residue. - 4
Transfer to spray bottle
Pour the solution into the spray bottle using a funnel. Leave space at the top for shaking and label the bottle with the ratio and date.
Tip: Shake gently before every use to re-mix components. - 5
Test and use on surfaces
Spot-test on an inconspicuous area before broad use. Apply to glass, countertops, and tile; rinse or wipe dry as needed. Avoid stone and waxed surfaces unless approved by the manufacturer.
Tip: Ventilate the room during cleaning to speed up odor dissipation.
Questions & Answers
Can I use vinegar on all surfaces?
Vinegar works on many non-porous surfaces but should not be used on natural stone or waxed wood. Always test a small area first and consult manufacturer guidelines for delicate finishes.
Vinegar is great for many surfaces, but avoid natural stone and waxed wood; test a small area first.
Is vinegar an effective disinfectant?
Vinegar provides limited disinfectant properties and is not a reliable disinfectant for all pathogens. For disinfection, use EPA-approved products and follow their labeled instructions.
Vinegar isn’t a reliable disinfectant; use approved products where disinfection is needed.
Can I mix vinegar with other cleaners?
Do not mix vinegar with bleach, ammonia, or hydrogen peroxide due to potentially dangerous fumes. Stick to water-based dilutions or mild soap if needed.
Never mix vinegar with bleach or ammonia; stick to water-based cleaners or soap.
How should vinegar be stored?
Store in a labeled bottle away from heat, sunlight, and children. Do not transfer vinegar into containers that previously held bleach to avoid contamination.
Keep it in a labeled bottle, away from heat or kids, and avoid reusing bleach containers.
Does vinegar leave a smell?
A light vinegar scent is normal and should fade as surfaces dry. Improve ventilation to speed up the smell's disappearance.
A mild vinegar smell is normal but will fade with airflow.
Can I use vinegar on wood surfaces?
Vinegar can damage some finishes on wood; avoid using it on unfinished or untreated wood unless you’ve tested it first.
Avoid vinegar on wood finishes unless you’ve tested a small area.
Watch Video
The Essentials
- Wash surfaces effectively with properly diluted vinegar.
- Avoid mixing vinegar with bleach or ammonia for safety.
- Test a small area before widespread use to protect finishes.
- Label and store cleaners responsibly to prevent mix-ups.
- Vinegar works well on glass, metal, and ceramic surfaces.