Office Cleaning Guide: Step-by-Step for Busy Spaces
Learn how to clean an office effectively with a practical, step-by-step routine. This guide covers desks, screens, floors, and high-touch areas, plus safety tips and eco-friendly options to keep your workspace healthy and productive.

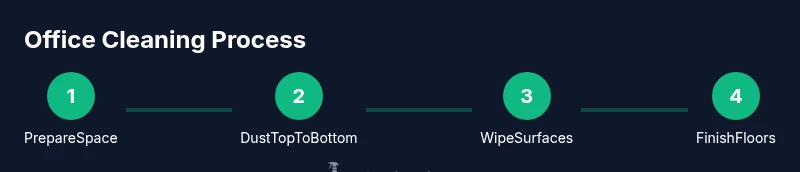
You’ll learn how to clean an office quickly and thoroughly. The quickAnswer outlines a practical routine: prep the space, dust and wipe surfaces, sanitize high-touch areas, and refresh floors. This method saves time, reduces allergens, and protects equipment. Follow the steps to achieve a healthier workspace in about 60–90 minutes, with adjustments for your office size and layout.
Why Office Cleaning Matters
Keeping an office clean isn’t just about appearances. A well-maintained workspace supports better air quality, fewer allergens, and a healthier environment for employees and visitors. Regular cleaning reduces the buildup of dust, grime, and bacteria on desks, keyboards, phones, and shared equipment, which can affect productivity and comfort. When you set a consistent routine, you also protect sensitive electronics and extend the life of furniture and flooring. In the context of a busy office, a clean environment helps staff stay focused, reduces sick days, and creates a welcoming impression for clients and partners. If your goal is an office to clean that supports daily collaboration, prioritize simplicity, safety, and speed in your routine.
Planning Your Cleaning Schedule
A practical cleaning schedule balances daily maintenance with deeper cleanings. Start with a quick daily routine: wipe desks, sanitize high-touch surfaces, empty trash, and sweep or vacuum entryways. For weekly tasks, target computer screens, keyboard gaps, shelves, and glass surfaces. Monthly tasks can include blinds, windows, and door frames. Use a per-room plan so each area gets attention without overwhelming your team. Establish who is responsible for each area, and set reminders in your calendar so nothing gets missed. According to Cleaning Tips, a clearly defined schedule helps homeowners and renters keep an office space consistently healthier and more comfortable to work in.
Surface-by-Surface Cleaning Guide
Different surfaces require specific care. Desks and wood laminates respond to a gentle, non-abrasive cleaner and a microfiber cloth to avoid scratches. Glass surfaces benefit from a streak-free cleaner and a lint-free cloth. Electronics should be cleaned with 70% isopropyl alcohol wipes or electronics-safe cleaners, never spray liquids directly onto devices. For keyboards and mice, use compressed air or a soft brush to remove debris before wiping with a dry microfiber cloth. High-touch hardware like door handles and switches should be disinfected with EPA-registered products. Regular dusting with a microfiber cloth prevents grime from spreading to other surfaces. By working from top to bottom, you minimize recontamination and keep work areas neat.
Deep Cleaning and Periodic Maintenance
Deep cleaning goes beyond the daily routine. Perform a more thorough scrub on a monthly basis, including window sills, blinds, and vent covers. Clean behind furniture and under desks to remove accumulated dust and debris. For shared spaces like conference rooms, sanitize tabletop surfaces after meetings, and wipe projector remotes and presentation equipment. Schedule seasonal checks on HVAC vents and air purifiers to maintain air quality. Periodic maintenance reduces the likelihood of buildup that can impair performance of devices and fixtures. When you incorporate these tasks into your calendar, you’ll maintain an office that remains productive and comfortable over time.
Tools, Materials, and Safety
Having the right tools makes cleaning faster and more effective. A clean office uses microfiber cloths, a versatile all-purpose cleaner, a disinfectant spray, glass cleaner for windows and mirrors, a soft brush, and a vacuum or broom and mop. Layer safety into your process: wear gloves, ventilate the area, and keep cleaners away from food and electronics. Test cleaners on a small area before applying to larger surfaces, especially on wood finishes or delicate screens. Proper storage and labeling of chemicals reduce the risk of mix-ups. When in doubt, favor non-abrasive products and water-based cleaners that are gentle on surfaces yet effective at removing grime.
Time-Saving Routines for Busy Offices
Batch cleaning tasks to minimize disruption. For example, assign one person to dust all surfaces first, another to disinfect high-touch areas, and a third to handle trash and restrooms if applicable. Use a “top-to-bottom” approach and complete tasks room by room to avoid backtracking. Create a quick daily 10-minute reset: wipe desks, sanitize devices, and tidy cables. For larger offices, create micro-checklists that fit into 15-minute blocks during breaks or after meetings. Regularly updating the plan keeps routines fresh and efficient. These habits reduce downtime and help teams stay focused on core work.
Green Cleaning Options and Safety
Eco-friendly cleaning reduces chemical exposure and supports a healthier office environment. Look for plant-based cleaners, refillable bottles, and microfiber cloths that minimize waste. Common eco-friendly ingredients like vinegar and baking soda can be used for general cleaning, but avoid using vinegar on stone surfaces or stone countertops. Always follow the product label and ensure appropriate ventilation when using cleaners. Choosing low-VOC products improves indoor air quality and aligns with sustainable office practices. Tracking your usage can also help identify cost-saving opportunities and reduce environmental impact.
Common Mistakes and How to Avoid Them
Avoid over-wetting electronics or allowing liquids to pool around electrical outlets. Don’t spray cleaners directly onto devices; apply to a cloth first. Skipping the top-to-bottom method can spread dust and grime. Neglecting high-touch areas leads to persistent germ hotspots. Finally, using harsh abrasives on finishes can dull surfaces over time. By anticipating these pitfalls, you can maintain a cleaner, safer office with less rework.
Tools & Materials
- Microfiber cloths (set)(Use lint-free, washable cloths for desks, screens, and glasses.)
- All-purpose cleaner(Choose a spray suitable for multi-surface use; avoid ammonia on glass.)
- Disinfectant spray or wipes(EPA-registered product for high-touch areas.)
- Glass cleaner(Streak-free formula for windows and glass partitions.)
- Vacuum cleaner or broom and dustpan(A vacuum with a HEPA filter helps capture fine dust.)
- Mop and bucket(Use a clean mop head and rung-out wringer.)
- Gloves(Protect hands from chemicals; use disposable or reusable gloves.)
- Trash bags and recycling bins(Commercial-size bags for easy replacement.)
- Keyboard and electronics-safe wipes(Use alcohol-based wipes or screen-safe cleaners.)
- Dusting tools (extendable duster)(Helpful for ceiling fans and high shelves.)
Steps
Estimated time: 60-90 minutes
- 1
Prepare the space
Open windows or turn on ventilation. Clear desks of papers, cups, and debris. Move fragile items away from edges and switch off electronics if needed before cleaning nearby. This step reduces interference and sets a safe baseline for cleaning.
Tip: Ventilate for 5–10 minutes before cleaning electronics to minimize fumes. - 2
Dust from top to bottom
Dust ceiling fixtures, light fixtures, shelves, and finally desks to prevent recontamination. Use a microfiber cloth and extendable duster for hard-to-reach areas. Work in small sections to stay organized.
Tip: Then wipe surfaces with a slightly damp cloth to trap remaining dust. - 3
Desks and work surfaces
Wipe with a microfiber cloth dampened with a non-abrasive cleaner. Use circular motions to lift grime and avoid streaks on wood finishes. Dry surfaces with a clean cloth to prevent moisture damage.
Tip: Test on a hidden area if unsure about wood finishes. - 4
Electronics safety
Use electronics-safe wipes on keyboards, screens, and mice. Wring wipes well to avoid dripping; never spray cleaners directly onto devices. Allow surfaces to dry completely before reinserting power if unplugged.
Tip: Keep wipes away from ports and vents to avoid moisture ingress. - 5
Disinfect high-touch areas
Target doorknobs, light switches, conference room tables, and shared equipment. Follow label directions for contact time to maximize effectiveness. Consider re-cleaning after meetings in high-traffic zones.
Tip: Rotate disinfectant brands to avoid residue buildup on surfaces. - 6
Glass and partitions
Clean glass surfaces with a streak-free cleaner and microfiber cloth. Use a squeegee for large panes and dry edges first to prevent water marks. Avoid cleaning polish that could leave a film on glass curved surfaces.
Tip: Work in a zigzag pattern to minimize streaks. - 7
Floor care
Vacuum carpeted areas or sweep hard floors, then mop with a suitable cleaner. Allow floors to dry completely before foot traffic resumes. Check for spots missed under desks and in corners.
Tip: Use a worn-out corner of a microfiber pad to reach tight gaps. - 8
Waste management
Empty trash and replace liners. Sort recyclables separately and place in designated bins. Wipe bin lids if they are visibly dirty.
Tip: Keep extra liners handy to speed up the process. - 9
Final inspection
Walk through the office to confirm no spots are missed. Check for streaks, lingering odors, and any wet areas. Note tasks for the next cleaning cycle and adjust the plan if needed.
Tip: Ask a colleague to provide a fresh pair of eyes on the space.
Questions & Answers
How often should an office be cleaned daily, weekly, and monthly?
Aim for a quick daily wipe-down of desks and high-touch surfaces, a weekly deep clean of electronics and glass, and a monthly maintenance sweep of blinds and vents.
Clean daily, then do a deeper weekly clean and a monthly maintenance sweep for best results.
What cleaners are safe for electronics and screens?
Use electronics-safe wipes or isopropyl alcohol (70%) on a microfiber cloth. Never spray liquids directly on devices.
Use electronics-safe damp wipes and avoid spraying liquids on devices.
Can I use natural cleaners like vinegar in an office?
Vinegar can be effective for many tasks, but avoid using it on stone surfaces or parts with a finish not compatible with acidic cleaners.
Yes for many tasks, but skip on sensitive surfaces like stone and some finishes.
How do I sanitize high-touch areas without harsh chemicals?
Use EPA-registered disinfectants as directed, and consider alternative products with lower chemical impact when possible.
Follow product directions and consider eco-friendly options when available.
What’s the best order to clean an office?
Top-to-bottom, left-to-right, dusting first then wiping, followed by disinfecting high-touch areas and finally floors.
Start high and move down to prevent recontamination.
How can I maintain a clean office between deep cleans?
Do a quick 5–10 minute reset daily: wipe desks, sanitize keyboards, and tidy cables.
A quick daily reset keeps grime from building up between deep cleans.
Watch Video
The Essentials
- Schedule regular cleanings to sustain productivity
- Prioritize high-touch areas for sanitation
- Use microfiber for efficient dust control
- Ventilate during cleaning to reduce fumes
- Finish with a quick spot-check to ensure nothing is missed