Squeaky Clean Car Wash: Step-by-Step Guide to a Showroom Shine
A thorough, practical guide to achieving a squeaky clean car wash using a two-bucket method, proper drying, and protective finishes for a showroom shine.

Goal: achieve a squeaky clean car wash that protects paint and finishes with a streak-free shine. You’ll need proper soap, a two-bucket wash method, clean microfiber cloths, a drying towel, and a rinse aid if available. Use gentle pressure, wash from top to bottom, and dry with a microfiber for best results.
Why a squeaky clean car wash matters
According to Cleaning Tips, delivering a squeaky clean car wash is not only about removing visible dirt; it also protects the clear coat, reduces micro-scratches, and helps maintain resale value. The Cleaning Tips team found that technique, product quality, and drying discipline are the biggest drivers of finish and longevity. When you prioritize a true squeaky clean car wash, you minimize swirling and water spots while maximizing gloss across the paint surface.
A true, well-executed wash removes embedded contaminants like road grime and tar that can etch into the clear coat over time. By using proper soap formulated for automotive finishes, a two-bucket method, and clean microfiber tools, you create a protective baseline that supports future waxing or sealing. The result is a finish you can see and feel, with water sheeting off rather than beading in dull spots.
In the long run, a consistent squeaky clean car wash routine reduces the need for aggressive polishing. That means fewer chances to remove clear coat or introduce micro-scratches during detailed work. This approach also helps with environmental considerations, as proper rinsing and targeted product use minimizes runoff.
For readers who want a practical, repeatable process, this guide centers on achievable steps you can perform at home without specialized equipment. The aim is to empower homeowners and renters to achieve showroom shine with safe, non-abrasive methods.
Key takeaway: start with a plan, use purpose-built car care products, and dry promptly to preserve finish and aesthetics.
Wash Method Foundations: Hand Wash vs. Auto Wash
A squeaky clean car wash is most reliably achieved with a careful hand wash in many scenarios. Hand washing provides tactile feedback, allows you to inspect for paint damage, and minimizes abrasive contact compared with some automatic systems. When you choose hand washing, you can tailor the wash to your car’s curves and panel gaps, ensuring that no area is neglected. If you must rely on an automated wash, opt for the brush-free, touchless models that reduce scratching risk, and pair it with a maintenance routine that complements the wash.
From the perspective of maintenance and longevity, a hand wash is generally preferred for achieving a truly squeaky clean car wash. It gives you direct control over water flow, soap dilution, and contact pressure, enabling you to minimize micro-marring and preserve surface clarity. The Cleaning Tips team emphasizes the importance of consistent technique over flashy gadgets when aiming for a “showroom shine.”
In terms of environmental impact, adopt water-conscious practices regardless of method. Using a spray rinse in a shaded area and catching runoff helps protect soil and waterways. A squeaky clean car wash is as much about responsible water use as it is about dirt removal.
Bottom line: Hand washing offers the greatest control for scratch-free, glossy finishes, while high-quality touchless systems can be a viable option when used within a broader, eco-conscious routine.
Tools & Materials
- pH-neutral car wash soap(Formulated for automotive paints; avoid household detergents.)
- microfiber wash mitt(Lint-free and gentle on paint; rinse frequently in the rinse bucket.)
- two clean buckets(One for wash, one for rinse; consider a grit guard in each bucket.)
- grit guards(Helps keep dirt at bottom of the wash water, not on the mitt.)
- microfiber drying towels(Large, plush towels for quick, scratch-free drying.)
- edge-less sponge or mitt for trim areas(Optional for difficult panels; use with caution.)
- hose with adjustable nozzle(Gentle, even spray; avoid high-pressure directly on seams.)
- wax or surface sealant (optional)(Use after drying to extend protection.)
Steps
Estimated time: 60-90 minutes
- 1
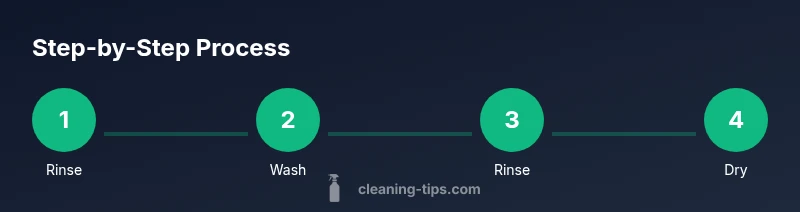
Rinse the vehicle from top to bottom
Begin with a thorough rinse to remove loose dirt and surface debris. Keep the nozzle at a low to medium flow and avoid spraying directly into crevices at high pressure. Rinsing from top down helps prevent dirty water from re-depositing on clean areas as you progress.
Tip: Work from the highest point down; this minimizes dirt transfer to finished areas. - 2
Set up a clean two-bucket wash system
Fill one bucket with car wash soap and clean water, and the second with clean water for rinsing the mitt. Use a grit guard and keep the rinse bucket accessible to prevent dragging dirt back to the wash water. Label the buckets to avoid cross-contamination.
Tip: Rinse the mitt in the rinse bucket frequently to minimize dirt carry-back. - 3
Wash panels from top to bottom with a gentle touch
Dip the mitt into the soap bucket, then glide across the panel using straight or figure-eight motions. Avoid scrubbing back and forth aggressively. Rinse the mitt often and keep the soap working on dirt, not on the paint surface.
Tip: Never scrub in circular, hard motions that can embed swirls. - 4
Rinse the vehicle again after each section
After washing a panel, rinse the mitt and the vehicle surface to remove loosened grime before moving to the next area. This reduces the chance of dirt being redeposited on freshly cleaned paint.
Tip: Rinse from top-to-bottom to prevent water streaks on finished areas. - 5
Dry the car with clean microfiber towels
Blot or drag-dry using large microfiber towels. Lift the water off the surface rather than spreading it around. Drying quickly minimizes water spots and helps preserve the gloss.
Tip: Dust-free towels and a dedicated drying area reduce the risk of cross-contamination. - 6
Apply optional wax or sealant for protection
With the car fully dry, apply a thin layer of wax or sealant as directed. This adds a protective layer that enhances shine and makes future washing easier by reducing surface adhesion.
Tip: Follow product directions and use small, circular motions for even coverage.
Questions & Answers
What makes a car wash 'squeaky clean' exactly?
A squeaky clean car wash removes dirt and contaminants without scratching the surface, leaving a glossy, protected finish. It emphasizes proper technique, suitable products, and careful drying.
A squeaky clean car wash means a scratch-free, glossy finish achieved with the right technique and products.
Is a two-bucket wash really better than a single bucket?
Yes. A two-bucket wash helps prevent dirt from returning to the wash water, reducing the chance of scratching the paint during cleaning.
Two buckets help keep dirt out of the wash water, which keeps your finish safer and shinier.
How long does a full wash usually take?
A typical hand wash with drying and optional protection can take about an hour, depending on the vehicle’s size and condition.
Usually about an hour, depending on the car and how thorough you are.
Can I skip drying the car after washing?
Drying promptly helps prevent water spots and mineral deposits from forming on the paint and glass.
Drying right away prevents water spots and preserves the shine.
Should I use wax or a sealant after washing?
Applying wax or sealant after washing adds a protective layer, enhances gloss, and makes future washes easier.
Wax or sealant gives extra protection and a showroom shine after washing.
Is washing in direct sun bad for the finish?
Washing in direct sun can cause water spots and uneven product application; try to work in shade or cooler times of day.
Avoid direct sun to prevent water spots and streaks.
Watch Video
The Essentials
- Wash top-to-bottom with a two-bucket system
- Dry promptly with clean microfiber to avoid water spots
- Finish with wax/sealant for lasting shine
- Use purpose-built car care products, not household cleaners
- Work in shade and rinse thoroughly to protect paint