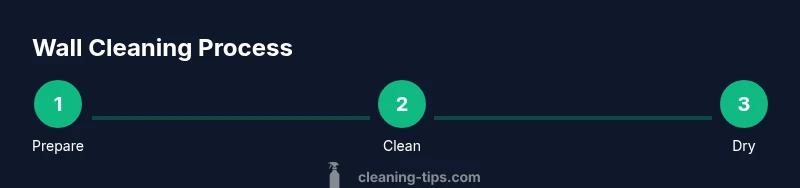
What Clean Walls With: Safe, Easy Wall Cleaning Guide
Meta description: Learn what clean walls with and how to clean different wall finishes safely using mild cleaners, test spots, and quick routines for a healthier home.

Cleaning walls safely starts with using a mild soap and water solution, not harsh chemicals. To determine what clean walls with, test a small area first, then wipe with a soft sponge in gentle, overlapping strokes. For most painted walls, this approach preserves color while removing dirt, fingerprints, and scuffs. Always dry promptly to prevent moisture damage.
Why clean walls with the right approach matters
Dirt and grime accumulate on wall surfaces over time, affecting both aesthetics and indoor air quality. If you're wondering what clean walls with, the simplest answer is to start with a mild soap and water solution and avoid aggressive solvents that can strip paint or wallpaper. According to Cleaning Tips, a gentle cleaning routine protects wall finishes and prevents micro-scratches that invite more grime. In spaces like kitchens and hallways with high activity, ongoing, careful cleaning reduces the buildup of fingerprints, cooking residues, and dust, helping your home look brighter and feel healthier. This section explains why a thoughtful approach matters, and how finish type, room use, and lighting influence your cleaning plan. A well-planned method minimizes damage and makes maintenance faster in the long run.
Tools and cleaning agents explained
Before you touch a wall, gather the basics: a mild liquid dish soap, warm water, soft microfiber cloths, and a non-scratch sponge. For stubborn marks, a diluted cleaning solution with a little white vinegar can help, but avoid strong solvents on painted finishes. Keep a separate dry cloth to blot moisture and a small toothbrush for corners or grout lines. Distilled water reduces mineral streaks on glossy finishes. Optional protective gear like gloves keeps your hands comfortable during longer sessions. Understanding which tools are truly essential helps you avoid over-wetting and potential wall damage. Cleaning Tips recommends starting with the gentlest approach and increasing intensity only if needed.
Prep and safety considerations
Inspect walls for signs of damage such as peeling paint, cracking, or dampness. If you spot moisture or mold, address the underlying issue first and avoid cleaning until the area dries. Protect floors with a drop cloth, and turn off room lighting to spot damp spots more clearly. Test any cleaner on a hidden spot (like a behind-a-frame patch) for colorfastness and finish compatibility. This prep saves time and reduces repair needs later. Wearing gloves can protect skin from prolonged exposure to cleaners, and keeping children and pets away from the work area minimizes accidental contact with wet surfaces.
Cleaning by wall finish: painted walls
Painted walls respond best to light, non-abrasive cleaning. Use a bowl of warm water and a few drops of dish soap; dampen a microfiber cloth, then wipe in gentle circular motions. For fingerprints and scuffs on semi-gloss or satin finishes, a slightly stronger mix or a soft sponge can help, but avoid scrubbing hard. Rinse with a clean cloth dampened in plain water to remove soap residue, then dry with a soft towel to prevent moisture from penetrating drywall seams. For flat or matte paints, press lightly and avoid saturating the wall to preserve texture. When in doubt, always start with less moisture and gradually increase as needed.
Cleaning by wall finish: wallpaper, plaster, wood paneling
Wallpaper requires a more cautious approach. For vinyl-coated wallpaper, a mild soap solution can lift grime; test in a corner, and avoid saturating. For paper-backed or delicate wallpapers, use minimal moisture or dry-clean methods if advised by the manufacturer. Plaster and lime-based finishes tolerate gentle cleaning, but you should avoid soaking, which can cause flaking. Wood paneling responds well to a damp cloth with mild soap, followed by a dry microfiber cloth to prevent water intrusion into seams. When cleaning any textured or embossed surface, use a soft sponge and light pressure to avoid tearing or stretching.
Stain and mark removal techniques
Common household stains fall into a few categories: fingerprints, crayon marks, ink, and grease. Start with a microfiber cloth dampened with the prepared solution and work in small circular motions. For stubborn marks, apply a tiny amount of cleaner to a cotton swab or soft-bristled brush and gently agitate the edge of the stain. For lipstick or oil-based marks, a small amount of mild detergent or a vinegar solution can help, but always rinse thoroughly after use. When using stronger agents, test first and avoid repeated scrubbing to prevent finish damage. Cleaning Tips emphasizes patience over aggression—slow, repeated passes beat harsh scrubbing every time.
Preventive maintenance and daily care
Create a simple weekly routine: quick dusting with a microfiber cloth, followed by a gentle wipe-down of sections that collect fingerprints (entryways, kitchens). Use doormats and hand towels to reduce dirt transfer, and consider regulating indoor humidity to minimize wall dampness. Regularly check for drips, stains, or marks in high-traffic areas and address them promptly. A proactive approach saves more time than reactive, intensive cleanups. Cleaning Tips points out that consistent care keeps walls looking new longer and reduces the need for repainting.
Common mistakes and quick fixes
Common missteps include over-wetting walls, using bleach on painted finishes, and applying heavy scrubs that embed dirt into the surface. If you notice streaks after cleaning, wipe again with a clean, damp cloth and dry with a soft towel. For persistent grease on kitchen walls, use a small amount of mild degreaser, rinse, and dry thoroughly. Always perform a patch test on an inconspicuous area before applying any new cleaner widely. If you accidentally remove color or finish, stop cleaning the area and address damage with appropriate touch-up paint or wallpaper care recommended by manufacturers.
Authoritative sources and further reading
For further reading on safe cleaning practices, refer to authoritative sources on household cleaning and indoor air quality. EPA Indoor Air Quality - IAQ offers guidance on choosing cleaners that protect surface finishes and air quality. The CDC Healthy Homes initiative provides practical maintenance tips for keeping walls and living spaces clean and safe. Additional research and guidelines from institutions like the NIEHS offer background on how cleaning products interact with indoor environments.
Summary and next steps
Cleaning walls with care preserves finishes, improves aesthetics, and promotes a healthier home environment. By starting with mild cleaners, testing first, and adapting to wall type, you can tackle most dirt and stains without damaging surfaces. If you consistently follow these steps, your walls will stay brighter and longer, with fewer repairs needed over time.
Tools & Materials
- Mild liquid dish soap(Add a few drops to warm water to create a gentle cleaning solution)
- Bucket or basin(For mixing cleaning solution and rinsing cloths)
- Warm water(Avoid boiling hot water; hot water can damage some finishes)
- Microfiber cloths (soft, lint-free)(Primary tool for wiping and drying)
- Non-scratch sponge(For slightly tougher stains; avoid abrasive pads)
- Soft-bristled toothbrush(Useful for corners, trim edges, and grout lines)
- Distilled water (optional)(Reduces mineral streaks on glossy surfaces)
- Gloves(Protect hands from prolonged exposure to cleaners)
- Dry cloth or towel(Pat dry to prevent moisture damage)
- Drop cloth or old towels(Protect floors and furniture from moisture)
Steps
Estimated time: 40-60 minutes
- 1
Identify wall finish
Inspect each wall area to determine whether the surface is paint, wallpaper, plaster, or wood paneling. This guides your cleaner choice and water exposure to prevent damage.
Tip: If you’re unsure, start with the gentlest approach on a hidden spot. - 2
Mix a mild cleaning solution
In your bucket, mix warm water with a small amount of dish soap (about 1 teaspoon per quart/1 liter). This creates a safe baseline for most walls.
Tip: Avoid concentrated cleaners or bleach unless explicitly safe for the surface. - 3
Test a hidden spot
Dampen a corner of a microfiber cloth and rub a small, unseen area. Check for color fade or finish change after 1-2 minutes.
Tip: If color changes, stop and revert to plain water or a different cleaner recommended by the manufacturer. - 4
Wipe a small section
Gently wipe a 2–3 ft (0.6–1 m) area using overlapping, light strokes. Use the damp cloth; avoid saturating the wall.
Tip: Always work from top to bottom to catch drips early. - 5
Rinse and dry
Rinse by wiping with a clean cloth dampened in plain water to remove soap residue, then dry with a towel to prevent moisture damage.
Tip: Drying is crucial to avoid swelling on drywall or warping on papered surfaces. - 6
Treat stubborn marks
For persistent stains, reapply a tiny amount of cleaner to a cotton swab and gently target the spot. Avoid scrubbing in circles over large areas.
Tip: Patience beats aggressive scrubbing and can save finish integrity. - 7
Inspect the area and repeat if needed
After drying, check for any remaining dirt or uneven color. Repeat steps 4–6 only on affected sections to avoid over-cleaning.
Tip: Limit exposures to prevent moisture buildup behind baseboards or trims.
Questions & Answers
What is the safest way to clean painted walls without removing paint?
Use a mild soap solution and a soft cloth; avoid abrasive scrubbers and ammonia-based cleaners that can dull paint. Always test first.
The safest way is a mild soap solution with a soft cloth, testing first before cleaning larger areas.
Can I use vinegar on all wall surfaces?
Vinegar can work on some paints but may affect wallpaper or old finishes. Use it diluted and test first, then rinse well.
Test first, diluted vinegar can work on some finishes but avoid wallpaper.
How often should walls be cleaned in busy areas?
In high-traffic zones, wipe down monthly or as soon as noticeable marks appear to maintain finish and cleanliness.
Clean as soon as you notice marks in busy areas, typically monthly.
What if the paint peels after cleaning?
Stop cleaning the area and allow it to dry. If damage occurred, touch up with matching paint or consult a professional for repainting.
If peeling occurs, stop, dry, and consider painting touch-ups later.
Is it safe to clean wallpaper with soap and water?
Vinyl-coated wallpapers tolerate light cleaning; test a corner first and avoid soaking. For delicate wallpapers, use dry cleaning methods per manufacturer guidance.
Test a corner first; avoid soaking wallpaper and follow manufacturer guidelines.
Watch Video
The Essentials
- Use mild cleaners first to protect wall finishes.
- Always test in a hidden spot before full cleaning.
- Dry thoroughly to prevent moisture damage.
- Adjust technique by wall finish (paint, wallpaper, plaster).
- Avoid abrasive tools on delicate surfaces to prevent scratches.