How to Clean a Kitchen Sink Drain: A Practical Guide
Learn how to clean a kitchen sink drain safely using baking soda, vinegar, and hot water. Prevent clogs and odors with a practical, non-toxic routine suitable for busy kitchens.

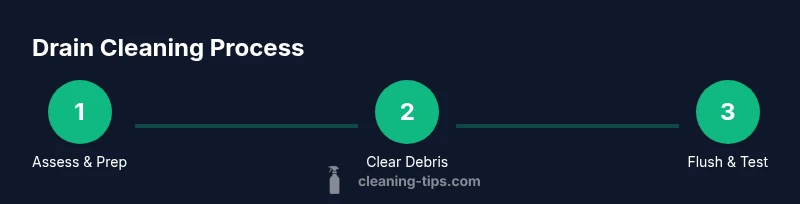
By following this guide, you will clean a kitchen sink drain quickly and safely using common household tools. You'll learn to remove odors, clear minor clogs, and prevent future buildup with steps that minimize chemical use. Required basics include baking soda, white vinegar, hot water, a plunger, and a tray to catch spills.
Why a clean kitchen sink drain matters
A clean kitchen sink drain matters because odors, slow draining, and clogs can disrupt daily cooking and cleaning routines. Food particles, grease, soap scum, and hair accumulate in the drain and trap, creating a gritty buildup that harbors bacteria. Regular maintenance reduces these issues and helps keep your plumbing flowing smoothly. According to Cleaning Tips, homeowners who adopt a simple routine with natural cleaners experience fewer repeated clogs and less foul odor over time. The benefits go beyond odor control: a clean drain reduces the need for harsh chemicals, protects pipes from corrosion, and supports a healthier kitchen environment. In modern homes, the sink drain interacts with disposal units and P-traps made of metal or PVC, so choose methods that are compatible with your configuration. Start with non-chemical options and escalate to targeted tools if necessary. A little time spent on drain care adds up to a cleaner kitchen and fewer service visits in the long run.
Safe cleaning agents and when to avoid chemicals
For most households, natural cleaners are enough to maintain a clean kitchen sink drain. Baking soda and hot water act as a mild abrasive and helps loosen grime, while white vinegar provides deodorizing properties and helps break down organic buildup. Avoid mixing vinegar with bleach or ammonia, which can create harmful fumes. Enzymatic cleaners are another option for ongoing maintenance and are gentler on pipes. The Cleaning Tips team recommends starting with baking soda and vinegar first, then flushing with hot water. When dealing with stubborn odors or minor clogs, a small amount of salt or a citrus rind can add fresh scent and extra scrubbing power. If you choose chemical drain cleaners as a last resort, proceed with caution and follow the product label exactly, as these can damage pipes if misused or overapplied. Always ventilate the area and wear gloves.
Prep your sink and trap before cleaning
Clear the area under the sink and drain space. Place a bucket or dishpan to catch any water, and lay down old towels to protect the cabinet. Put on gloves and safety glasses if you have them. Remove dishes from the sink and unplug any garbage disposal if applicable. Inspect the trap (P-trap) under the sink for visible clogs or buildup. Having a flashlight handy helps you see inside the trap and pipe joints. This preparatory step reduces mess and prevents water damage while you work. If the arrangement includes a disposal, disconnect it only if you are comfortable with basic plumbing and ensure the circuit is off. Use a trash bag to collect any debris from the trap for easy disposal.
Prevention strategies to keep drains clear
Adopt a weekly routine that includes a quick flush with hot water, especially after cooking or washing greasy dishes. Scrape food scraps into the trash or compost rather than sending them down the drain. Use a sink screen or stopper to catch debris before it enters the drain. Regularly clean the P-trap by disassembling it (carefully) and rinsing out hair and residue. Don't pour oil or grease down the drain; it congeals and binds with other waste, creating stubborn clogs. If you have a small disposal, run cold water while grinding to help solids move through the pipe. In households with hard water, consider occasional descaling with white vinegar in a safe amount, ensuring you rinse thoroughly afterward. Small habits compound into a noticeably cleaner, faster-draining sink.
Troubleshooting common drain issues
If water drains slowly despite cleaning, there may be a clog farther down the line. Use a plunger to attempt a gentle seal and create a back-and-forth motion that dislodges the blockage. If this fails, a hand drain snake can reach deeper into the pipe to break up debris. Do not force tools; apply steady pressure and pull back to remove debris. After clearing, flush with hot water and a splash of vinegar to neutralize odors. Persistent backups after these steps could indicate a more serious issue, such as a damaged pipe or a vent problem; consider scheduling a professional inspection. If the problem recurs, track whether a specific garbage disposal load or food type tends to trigger clogs and adjust habits accordingly.
Quick maintenance routine you can implement weekly
Set a calendar reminder for a 10-minute drain care session weekly. Start with a hot water flush (2-3 minutes), then pour 1/2 cup baking soda followed by 1 cup vinegar; cover for 5-10 minutes, then flush again with hot water. Run your disposal (if present) with cold water for 10 seconds to clear the drain. Clean the area around the trap and dispose of debris; replace any worn screens. This tiny routine keeps smells down and reduces future clogs, saving time and money. If you notice persistent odors even after cleaning, it may indicate trap seal failure that needs resealing or replacement.
Bonus: extending the life of metal pipes under the sink
Metal pipes, even when corrosion-resistant, benefit from gentle, periodic maintenance. Avoid harsh chemical cleaners that can corrode metal and reduce the system's lifespan. Rely on mechanical means first, and reserve chemical treatments for rare cases. Keeping the area dry, wiping down after use, and inspecting joints for leaks helps you address issues early before they turn into bigger problems. A clean drainage environment supports better odor control and reduces the frequency of professional interventions.
Tools & Materials
- nitrile gloves(Protect hands from cleaners)
- bucket or dishpan(To catch water under the sink)
- plunger (cup-style)(For minor clogs)
- drain snake / auger(12-18 inch hand tool)
- old towels or rags(Protect cabinet floor and catch drips)
- baking soda(1/2 to 1 cup)
- white vinegar(1 cup)
- hot water(Boiled water or kettle-hot)
- enzyme-based drain cleaner (optional)(Gentle maintenance option)
- flashlight or phone light(Inspect inside pipes)
Steps
Estimated time: 20-40 minutes
- 1
Put on gloves and prep workspace
Don a pair of nitrile gloves and set up a bucket under the sink to catch spills. Wipe the area dry and arrange towels to protect the cabinet floor. This initial action reduces mess and keeps your hands clean while you work.
Tip: Keep a small tray nearby to hold your tools so you don’t lose track during the clean. - 2
Place a bucket and towels to catch water
Position the bucket directly under the P-trap outlet and lay towels around the base. This containment minimizes splashes when you disconnect the trap and during flushing steps.
Tip: Use a color-coded towel to quickly identify wet areas after disassembly. - 3
Remove the P-trap
Carefully loosen the slip nuts of the P-trap using pliers, then gently pull it out. Expect some water in the trap; empty it into the bucket and inspect for obvious blockages.
Tip: Take a photo of the trap’s orientation before removal to simplify reassembly. - 4
Clean the P-trap debris
Rinse the trap with warm water in the bucket, remove hair and gunk with a brush, and scrub the interior. Rinse again andlet dry before reattachment.
Tip: A small brush or old toothbrush works well for tight corners. - 5
Flush with hot water and baking soda
Pour 1/2 cup baking soda into the drain, followed by a kettle of hot water. Let it sit 5-10 minutes to loosen residues, then flush with more hot water.
Tip: If the drain feels resistant, pause and re-check for additional debris in the trap. - 6
Add vinegar and let it fizz, then rinse
Pour 1 cup white vinegar into the drain and allow it to fizz for several minutes. Rinse with hot water to wash away loosened material and neutralize odors.
Tip: Do not mix vinegar with bleach; never combine cleaners that produce dangerous fumes. - 7
Reassemble trap and test drainage
Reconnect the P-trap in the correct orientation, tighten nuts firmly (not overtight), and run water to confirm a steady flow with no leaks. If slow drainage persists, try a plunger or drain snake once more.
Tip: Wipe away any residual drips and check for leaks at the joints after a run of hot water.
Questions & Answers
What causes a slow kitchen sink drain?
Slow drainage is usually caused by a buildup of food particles, grease, and soap scum inside the drain or P-trap. Regular cleaning and the use of safe cleaners can prevent this buildup. If odors persist, inspect the trap for cracks and ensure seals are tight.
Slow drains are usually from grease and food buildup in the drain or trap. Regular cleaning helps prevent this, but check for leaks or damaged seals if odors persist.
Can I use boiling water to clean a kitchen drain?
Boiling water is effective for flushing loose debris, but avoid pouring boiling water down hot water pipes if you have PVC joints or a garbage disposal; extreme heat could damage the fittings over time. Use it in moderation and follow with a flush of clean water.
Boiling water can help flush loose debris, but be careful with PVC pipes and disposals.
Is the P-trap necessary?
Yes. The P-trap prevents sewer gases from entering the kitchen and captures debris, making clog removal easier. Regular inspection helps catch leaks and corrosion early.
The P-trap is essential for blocking sewer gases and catching debris.
What if the clog persists after baking soda and vinegar?
If the clog remains, try mechanical methods like a drain snake or plunger. Avoid forcing tools; work gradually to avoid damaging pipes. If symptoms persist, professional assistance may be needed.
If cleaning doesn't fix it, use a drain snake or plunger, and consider a professional check.
When should I call a plumber?
Call a plumber if you notice persistent backups, persistent leaks, or trapped gas smells after attempting safe maintenance. A professional can assess pipe damage or vent problems.
Call a plumber if backups or leaks persist after DIY cleaning.
Can enzymatic cleaners help in the long term?
Enzymatic cleaners can aid ongoing maintenance by digesting organic matter, but they aren’t a quick fix for a blocked drain. Use them as a preventive measure after a thorough cleaning.
enzymatic cleaners help with ongoing maintenance but aren’t a quick fix for a clog.
Should I remove the disposal before cleaning?
Only remove a disposal if you are confident with basic plumbing and the power is off. In many cases, you can complete maintenance without removing the unit by focusing on the trap and drain itself.
You can usually clean the drain without removing the disposal, but switch off power first if you do.
Watch Video
The Essentials
- Use safe cleaners first to protect pipes
- Disassemble the trap to remove debris
- Hot water + baking soda is a solid first step
- Do not mix cleaners that can emit fumes
- Create a simple weekly drain maintenance routine