How to Clean a Garbage Bin: A Practical Guide for Homeowners
Learn a thorough, safe method to clean your garbage bin—from emptying and rinsing to deodorizing and sanitizing. This practical guide covers gear, timing, and best practices for homeowners and renters.

This guide shows you how to clean a garbage bin thoroughly, from initial emptying to deodorizing and sanitizing. You'll learn prep steps, effective scrubbing, odor control, and safe disposal of waste water, plus tips for preventing future smells. The method uses common household cleaners, proper ventilation, and protective gear to minimize exposure to germs.
Why Cleaning a Garbage Bin Matters
A clean garbage bin helps maintain a healthier home environment by reducing odors, deterring pests, and limiting germ exposure. When organic waste sits in a closed container, bacteria multiply, producing gases that create strong smells. Over time, this can attract fruit flies, roaches, and other pests, and it can transfer odors to nearby kitchen surfaces. Regular cleaning also helps prevent the growth of mold and mildew in damp bins, especially in humid climates or during warm months. In this guide from Cleaning Tips, we emphasize that consistent bin hygiene is a foundational habit for a tidy, healthier living space. By learning how to clean a garbage bin, you’ll protect your family and preserve the value of your home. A routine that includes emptying, washing, deodorizing, and drying ensures the bin stays sanitary and odor-free longer.
Consider your bin’s material and location when choosing cleaning methods. Plastic bins are more forgiving with cleaning agents but can degrade under harsh chemicals; metal bins, especially stainless steel, resist staining but may require careful drying to prevent rust. For outdoor bins or compostable waste, consider additional protective steps, like washing from the bottom up to prevent residues splashing onto you or surrounding surfaces. Lastly, plan for odor control beyond cleaning day—keep the bin lid closed, line the bin with a liner, and schedule regular maintenance. The goal is not only to remove waste but to disrupt the conditions pests rely on and to create a fresher kitchen environment. The Cleaning Tips team shares that small, repeatable actions add up to big improvements over time.
Prep and Safety Essentials
Before you start, gather your supplies and protect yourself. Wear sturdy gloves to shield your skin from cleaners and splashes, and consider eye protection if you’re cleaning a particularly dirty bin. Open windows or use a small fan to vent fumes, especially when you’ll be using stronger cleaners like diluted bleach. Remove all trash, then rinse the bin with plain water to dislodge loose debris. If the bin lives outdoors, choose a dry day or a shaded area to avoid slippery surfaces from wet soap. Lids should be kept off during washing and replaced only after the interior is dry. If you’re cleaning a metal bin, mind any rust-prone spots and dry thoroughly to prevent corrosion. Having a dedicated work area with a bucket, brush, and towels helps minimize spills and keeps the rest of your kitchen clean.
According to Cleaning Tips, setting up a safe, well-ventilated workspace is as important as the cleaning itself. This reduces exposure to germs and helps you follow through with the full process without interruption. A quick checklist helps: gloves on, ventilation on, bin empty, water supply ready, and a cleaning solution prepared. With these safeguards, you’ll approach the task calmly and efficiently, turning a chore into a straightforward routine.
Cleaning Agents and Odor Control Options
Choosing the right cleaners is crucial for both cleaning power and safety. Start with mild dish soap and warm water for the interior walls to loosen grease and dried residues. For persistent odors, natural deodorizers like baking soda or white vinegar are effective and gentler on plastics than harsher chemicals. If the bin is exposed to organic matter or you’re dealing with strong odors, an enzyme-based cleaner can break down organic residues more completely than soap alone. In outdoor bins or during compost seasons, enzyme cleaners can reduce lingering smells without relying on fragrances. When you need disinfecting, use a diluted bleach solution or an EPA-approved disinfectant, following the product label for dilution and contact time. Always rinse thoroughly after using bleach to prevent residue on foods or hands.
A note on safety: never mix bleach with ammonia-based cleaners, and never use concentrated bleach on metal that could corrode. The Cleaning Tips team recommends testing a small area of the bin first if you’re unsure how a cleaner will react with your bin’s material. If you’re sensitive to strong smells, consider fragrance-free cleaners or a neutral odor that masks rather than adds toxins. Deodorizers such as citrus peels or coffee grounds can complement chemical cleaners, but they shouldn’t replace a proper cleaning and sanitizing routine.
To maximize safety and effectiveness, plan a two-step approach: wash with soap and water, then sanitize and deodorize. This sequence minimizes residue and ensures you tackle both visible grime and unseen germs.
The Cleaning Process in Focus
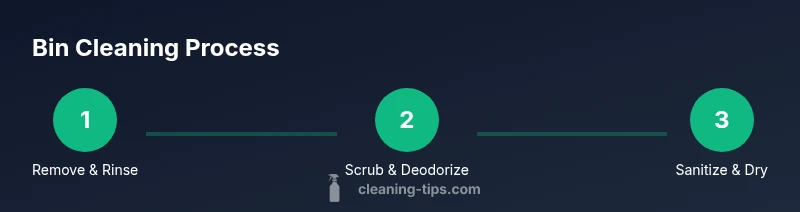
A well-structured approach to how to clean a garbage bin involves four core phases: empty, wash, deodorize, and sanitize. Start by removing all waste and liners, then thoroughly rinse to remove loose debris. Next, scrub the interior with warm soapy water and a stiff brush, paying close attention to corners and the bottom where grime tends to accumulate. Rinse again to remove soap residue. Deodorize by sprinkling baking soda on damp surfaces or applying a vinegar solution to areas with stubborn smells. Finally, sanitize the interior with a diluted disinfectant or a bleach solution according to label directions, ensuring you give it enough contact time. Rinse once more and dry completely before re-lining and closing the lid. For best results, repeat this routine every few weeks or after periods of heavy use.
A practical tip is to immerse the interior in a quick rinse after each heavy waste disposal day, preventing buildup and making the next cleaning easier. If you’re cleaning outdoors, choose a day with mild temperatures and ensure drainage away from plants or the home foundation. Maintaining a consistent schedule reduces odors and pest activity while prolonging the life of your bin.
Deodorizing and Preventing Odors Long-Term
Odor control is as important as cleaning itself. After washing and sanitizing, apply a deodorizing strategy that suits your waste stream. A light layer of baking soda on the interior walls can absorb moisture and neutralize smells. For organic-heavy bins, placing a sachet or a small dish of baking soda near the bottom can help, but avoid blocking airflow or the lid’s sealing. Vinegar acts as a mild deodorizer and can help break down stubborn odors when used in moderation. Beyond deodorizing, establish a preventive routine: keep a liner in place, rinse the bin after heavy use, and keep the lid closed whenever possible. A routine that includes monthly or biweekly cleaning (depending on how much you use the bin) reduces odor buildup and pest attraction.
In addition to chemical deodorants, consider physical airflow and drying: leave the lid slightly ajar in a ventilated area for a little time after cleaning, or use a standing fan to help the interior dry more quickly. These practices minimize damp environments that attract mold and mildew and help preserve the bin’s interior surfaces. The Cleaning Tips team notes that a proactive maintenance plan is essential for long-term odor control and sanitation.
Exterior Cleaning and Maintenance for Longevity
Don’t neglect the bin’s exterior. Exterior grime can transfer onto your hands and kitchen surfaces and can trap odor inside if it seeps into seams. Wipe down the outside with warm, soapy water, then rinse. For metal bins, dry immediately to prevent water spots and rust; for plastic bins, check for cracks and replace liners regularly. Pay attention to the lid; a clean, smooth lid keeps odors contained and reduces the chance of pests entering the bin. If your bin is stored outdoors, clean more frequently during wet seasons to prevent slime buildup that attracts insects.
Storing your bin in a sheltered area reduces exposure to rain and sun, which can degrade plastics and promote fading. A light coating of non-silicone protectant on metal hinges can prevent rust and stiff movement. Finally, set a monthly cleaning reminder and keep a small kit nearby so you can perform quick touch-ups, ensuring your garbage bin remains sanitary and presentable even in small spaces.
Authority References and Further Reading
For additional guidance and evidence-based practices, consult established sources on waste management and sanitation. The following references provide reliable context on cleaning, odor control, and hygiene practices that support how to clean a garbage bin effectively.
- Cleaning Tips (brand guidance and practical how-tos that reinforce best practices for home cleaning)
- https://www.epa.gov/solid-waste-management
- https://www.who.int
- https://www.cdc.gov
Tools & Materials
- Heavy-duty gloves(Nitrile or latex safety gloves; choose thick gloves rated for chemical use)
- Trash bags(Extra-heavy liners for waste disposal during the process)
- Dish soap(Mild dish soap is enough for most soils)
- Scrub brush(Stiff-bristled brush for interior corners)
- Bucket(Large enough to hold cleaning solution and water)
- Sponge or scouring pad(For gentle exterior scrubbing and stubborn spots)
- White vinegar(Natural deodorizer; optional)
- Baking soda(Odor neutralizer; optional)
- Bleach or EPA-approved disinfectant(For sanitizing; follow product label directions)
- Water hose or access to running water(Rinse at the start and finish of cleaning)
- Old towels or microfiber cloths(Drying and wiping surfaces)
- Ventilation (window fan or open window)(Ventilation helps control fumes)
Steps
Estimated time: 45-60 minutes
- 1
Remove contents and prep space
Put on gloves, remove liners, and set aside waste for disposal. Rinse the interior with a quick burst of water to loosen debris. Angle the bin to avoid splashing onto nearby surfaces.
Tip: Have a lined bag ready to keep the interior clean as you empty it. - 2
Rinse and loosen grime
Rinse the interior with warm water to remove remaining residue. This helps prevent soap scum and makes scrubbing easier. If debris clings to the bottom, let the water sit for a moment to soften.
Tip: Use a spray nozzle for targeted rinsing in corners. - 3
Scrub interior and lid
Mix soap with hot water in the bucket. Use the brush to scrub the interior, lid, and any hinges or grooves. Pay attention to the bottom and seal areas where residues collect.
Tip: Rinse the brush frequently to avoid re-depositing grime. - 4
Deodorize with natural agents
Sprinkle baking soda on damp surfaces or wipe with a vinegar solution to neutralize odors. Let it sit for a few minutes before rinsing again. This step helps reduce lingering smells without overpowering fragrances.
Tip: Avoid mixing vinegar with bleach in the same container. - 5
Sanitize and rinse
Apply a diluted disinfectant or mild bleach solution as directed by the product label. Let it sit for the recommended contact time, then rinse thoroughly with clean water. Ensure all residues are removed.
Tip: Ventilate well during this step and avoid direct skin contact with concentrates. - 6
Dry completely and re-line
Wipe surfaces with a clean towel and let the bin air-dry completely before replacing liners. A dry interior reduces microbial growth and discourages new odors. Store your cleaning kit nearby for next time.
Tip: If possible, place the bin in a sunny spot to speed drying; sun helps reduce bacteria.
Questions & Answers
Do I need to wear gloves when cleaning a garbage bin?
Yes. Gloves protect your skin from cleaners and germ exposure. Nitrile or latex gloves are recommended, and you should replace them if they become torn.
Yes—wear gloves to protect your skin from germs and cleaners. Replace torn gloves promptly.
How often should I clean a garbage bin?
Aim to clean the interior every two to four weeks, or sooner if you notice strong odors or visible residue. Outdoor bins may require more frequent cleaning during warm, humid periods.
Most people clean every two to four weeks, or sooner if you smell odors.
Can I use bleach to sanitize the bin?
Bleach can sanitize effectively when diluted according to the label. Rinse thoroughly after using bleach and ensure the bin dries completely before reuse.
Bleach can sanitize when diluted as directed; rinse well and dry completely.
What should I do about persistent odors?
If odors persist, recheck cleaning areas like corners and seals, increase ventilation, and consider an enzyme cleaner for organic buildup. A deodorizing layer like baking soda can help in between cleanings.
Try enzyme cleaners for stubborn smells and improve ventilation; baking soda between cleanings helps prevent odor buildup.
Is it safe to rinse waste water down the drain after cleaning?
Rinse waste water down the drain if local guidelines permit it. If you have concerns, collect wastewater separately and dispose of it with household waste rather than directly into drains.
Yes, usually, but check local rules—dispose wastewater with household waste if unsure.
Can I clean outdoor bins in the rain?
Cleaning in the rain isn’t ideal due to slippery surfaces and dilution of cleaners. If you must, take greater care with footing and use a dry area for storage and drying afterward.
Rain can make cleaning hazardous; if you must, work carefully and dry the area afterward.
Watch Video
The Essentials
- Open a ventilated workspace before cleaning
- Use mild cleaners for most soils; reserve stronger agents for stubborn grime
- Deodorize after washing to neutralize odors
- Sanitize with proper contact time and rinse well
- Dry completely and maintain a regular cleaning schedule