Can You Dry Clean at Home? A Practical Guide
Learn whether you can dry clean at home, which fabrics are suited for DIY methods, how to use home dry-cleaning kits safely, and when to call a professional. Practical steps, tips, and safety advice for homeowners and renters.

Dry cleaning at home is possible for many fabrics using consumer kits and proper spotting, but it’s not a one-size-fits-all solution. You can handle certain garments safely by following care labels, testing solvents on inconspicuous areas, and using manufacturer-approved kits. For delicate fabrics or labeled ‘dry clean only,’ professional services remain the safest option.
What does it mean to dry clean at home?
Dry cleaning at home refers to using consumer-grade kits or safe spot-cleaning methods to refresh fabrics without submerging them in water. It can be practical for many garments, but it’s not a universal solution for every fabric or stain. According to Cleaning Tips, you can achieve respectable results on a broad range of pieces by following care labels, testing solvents on hidden areas, and using products designed for home use. The key is knowing when DIY methods are appropriate and when to entrust items to a professional. Familiarize yourself with garment labels and the safety data on cleaning solvents, and always prioritize fabric integrity over speed. If you’re unsure, consider professional cleaning to avoid shrinking, color bleeding, or setting stains.
Fabrics that typically respond well to at-home methods
Most synthetic fibers (polyester, nylon, acrylic) and many cotton blends tolerate at-home cleaning methods reasonably well. You’ll often find success with fabrics labeled as suitable for ‘dry cleaning with solvents’ or those without delicate finishes. For wool blends and some rayons, results vary; always test on an inconspicuous area and follow the kit’s instructions. Remember, the goal is to refresh the garment without risking distortion, distortion, or fiber damage. If a label says ‘dry clean only,’ treat it as a warning flag and lean toward professional care to preserve shape and color.
How DIY dry-cleaning kits work in practice
Home dry-cleaning kits simulate the gentle, solvent-based cleaning process by using a contained cartridge, absorbent cloths, and a controlled heat cycle. The process generally involves applying a stain treatment, running the garment through the kit’s cycle, and then using a vented or air-dry finish. These kits are designed for at-home use and are most effective for light soil, minor odors, and fabrics that tolerate light chemical exposure. The key is to follow the manufacturer’s directions precisely and avoid overloading the kit with multiple items, which can hinder results and cause tangling or creasing.
Spot treatment and pre-cleaning techniques
Before running a kit, address obvious stains with a gentle pre-treatment pen or liquid, applied to the stained area only. Blot gently rather than rubbing to avoid embedding stain particles deeper into the fabric. Let the treatment sit for the recommended time, then blot with a clean cloth. For oily stains, sprinkle a small amount of cornstarch or baking soda to absorb grease before brushing it off. Testing on a hidden seam is essential to ensure the solvent won’t affect color or finish.
Reading care labels and choosing the right approach
Always start by reading the garment’s care label. If the label says ‘dry clean only,’ consider professional services unless you’re dealing with a small, removable stain on a fabric that’s known to tolerate DIY methods. If the label allows machine washing or hand washing, you may safely launder using appropriate settings. When attempting any DIY method, keep a record of what you did and the results so you can adjust future attempts or seek professional help if needed.
Safety and ventilation considerations
Work in a well-ventilated area and avoid exposing yourself to chemical fumes. Use gloves if you have sensitive skin and keep solvents away from heat sources or open flames. Store any unused kit components safely and out of reach of children or pets. If you experience headaches, dizziness, or skin irritation, discontinue use and move to a safer cleaning method or seek professional cleaning services.
Common mistakes that ruin clothes
Rushing the process, using too much solvent, or applying heat too closely can cause fabrics to shrink, warp, or fade. Overlapping heavy garments in a single kit cycle may prevent even cleaning. Do not attempt to re-clean a stained area with a new solvent cycle immediately; instead, reassess the stain and adjust your approach or consult a professional. Always cool down garments before handling to avoid heat damage.
Alternatives to at-home dry cleaning for delicate fabrics
Some fabrics benefit more from hand washing, spot cleaning, or professional wet cleaning, depending on their fiber content and finish. For silk, satin, or wool with special finishes, professional cleaning often preserves texture and sheen better than home methods. When in doubt, seek a professional opinion to protect garment longevity.
How to dry and store garments after cleaning
After a successful at-home clean, air-dry garments on a padded hanger or a flat surface to prevent misshaping. Avoid direct sunlight to prevent color fading. Once fully dry, press as needed with a clean pressing cloth and a low heat setting. Store clothes in a cool, dry closet away from moisture and pests to maintain freshness and structural integrity.
When to call a professional
If you’re dealing with delicate fabrics, complex stains, heavy soils, or items labeled ‘dry clean only,’ professional cleaning is the safest route. A dry cleaner can assess fabric tolerance, choose the right solvent, and ensure the garment maintains its color, texture, and fit. For high-value or sentimental pieces, professional care often yields the best long-term results.
Tools & Materials
- Home dry-cleaning kit(Includes solvent cartridge, absorbent cloths, and a cycle for at-home use)
- Stain treatment pen or liquid(Test on a hidden area before applying to stains)
- White cotton towels(For blotting and protecting surfaces)
- Soft-bristle garment brush(Useful for removing surface dust before treatment)
- Ventilated drying rack or area(Helps garments dry evenly without heat buildup)
- Gloves and a protective mask(Wear if you are sensitive to solvents or prefer extra protection)
- Pressing cloth and iron with adjustable heat(Use after drying if wrinkles remain (low heat on delicate fabrics))
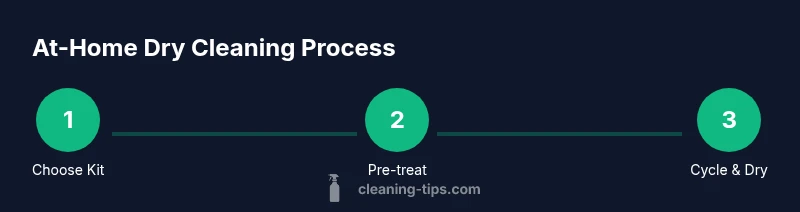
Steps
Estimated time: Total time: 60-90 minutes
- 1
Check garments and label
Inspect each item for care labels and notes about dry cleaning. Identify fabrics that are safe for DIY methods and flag any labeled as 'dry clean only' for caution. This initial assessment prevents damage from inappropriate solvents or cycles.
Tip: Take photos of labels for quick reference during the process. - 2
Gather kit and materials
Place the dry-cleaning kit, stain treatment, towels, and ventilation area within easy reach. Prepare a dedicated workspace to avoid cross-contamination with regular laundry.
Tip: Lay a protective sheet or old towel under the workspace to catch any drips. - 3
Pre-treat stains
Apply a small amount of stain treatment to the affected area following the kit instructions. Blot gently with a clean cloth; avoid rubbing, which can push stains deeper.
Tip: Always test the treatment on a hidden seam before applying to visible areas. - 4
Run the kit cycle
Place the garment in the kit’s drying chamber and run the cycle as directed. Do not overload the chamber; ensure clothing can move freely to maximize cleaning efficiency.
Tip: Keep scents and residues away from skin by using gloves. - 5
Check results and re-treat if needed
Remove the garment, inspect for remaining stains or odors. If necessary, repeat a gentle cycle on a small section or switch to a different method compatible with the fabric.
Tip: Never repeat aggressive cycles on delicate fabrics. - 6
Dry and press
Air-dry the garment completely on a hanger or flat surface. If needed, use a pressing cloth and low heat to revive a smooth finish, taking care not to scorch the fabric.
Tip: Test pressing on an inconspicuous area first to avoid shine or distortion.
Questions & Answers
Can you dry clean at home for all fabrics?
No. While many fabrics tolerate at-home dry cleaning, some materials—especially delicate silks, wools with finishes, and items labeled 'dry clean only'—are not suitable for DIY methods. Always follow the care label and consider professional cleaning for high-risk garments.
Not all fabrics can be safely dry cleaned at home. Check the care label and why certain fabrics require professional cleaning.
What signs indicate I should avoid at-home dry cleaning?
If a garment has intricate finishes, metallic threads, or oil-based stains that require specialized solvents, avoid at-home methods. Color bleed, fabric distortion, and texture changes are red flags indicating professional cleaning is needed.
Look for fancy finishes or stubborn stains; these usually need a professional cleaner.
How do I know if a label says 'dry clean only'?
Care labels typically list symbols or the words 'dry clean only.' If you’re unsure, consult the manufacturer’s guidelines or seek professional advice. When in doubt, treat conservatively and opt for professional cleaning.
Look for 'dry clean only' on the label or consult the brand’s guidelines.
Are home dry-cleaning kits safe for wool and silk?
Wool and silk can be sensitive to solvents. Some kits may work for lightly soiled items, but heavy soils or delicate finishes should be handled by a professional cleaner to preserve texture and sheen.
Wool and silk need careful handling; many times a professional cleaner is best.
How long does a DIY dry-clean cycle take?
DIY cycles are typically quick, often under an hour, but total time includes prep, stain treatment, and drying. Plan for 60-90 minutes plus any additional touch-up time if needed.
Most cycles take under an hour, but you should budget about an hour to a bit more for prep and dry time.
What should I do if a garment doesn’t look right after a DIY clean?
If results are poor, stop and consider professional cleaning. Document the garment’s care details and the steps you took to help the cleaner choose an appropriate approach.
If it looks off, skip DIY and ask a professional for help.
Watch Video
The Essentials
- Know fabric labels before attempting DIY dry cleaning.
- Test solvents on hidden areas to prevent color loss.
- Use the kit exactly as directed for best results.
- Delicate or 'dry clean only' items should go to professionals.
- Always air-dry fully to avoid heat damage and shrinkage.