How to Dry Clean: A Practical Home Guide for Laundry
Learn how to dry clean clothes safely, whether you choose a professional service or an at-home kit. This guide covers fabric suitability, pre-cleaning steps, label interpretation, and step-by-step methods to prevent color bleed, shrinkage, and damage.

Learn how to dry clean clothes safely, whether you choose a professional service or an at-home kit. This guide covers fabric suitability, pre-cleaning steps, and how to follow kit instructions. You’ll discover practical, step-by-step techniques to prevent color bleed, shrinkage, and damage, plus safety tips for handling solvents. This article from Cleaning Tips translates professional methods into home-friendly steps.
What is dry cleaning and when to choose it
Dry cleaning uses a solvent-based process to remove soils from fabrics without submerging the garment in water. It’s particularly effective for delicate fibers, structured garments, and fabrics that retain shape when not washed in water. According to Cleaning Tips, dry cleaning can protect silk, wool, and certain synthetics from shrinking or losing texture, but it isn’t necessary for every item. Read garment care labels to determine if dry cleaning is recommended, and consider the garment’s value, colorfastness, and construction. If you’re unsure, testing a small, inconspicuous area can help you decide whether to proceed with home methods or seek professional cleaning.
Items suitable for dry cleaning
Not all fabrics require or tolerate dry cleaning. Common items that benefit include silk blouses, wool suits, cashmere sweaters, and items with complex linings or structured shapes. Coloured fabrics may experience dye transfer if washed, so dry cleaning can preserve vibrancy. Extreme stains or heavy soils might need professional attention. The Cleaning Tips team suggests always checking the care label and performing a spot test when attempting DIY options to avoid color bleed or fiber damage.
At-home vs professional: pros and cons
Professional dry cleaning offers consistent results, specialized equipment, and solvent management that minimizes risk for high-value garments. At-home kits provide convenience and control, allowing quick cleanups without a trip to the cleaners. The trade-offs include potential color fading, fabric shrinkage, or residue if instructions aren’t followed closely. Cleaning Tips analysis notes that careful pre-treatment and adherence to kit directions can bridge the gap, especially for low-risk fabrics.
Reading garment labels and fabric care
Care labels are your primary guide. Look for symbols indicating dry clean only or specific solvent types (e.g., perchloroethylene or hydrocarbon solvents). If the label is missing, note the fabric content and construction. For example, delicate silks and wools are often best left to professionals, while sturdy synthetics may tolerate at-home methods when handled gently. Always test a hidden seam or hem before applying any solvent or treatment to the entire garment.
Pre-treating stains before dry cleaning
Address stains promptly but gently. Blot excess soil with a clean cloth, then apply a small amount of an appropriate stain remover to the affected area. Avoid rubbing, which can set stains or damage fibers. After pre-treatment, work from the outside of the stain toward the center to prevent spreading. In some cases, a solvent-free stain remover is preferable to traditional solvents, especially on color-sensitive fabrics. Cleaning Tips emphasizes labeling test spots to ensure no adverse color change occurs.
Safety and ventilation considerations
Always work in a well-ventilated area. Solvent vapors can irritate skin, eyes, and lungs, so wear gloves if you’re handling cleaners, and keep away from flames or heat sources. Store any cleaning agents securely out of reach of children and pets. Never mix different cleaning products, and follow the manufacturer’s instructions precisely to minimize risk. If you have respiratory sensitivities, consider professional cleaning as a safer alternative.
How to extend results after dry cleaning
Air garments on a hanger in a ventilated space before storing to eliminate any lingering solvent odors. Brush and restyle fabric fibers as needed, and avoid overloading closets with tight packing, which can cause wrinkling. Consider garment bags for transport and storage to protect against dust and light exposure. For frequent dry cleaning needs, plan a regular schedule to maintain fabric integrity without excessive exposure to solvents.
What to expect from a professional dry cleaning visit
A professional cleaner typically inspects garments for charges, stains, and fabric compatibility. Expect a pre-inspection, spot treatment, and a finishing step that may press or steam to restore shape. If any stains persist, ask about additional treatment options and turnaround times. Always request a receipt and note any tag or label changes for future reference. Cleaning Tips reminds readers that professional care can extend the life of valuable garments when done properly.
Authority learning: integrating best practices
Learning to dry clean responsibly means balancing professional and DIY approaches. Consider item value, frequency of wear, and the fabric type before choosing a method. The Cleaning Tips team recommends starting with a professional assessment for high-end garments and using at-home kits for light, everyday items that have clear labels and low risk of color bleed. Personal diligence—like spot testing and following instructions—remains essential for success.
Tools & Materials
- At-home dry cleaning kit(Includes stain remover, dry-cleaning solvent or solvent-free alternative, and finishing cloths)
- Stain remover pen or stick(For pre-treating spots on the garment surface)
- Absorbent cloths or towels(To blot soils and absorb any solvent during the process)
- Old towels or protective coverings(Protect surfaces from solvent damage and residues)
- Ventilated workspace(Work in a well-ventilated area; avoid open flames and heat sources)
- Gloves(Skin protection when handling cleaners)
Steps
Estimated time: 60-120 minutes
- 1
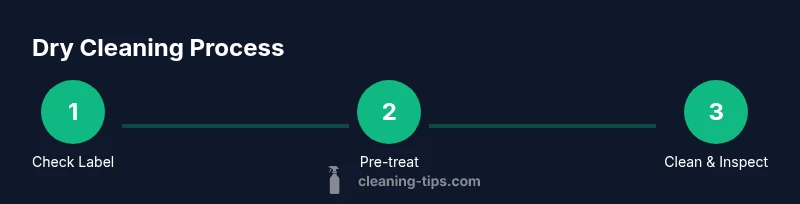
Check care labels and prepare materials
Read the garment’s care label to determine if dry cleaning is recommended and note any warnings. Gather your kit and protective supplies before you begin to avoid interruptions.
Tip: Always start with a label check; it guides your approach and minimizes risk. - 2
Pre-treat stains
Apply a small amount of stain remover to the affected area, then blot—don’t rub—to prevent spreading. Let it sit briefly if the product directs, but don’t oversaturate the fabric.
Tip: Test on an inconspicuous area first to ensure colorfastness. - 3
Test solvent on a hidden area
Dampen a clean cloth with the kit solvent and dab a hidden seam to ensure no color bleed or damage. If color transfers, discontinue and seek professional cleaning.
Tip: A colorfast test protects the entire garment from harm. - 4
Package for the kit
Place the garment in the kit pouch or dry-cleaning bag as directed by your product; seal properly to prevent moisture loss and ensure even treatment.
Tip: Avoid overstuffing the bag; air flow aids the cleaning process. - 5
Run the kit’s processing steps
Follow the kit’s instructions for the cleaning cycle, including any drying or steaming steps. Do not exceed recommended times; check progress at intervals.
Tip: Adhere to timing to prevent fiber damage or residue. - 6
Air and inspect
Remove the garment, allow it to air in a ventilated space, then inspect for remaining stains or odor. If needed, repeat or seek professional help.
Tip: Ventilation prevents solvent odor from setting into fabric. - 7
Store properly
Once dry, hang garments in a breathable bag or cloth cover in a cool, dry closet away from direct sunlight.
Tip: Proper storage maintains shape and color.
Questions & Answers
What fabrics are best for dry cleaning?
Dry cleaning is typically recommended for delicate fabrics like silk, wool, and certain synthetics, as well as structured garments that may shrink or distort with water-based washing.
Dry cleaning works best on delicate fabrics and structured items that could shrink or fade in water.
Can I dry clean at home, and is it safe?
Yes, using an appropriate at-home kit with clear instructions can be safe for many items. Always test a hidden area first and avoid fabrics labeled dry clean only if unsure.
Yes, you can, but test first and follow the kit’s directions.
What should I do if a stain remains after cleaning?
If a stain persists after the at-home process, consider professional cleaning or spot-testing more targeted methods recommended by the garment label.
If the stain won’t come out, it’s best to see a professional.
How often should I dry clean my wardrobe?
Frequency depends on use and fabric. High-maintenance items may need periodic cleaning, while casual pieces benefit from spot treatment and occasional professional care.
Clean according to wear and fabric needs; don’t overdo it.
Are there risks with dry cleaning solvents?
Solvents can irritate skin or lungs; always ventilate and use protective gear if needed. Seek professional cleaning for sensitive individuals.
Be cautious with solvents; ventilate and consider professionals for sensitive situations.
Should I freshen clothes after dry cleaning?
Allow garments to air out, gently brush fibers, and store in breathable covers to prevent odors from lingering.
Air out and brush after cleaning to keep fabrics looking fresh.
Watch Video
The Essentials
- Know when to dry clean based on fabric type and label
- Pre-treat stains and test colorfastness before cleaning
- Follow kit instructions precisely to avoid damage
- Air-dry and store garments properly to extend life