Dog Ear Cleaning: A Safe, Step-by-Step Home Guide
Learn to clean a dog's ears safely at home with vet-approved methods, essential tools, and a clear step-by-step routine. Spot warning signs early and protect your dog's hearing and comfort.

This quick guide shows you how to safely clean a dog's ears at home, what you need, and how to recognize warning signs that require a vet visit. You’ll learn when cleaning is appropriate, choosing vet-approved solutions, and a step-by-step routine that minimizes stress for both you and your dog.
Why Ear Care Matters for Dogs
Ear health is a cornerstone of overall well-being for dogs, and regular attention to their ears can prevent a lot of discomfort. If you search for guidance on dog ear cleaning, you’ll often see the emphasis on a gentle touch, consistent routines, and vet-approved products. Keeping the ears clean helps reduce the buildup of wax, dirt, and moisture that can irritate the delicate skin inside the ear canal. When you talk about "dog clean ears" in a home care context, the goal is not to scrub aggressively but to gently remove debris, dry the ear after baths or swimming, and monitor for changes over time. According to Cleaning Tips, establishing a calm routine and using the right tools makes at-home care safer and more effective for most dogs. A clean ear-cleaning practice also supports listening comfort and can minimize pruritus that leads to head shaking. For puppies and senior dogs, developing a predictable routine reduces stress and builds trust between you and your pet. Remember that ear anatomy varies by breed, so adapt pressure, duration, and frequency to your dog’s needs. If you notice persistent redness, swelling, foul odor, or discharge, stop cleaning and consult your veterinarian to rule out infection or mites.
In practice, you should schedule ear checks as part of your regular grooming or health routine. A quick weekly glance can catch problems early. If your dog tolerates the process, you may extend cleanings to every 2-4 weeks, depending on ear shape, hair length, and exposure to moisture. For dogs with long ears or those prone to moisture retention, more frequent checks help prevent accumulation that can irritate the skin. The takeaway is that dog ear cleaning is a proactive habit that protects hearing, reduces allergic reactions, and promotes comfort—without aggressive scrubbing or home remedies that could cause harm. Tracking changes over time gives you a better sense of what is normal and what isn’t, which is crucial for early intervention and veterinary care when needed.
noteKeyWordsToAvoidInBlock2000WordsExplicitlyNotAllowedDiscussionWithDogOwnersHintTagBreedsThisBlockContainsALongFormExplanationIncludingBrandMentionAndGeneralAdvice
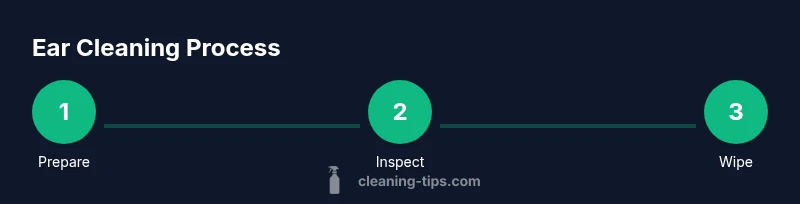
Tools & Materials
- Vet-approved ear cleaning solution(Alcohol-free, fragrance-free, pH-balanced; avoid peroxide and alcohol brands unless advised by your vet.)
- Cotton balls or gauze squares(For applying cleaner and wiping debris; avoid cotton swabs to prevent canal damage.)
- Towel or mat for workspace(Protect floors and keep dog comfortable during the cleaning.)
- Gloves (optional)(Can help with mess and personal hygiene during the process.)
- Treats or praise for positive reinforcement(Encourage calm behavior and make the experience positive.)
Steps
Estimated time: 15-25 minutes
- 1
Prepare your dog and workspace
Set up a calm, well-lit area. Have treats ready and use a soothing voice to relax your dog. Place a towel on the floor or table to catch any spills and protect surfaces. This initial setup reduces anxiety and makes the subsequent steps smoother.
Tip: Hold the dog securely but gently; a calm grip and slow movements prevent startled reactions. - 2
Inspect the ears before cleaning
Gently lift the ear flap to inspect the outer ear for redness, swelling, or discharge. Look for signs of wax buildup or debris, but do not probe deep into the canal. If you see bleeding, strong odor, or active infection signs, stop and seek veterinary advice.
Tip: If you’re unsure, err on the side of caution and consult your vet before proceeding. - 3
Apply ear cleaning solution correctly
Fill the ear canal with the recommended amount of solution while keeping the dog’s head steady. Massage the base of the ear for 20-30 seconds to loosen debris. Do not insert the nozzle deeper than the canal opening.
Tip: Keep the head upright during and after application to prevent solution from running into the ear canal. - 4
Wipe away debris from the outer ear
Use a moistened cotton ball or gauze to wipe away the softened debris at the opening of the ear. Repeat with a clean pad until the area looks clean. Do not push anything into the ear canal.
Tip: Use gentle, circular motions and avoid scrubbing or poking. - 5
Dry and recheck the ear
Gently pat the ear dry with a clean towel or gauze. Ensure there is no moisture left and that the ear feels warm but not hot. If the ear remains damp after several minutes, reschedule cleaning or consult your vet.
Tip: Moisture can promote infections, so thorough drying is essential. - 6
Reward, observe, and maintain routine
Offer a treat and praise to reinforce calm behavior. Monitor your dog for 24-48 hours for changes in head shaking, rubbing ears, or odor. Schedule next cleaning based on breed, ear type, and vet guidance.
Tip: Keep a simple log of each cleaning session to track changes over time.
Questions & Answers
Is it safe to clean my dog’s ears at home?
Yes, with the right tools and a vet-approved cleaner, you can safely perform routine cleanings at home. Always avoid deep probing and stop if you see signs of infection.
Yes, you can clean at home as long as you use a vet-approved cleaner and avoid inserting anything into the ear canal.
How often should I clean my dog’s ears?
Frequency depends on breed, ear structure, and activity level. Some dogs benefit from monthly cleanings, while others require more or less frequent care. Always follow your veterinarian’s guidance.
It depends on the dog; check with your vet for a personalized schedule.
What are signs of an ear infection I should watch for?
Redness, swelling, excessive discharge, foul odor, scratching, head shaking, or sensitivity around the ear are indicators to seek veterinary care.
Look for redness, swelling, discharge, or a bad smell—these mean seek a vet.
Can I clean my puppy’s ears using the same method?
For puppies, use extra gentle handling and shorter sessions. Puppies may need more frequent but shorter cleanings as they learn the routine.
Yes, but be extra gentle and keep sessions short for puppies.
What if cleaning triggers pain or bleeding?
Stop cleaning immediately and contact your veterinarian; pain or bleeding can indicate injury or infection needing professional care.
If there’s pain or bleeding, stop and see your vet.
Are cotton swabs ever safe to use in dog ears?
Cotton swabs should not be inserted into the ear canal as they can cause injury. Use gauze or cotton balls only for cleaning the outer ear.
Do not use cotton swabs in the ear canal.
Watch Video
The Essentials
- Clean ears safely with vet-approved solutions.
- Never insert objects into the ear canal.
- Use treats and calm handling to reduce stress.
- Monitor for signs of infection after cleaning.
- Establish a regular check-in routine for early detection.