How to Clean Tarnished Silver
Discover safe, effective methods to restore shine to tarnished silver. From baking soda with aluminum foil to gentle polishes, learn how to care for jewelry, flatware, and heirlooms without causing damage.

Learn how to safely clean tarnished silver using gentle, proven methods. This quick guide covers household solutions, polishing tips, and when to avoid certain cleaners to protect delicate pieces. By following these steps, you can restore shine on jewelry, flatware, and heirlooms without damage. It emphasizes safety and minimal chemical exposure.
Why Tarnish Happens
Silver tarnish forms when sulfur compounds in the air react with the metal, creating a thin layer of silver sulfide on the surface. This patina can dull shine and obscure detail on jewelry, flatware, and heirloom pieces. The rate of tarnish depends on humidity, temperature, cosmetics, and exposure to household cleaners. According to Cleaning Tips, the best approach starts with the mildest method and avoids harsh, abrasive cleaners that could scratch or wear away plating or finish. Regular maintenance reduces buildup and keeps designs looking their best. In this section, we’ll explore the chemistry behind tarnish and set expectations for results. Remember: tarnish is cosmetic at first; with careful care, you can restore original luster without compromising metal integrity.
Safe Cleaning Methods for Tarnished Silver
There are several approaches that balance effectiveness with safety. The simplest is a gentle wash with warm water and a drop of mild dish soap, followed by careful drying with a soft cloth. For lightly tarnished pieces, this method often restores shine without risk. The next option uses a chemical reaction in a lined container: place aluminum foil at the bottom, add hot water, a tablespoon of baking soda, and immerse the item. This electrochemical process transfers tarnish from the silver to the foil, leaving a bright surface. Finally, for items with intricate details or delicate motifs, a professional-grade silver polish applied with a soft cloth can be effective. Cleaning Tips emphasizes testing any method on a hidden area first and stopping if you notice discoloration or scratches. Lint-free cloths, microfiber, and non-abrasive brushes help protect delicate finishes during the process.
What Not to Use on Silver
Avoid abrasive pastes, including toothpaste, or scouring pads that can scratch the surface. Harsh acidic agents like undiluted lemon juice or vinegar should be used only with caution and never on plated or brushed finishes. Do not soak items with gemstones or porous enamel for long periods, and never use heated chemicals. Some silver items have thin plating; aggressive cleaners can wear through the layer and reveal base metal. If you’re unsure about a piece, consult a jeweler or refer to Cleaning Tips for guidance. Finally, never heat silver in a microwave while wearing metal objects inside; this can cause damage to both the piece and the appliance.
Hard-Wearing vs. Delicate Silvers: Choosing Your Method
Not all silver is created equal. Heirloom pieces with etched details, jewelry with delicate gemstones, or items with antique plating require gentler approaches. Start with the mildest option—warm water and a drop of dish soap—before moving to safer chemical reactions or dedicated polishes. For solid sterling silver, the aluminum foil method can be effective but may not suit every design or finish. When in doubt, test a tiny corner first and pace your cleaning to avoid rubbing away patina that contributes to character. Cleaning Tips recommends documenting what method worked best for each piece to streamline future maintenance.
Baking Soda and Aluminum Foil: Step-by-Step Method
The classic household method uses a simple chemical reaction to lift tarnish. Line a non-reactive container with aluminum foil (shiny side up), fill with hot water, add a few tablespoons of baking soda, and place the silver item inside. Let it sit briefly, then rinse with lukewarm water and dry with a soft cloth. This method is effective for common tarnish on many items but can affect finishes on delicate pieces. Always start with a test patch on an inconspicuous area and remove the piece promptly if you notice any discoloration. After cleaning, polish with a soft microfiber cloth to restore shine.
Silver Polish: Quick, Gentle Shine
For items with intricate designs or stubborn tarnish, a small amount of silver polish applied with a clean, soft cloth can be very effective. Work in circular motions and avoid applying polish to gemstones or painted details. Rinse or wipe away all residue, then dry thoroughly. Polishing not only boosts shine but can also help smooth tiny scratches that collect tarnish over time. When using polish, follow the product instructions and test on a hidden area first to ensure compatibility with your piece’s finish.
Caring for Different Silver Items
Jewelry often contains set stones or lacquered finishes; wait to clean until you confirm compatibility with your chosen method. Flatware may tolerate a more vigorous polish or the foil method if there are etched patterns. Antique or heirloom pieces deserve extra care—avoid aggressive scrubbing that can erase engravings or wear away plating. For items with delicate engravings, consider a micro-abrasive-free cloth and a gentle cleaner designed for jewelry. Regardless of the item, always dry completely to prevent water spots and corrosion over time.
Maintenance Tips to Prevent Tarnish
Prevention is easier than removal. Store silver in a cool, dry place, ideally in anti-tarnish cloth or bags with a silica gel desiccant. Keep items away from sulfur-containing cosmetics and acids from foods. Regular light cleaning—every few months—prevents heavy buildup. If you don’t use silver often, consider placing a small piece of chalk or activated charcoal in storage to absorb moisture and pollutants. With proper storage and mindful cleaning, tarnish becomes a rare visitor rather than a persistent problem.
Common Mistakes and Quick Fixes
Common missteps include soaking antique items with gemstones for too long, using toothpaste, or scrubbing with abrasive pads. If a piece looks dull after cleaning, re-check the finish and avoid repeating cleaning cycles too quickly; some patina adds character. When tarnish persists on a heavily lacquered or genuine heirloom, a professional conservator can assess whether a gentler approach or restoration is needed. Quick fixes include re-wiping with a clean microfiber and re-rinsing to remove any residue that may dull the shine.
Tools & Materials
- Soft microfiber cloth(Lint-free for polishing; use on finished surfaces)
- Mild dish soap(Small amount in warm water for initial clean)
- Warm water(Not hot to avoid thermal shock)
- Baking soda(Common pantry item for foil method)
- Aluminum foil(Line cleaning container with shiny side up)
- Non-reactive container(Glass or ceramic; avoid metal containers)
- Silver polish (optional)(Choose a mild, non-abrasive formula)
- Gloves (optional)(Wear to protect hands from cleaners)
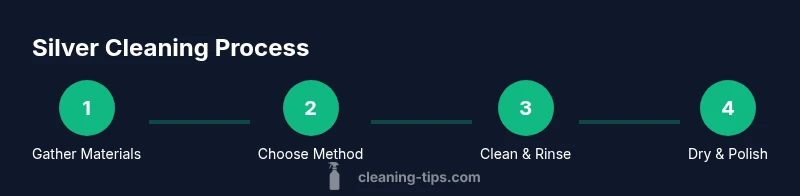
Steps
Estimated time: 30-60 minutes
- 1
Gather your materials
Collect the items listed in Tools & Materials so you won’t need to pause mid-cleaning. This prevents mistakes and ensures a smoother workflow. Check that any jewelry with stones is fully detached from surfaces that could be damaged by liquids.
Tip: Having everything ready reduces the temptation to rush through the process. - 2
Choose your cleaning method
Decide whether to use the aluminum foil bath, a gentle soap wash, or a dedicated silver polish based on tarnish level and piece type. Start with the mildest method to minimize risk to delicate finishes.
Tip: Begin with soap and water for light tarnish before moving to chemical methods. - 3
Prepare cleaning solution (foil method)
Line a non-reactive bowl with aluminum foil, shiny side up. Fill with hot water and add baking soda as directed. Submerge the item and observe the reaction; avoid overlong exposure.
Tip: If you see discoloration on the foil, rinse and stop cleaning. - 4
Apply or immerse
For the foil method, fully submerge the piece and watch for fizzing as tarnish transfers. For polish, apply a pea-sized amount to a cloth and gently rub in circular motions.
Tip: Never scrub aggressively on etched or engraved areas. - 5
Rinse thoroughly
Rinse under lukewarm water to remove all residues. Pat dry with a clean cloth to prevent water spots. Avoid hot water which can affect finishes.
Tip: Keep the piece moving under the water to avoid streaks. - 6
Dry and buff
Dry completely with a soft cloth, then buff to restore shine. For jewelry, hold the item at a slight angle to inspect for remaining dull areas.
Tip: Drying completely prevents future corrosion. - 7
Inspect and repeat if needed
Check for remaining tarnish. If necessary, repeat the appropriate method once or twice, but avoid over-cleaning which can wear plating.
Tip: Limit repetitions to preserve original patina and texture. - 8
Store properly
Place cleaned items in anti-tarnish storage or wrapped in a soft cloth within a dry, low-humidity environment. This reduces future tarnish and keeps items ready for next use.
Tip: Include a desiccant in storage for extra protection.
Questions & Answers
Is toothpaste safe to use on tarnished silver?
Toothpaste is abrasive and can scratch silver; it’s generally not recommended for tarnish removal. Use milder methods first, especially on delicate items.
Toothpaste can scratch silver. Use milder methods first and save toothpaste as a last resort.
Is lemon juice or vinegar safe for silver?
Acidic lemon juice and vinegar can damage certain finishes or plated surfaces. If you use acids, dilute and test on a hidden area, and avoid prolonged exposure.
Acidic cleaners can harm silver finishes; test on a hidden spot and use caution.
Will the aluminum foil method work on all silver items?
The foil method works for many plain silver items but may not suit pieces with gemstones, delicate enamel, or heavy patina. Test first and consider a professional approach for fragile pieces.
The foil method works for many items, but test first and be careful with fragile pieces.
How often should I clean silver to prevent tarnish?
Light, regular cleaning prevents heavy tarnish buildup. Avoid over-cleaning which can wear thin finishes or plating.
Clean lightly and regularly to prevent heavy tarnish.
Can I clean silver-plated items the same way as solid silver?
Plated items can wear more quickly; use gentler cleaners and shorter exposure times. If in doubt, test or consult a professional.
Plated items need gentler care; test or consult a professional if unsure.
What storage habits reduce tarnish long-term?
Store in anti-tarnish bags or cloths in a dry environment with low humidity. Avoid sulfur-containing cosmetics nearby and consider small desiccants.
Keep silver in anti-tarnish storage in a dry place with low humidity.
Watch Video
The Essentials
- Test a small area first before full cleaning
- Start with the mildest method that works
- Rinse thoroughly and dry completely after cleaning
- Store silver in anti-tarnish environments to prevent tarnish