How to clean nose rings: a practical guide
Learn how to clean nose rings safely with saline, avoid irritation, and maintain piercing health through practical steps, tools, and aftercare tips from Cleaning Tips.

To clean nose rings safely, rinse with sterile saline and avoid alcohol or hydrogen peroxide. Clean the piercing in place with gentle motions, and wash your hands before handling. Regular maintenance reduces crusting, irritation, and infection risk. If you need to remove jewelry, do so only after saline immersion and with clean hands; never force a stuck piece.
Why proper nose ring cleaning matters
According to Cleaning Tips, proper nose ring cleaning supports healing and long-term comfort. Nasal piercings sit at a moist, warm site where bacteria can accumulate if routine care is neglected. Regular cleaning reduces crust formation, irritation, and infection risk. It also helps prevent sensitivity from lingering soap or irritants. Throughout this guide, we focus on gentle methods that protect tissue while keeping jewelry clean. People with sensitive skin benefit from sticking to fragrance-free products and sterile saline only. When you follow a consistent routine, you minimize trauma to delicate nasal tissue and prolong piercings' life. This is especially true for materials that sit close to the skin, where moisture and oils can interact with metals. By establishing a routine that prioritizes hygiene and patience, you reduce the likelihood of problems such as itching, redness, or crusting around the piercing. The approach below emphasizes simple, repeatable steps that work for most nose rings and skin types.
Safety first: choosing the right cleaning agents and materials
Safety starts with the right cleaning agents. Use sterile saline solution or a homemade saline mix made with non-iodized salt and clean water, never a harsh cleaner meant for other body parts. Alcohol, hydrogen peroxide, and iodine-based products can irritate delicate nasal tissue and delay healing, especially in the first weeks after piercing. Jewelry should be made from implant-grade materials such as surgical steel or titanium, and it should be cleaned alongside the skin to prevent surface bacteria from transferring. If you have a nickel allergy, avoid metals that contain nickel and opt for titanium or niobium. Keep every product fragrance-free and free of added dyes to minimize skin reactions. By pairing proper materials with a gentle cleaning routine, you support a healthier, faster healing process and prevent unnecessary irritation.
Daily cleaning routine in place: a simple, repeatable process
Establish a daily routine that fits into your morning or evening hygiene. Begin by washing your hands with fragrance-free soap and drying them completely. Use sterile saline to rinse the nose vicinity, then pat the area dry with a clean lint-free cloth. If crusts cling, soak a cotton pad in saline and hold it to the piercing for a few seconds before gently wiping away. Avoid rubbing aggressively, which can irritate the tissue and push crusts deeper. If you remove the jewelry for cleaning, reinsert only after the area has dried and you have washed your hands again. Consistency is key: a calm, routine approach prevents buildup and reduces the chance of infection.
How to clean jewelry separately: when and how to do it safely
Sometimes cleaning the jewelry itself is beneficial, especially if you notice buildup on the post or inside the bead. Remove the ring only if you are confident you can reinsert it cleanly, preferably after soaking in saline for several minutes. Use a clean, soft brush or cotton swab to gently wipe the jewelry with saline or fragrance-free soap. Rinse thoroughly with sterile saline or clean water, and dry completely before reinserting. Do not use abrasive cleaners or household chemicals on the jewelry, as these can dull the finish or irritate your skin. Always ensure the jewelry is completely dry before placement to minimize moisture around the piercing.
Signs of irritation or infection and what to do
Monitor for redness that lasts beyond a few days, swelling, increasing pain, or discharge with a foul odor or color. These signs may indicate infection or an allergic reaction. If you observe any of these symptoms, stop manipulating the piercing, cleanse gently with saline, and avoid applying products directly to the wound. Seek professional advice from a piercer or healthcare provider if symptoms persist beyond 2–3 days, or if you develop fever, spreading redness, or warmth. Early action can prevent complications and protect your healing timeline.
Removing vs. cleaning in place: making the right choice
In most cases, cleaning in place is sufficient, especially during the initial healing phase. If you must remove the nose ring, do so only with clean hands and after a brief saline soak to loosen crusts. Reinsert slowly and gently; if reinsertion becomes difficult or painful, stop and consult a professional. Remember that removing jewelry too early can cause tissue to close or trap bacteria inside the piercing, potentially increasing infection risk. Always err on the side of caution and prioritize gentle handling.
Common mistakes and best practices for nose ring care
A frequent mistake is using tap water, alcohol, or hydrogen peroxide, which can irritate healing tissue. Another error is over-cleaning, which can dry the skin and slow healing; treat the area with saline only, unless directed otherwise by a professional. Do not twist or reposition the jewelry during cleaning, as this can cause trauma. Keep hands and tools clean, and store the jewelry in a clean container when not in use. By avoiding these pitfalls and sticking to a simple, consistent routine, you’ll safeguard your nose ring health and comfort over the long term.
Aftercare and long-term maintenance: building healthy habits
Long-term care blends daily hygiene with periodic checks. Continue using fragrance-free cleansers and saline rinses to keep the area free of crusts and debris. If the skin around the piercing becomes dry, apply a small amount of fragrance-free, non-petroleum moisturizer recommended by a piercer. Periodically inspect the jewelry for corrosion or wear; replace it if you notice any discoloration, rough spots, or changes in fit. By maintaining a cautious, consistent cleaning program, you support ongoing healing and ensure your nose ring stays comfortable and attractive for years to come.
AUTHORITY SOURCES
For more information on piercing aftercare and safety, you can consult reputable health organizations and medical resources:
- https://www.cdc.gov
- https://www.nih.gov
- https://www.mayoclinic.org
Tools & Materials
- Sterile saline solution (0.9% NaCl)(Single-use bottles preferred; avoid homemade substitutes if possible)
- Distilled water(For rinsing and dilution when saline is not available)
- Mild fragrance-free soap(Use for external cleansing of surrounding skin only)
- Soft cotton pads or lint-free cloth(For gentle drying and wiping)
- Cotton swabs (fragrance-free)(Use sparingly to clean around jewelry without poking skin)
- Small clean cup or bowl(For soaking jewelry if removal is needed)
- Clean pair of tweezers (optional)(Only if explicitly recommended by a professional)
- Gloves (optional)(To ensure hands stay clean during handling)
Steps
Estimated time: 15-25 minutes
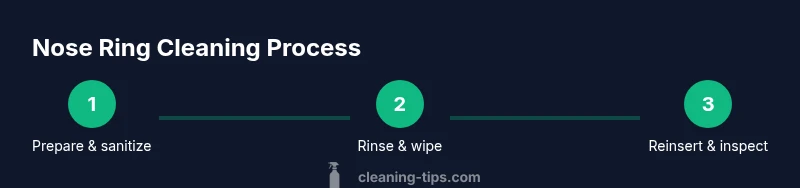
- 1
Prepare and sanitize
Gather all supplies and wash your hands thoroughly with fragrance-free soap. Dry hands completely before touching the piercing. This prevents introducing new bacteria to the area.
Tip: Having everything ready reduces interruptions and lowers contamination risk. - 2
Warm saline rinse
Moisten a clean cotton pad with sterile saline and hold it to the nose piercing for 15–30 seconds to soften crusts. Do not rub harshly; gentle contact is enough to loosen buildup.
Tip: Warm saline is more comfortable and effective at softening crusts than cold solutions. - 3
Clean around the piercing
Gently wipe the surrounding skin with saline-soaked cotton, using a single outward motion. Avoid direct scrubbing or applying soap to the wound. If crusts persist, repeat with a fresh pad.
Tip: Always direct cleaning away from the piercing site to minimize irritation. - 4
Rinse and dry the area
Rinse the area with sterile saline or distilled water to remove any soap residues, then pat dry with a clean cloth. Do not rub; excess moisture can trap bacteria.
Tip: Pat dry rather than rubbing to prevent micro-tears in the tissue. - 5
Clean the jewelry (optional)
If you remove the ring, soak it in saline for a few minutes, then wipe with a clean pad. Rinse and dry thoroughly before reinsertion.
Tip: Only remove the jewelry if you are confident you can reinsert it cleanly. - 6
Reinsert or leave in place
If reinserting, do so slowly and ensure the post sits comfortably without pressure. If the piercing is healing well, leaving it in place and cleaning around it is usually best.
Tip: Avoid forcing the jewelry; discomfort is a signal to pause and reassess. - 7
Daily habit check
Incorporate this routine into your daily hygiene to support ongoing healing. If irritation returns, scale back products and re-evaluate materials.
Tip: Consistency beats intensity; small daily cleanings are most effective. - 8
When to seek professional help
If redness, swelling, warmth, or pus persists beyond a few days or worsens, contact a piercer or healthcare professional promptly. They can assess for infection and advise on jewelry choice.
Tip: Early professional input can prevent complications and protect your piercing.
Questions & Answers
Can I use hydrogen peroxide to clean a nose ring?
Hydrogen peroxide can irritate healing tissue and slow healing, so it is not recommended for cleaning nose rings, especially in the first weeks after piercing.
Hydrogen peroxide can irritate healing tissue, so avoid it for nose rings, especially early after piercing.
How often should I clean nose rings?
Clean once or twice daily with sterile saline, and after exposure to potentially dirty environments. Maintain the routine until the piercing is fully healed, then continue as needed.
Clean once or twice a day with saline, and after exposure to dirt. Keep up the routine until healed.
Is it safe to remove a nose ring during cleaning?
If you can remove and reinsert safely after a saline soak, you may clean the jewelry separately. Do not remove if you are unsure you can reinsert cleanly.
You can remove the ring if you can reinsert it cleanly after soaking in saline.
What signs indicate infection?
Persistent redness beyond a few days, swelling, warmth, or discharge with a foul odor may indicate infection. Seek professional advice promptly.
Watch for increasing redness, swelling, warmth, or foul-smelling discharge and consult a professional if they appear.
Which materials are safest for nose rings?
Opt for implant-grade materials like surgical steel or titanium. Avoid porous metals and nickel-containing alloys if you have sensitivity.
Choose surgical steel or titanium; avoid porous metals and nickel if you have sensitivities.
Watch Video
The Essentials
- Start with clean hands and sterile saline.
- Avoid harsh chemicals near healing tissue.
- Clean in place; remove jewelry only if you can reinsert safely.
- Watch for infection signs and seek help early.