What Clean Rust Off: Safe, Effective Rust Removal Guide
Learn safe, effective techniques to remove rust from metal surfaces. This comprehensive guide covers mechanical, natural, and chemical methods, safety tips, and maintenance to prevent future rust. Includes step-by-step instructions and practical product guidance.

If you’re asking what clean rust off, this guide shows a safe, effective step-by-step approach to removing rust from metal surfaces. You’ll learn when to use natural acids, household cleaners, and rust converters, plus safety tips and how to protect treated items from future corrosion. This quick answer sets up the deeper techniques you’ll find in the body, including product suggestions, DIY methods, and how to avoid common mistakes.
What clean rust off means and when to treat
Rust is more than a cosmetic stain; it’s a chemical change in metal that can compromise strength over time. In plain terms, the question "what clean rust off" can be answered with a plan: identify the type and extent of corrosion, choose a removal method, and finish with a protective coating to slow future oxidation. According to Cleaning Tips, successful rust remediation starts with a clear assessment: surface rust (a thin film) versus deeper pitting, and whether you’re dealing with iron, steel, or stainless steel. This initial evaluation guides whether you reach for abrasives, natural acids, or specialized products. For homeowners and renters, recognizing the limits of DIY methods is part of smart maintenance; severe rust that has penetrated through the metal may require replacement or professional treatment. The goal here is safe, practical guidance you can apply to tools, hardware, cookware, or outdoor fixtures without risking damage to adjacent coatings or finishes.
Rust removal approaches: mechanical, chemical, and protective finishes
There are three broad paths to clean rust off metal surfaces: mechanical removal, chemical processes, and protective finishing. Mechanical approaches include brushing, scraping, and sanding to physically remove rust and restore a smoother surface. Chemical methods use rust removers or converters that dissolve or stabilize rust, often requiring shorter work time but careful handling. Protective finishes—such as primers, paints, or clear sealants—are applied after rust is removed to prevent future oxidation. The choice depends on the metal type, the severity of corrosion, the intended use of the item, and whether you must preserve underlying coatings. For instance, a rusted stainless-steel kitchen tool may tolerate light mechanical cleaning and a sealer, while an iron fence with heavy corrosion might benefit from a chemical rust remover followed by rust-inhibiting primer. Cleaning Tips emphasizes testing on a small area first and layering protection to extend life. This section also covers how to determine if surface rust is simply cosmetic or a precursor to deeper damage.
Natural methods: vinegar, lemon, and baking soda
Natural methods use common household items to remove rust without harsh chemicals. White vinegar or lemon juice contains acetic or citric acid that can loosen rust when applied with contact time. Baking soda creates a mildly abrasive paste that helps scrub rust without scratching delicate finishes. To try these, apply the acid or paste, let it sit for 15–60 minutes depending on severity, then scrub with a non-metallic brush and rinse dry. Always test a hidden area first to ensure there’s no adverse reaction with the metal’s finish. For cookware or tools with protective coatings, gentle treatment preserves the coating while removing surface rust. It’s important to document any color change or pitting after treatment, as natural methods may not halt deeper corrosion in all cases. Cleaning Tips notes that natural methods are excellent first-line options for light rust and for items that cannot withstand aggressive chemicals.
Chemical rust removers: when to use and safety
Chemical rust removers are formulated to dissolve iron oxide quickly. They’re most effective on heavy rust or bulkier items where mechanical cleaning would be labor-intensive. Follow label directions precisely, use gloves, eye protection, and work in a well-ventilated area. Some products require you to saturate the rusted area, wait for a specified dwell time, and then scrub with a brush before rinsing. After using any chemical remover, thoroughly rinse and dry the surface to neutralize residues. For porous metals or items with paint or plating, test the product on a small area first to prevent discoloration or stripping. If you’re treating items that are in contact with food or water, choose food-safe or food-contact-approved products and ensure all residues are removed. Cleaning Tips recommends keeping a strict log of dwell times and re-test rust after treatment to confirm effectiveness.
Rust converters and rust-inhibiting primers
Rust converters transform iron oxide into a stable compound that seals the rust and provides a primer layer for paint. They’re particularly useful when you want to stop ongoing rust without removing all rust first. After applying a converter, you can paint or seal the surface to prevent re-oxidation. If you’re working on outdoor metal or structural components, converters offer a practical balance between effort and protection. However, they do not restore original strength, and areas with deep pitting may still require replacement. When used properly, rust converters reduce ongoing corrosion and improve adhesion for topcoat finishes. Cleaning Tips emphasizes following product instructions and allowing complete curing times before exposure to moisture.
Tools, safety, and prep steps
Before you start, gather safety gear (gloves, eye protection), keep the work area ventilated, and prepare a clean workspace. If you’ll be sanding or grinding, wear a dust mask to avoid inhaling rust particles. Clean the surface with soap and water to remove grease, oil, and dirt, then dry thoroughly. For metal parts mounted or in hard-to-reach areas, consider probing crevices with a flexible brush. Tape off nearby surfaces to protect paint or finishes, and place a tray to catch debris. Degreasing with isopropyl alcohol or a mild degreaser helps ensure the rust removal product adheres properly. After cleanup, wipe once more and allow the surface to dry completely before applying any primer or sealant.
Step-by-step workflow for a typical rust job
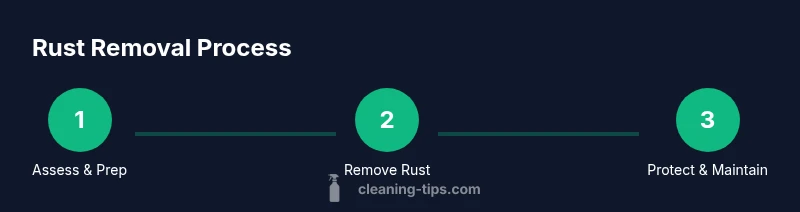
A typical rust removal job follows a logical sequence: inspect, prep, remove, rinse, dry, treat (if using converter or primer), seal, and maintain. The sequence minimizes recontamination and ensures a neat result. Start by inspecting the area for structural weakness and documenting areas that require extra attention. Then, prep the workspace and gather tools. Proceed with the chosen method—mechanical, chemical, or natural—follow by thorough rinsing and complete drying. If using a rust converter or primer, apply as directed and allow full curing time before applying the topcoat. Finally, establish a maintenance routine to prevent future rust, such as regular cleaning and periodic re-application of protective coatings. Cleaning Tips’s recommended approach is to tailor the steps to each item and expected use.
Common mistakes and how to avoid them
Common mistakes include rushing the drying step, skipping a test area, using the wrong grit sandpaper, or neglecting to neutralize chemical residues. These oversights can worsen surface damage or leave behind residues that promote future rust. To avoid them, always start with a test patch, use the appropriate abrasive grade, and follow safety guidelines. Keep surfaces dry between steps and never apply finishes onto damp metal. When in doubt, consult the product instructions and perform a final inspection for any remaining rust or pitting.
Maintenance and prevention to keep surfaces rust-free
Prevention is simpler than removal. After treating a surface, apply a protective coating such as primer and topcoat, wax, or a clear sealant, depending on exposure. Regular cleaning with mild soap and water helps prevent moisture buildup that accelerates rust. For outdoor metal, consider applying rust inhibitors periodically and storing items in dry, ventilated spaces. If rust reappears in the same spot, note recurring moisture sources (leaking pipes, condensation) and address them. Remember to recheck treated areas after heavy rain or seasonal changes. Cleaning Tips notes that consistent maintenance and timely touch-ups are the best long-term strategy to keep metal surfaces rust-free.
Tools & Materials
- Protective gloves(Nitrile or leather gloves; choose thicker leather for heavy rust areas)
- Safety goggles(Close-fitting safety goggles or glasses; splash protection required)
- Dust mask or respirator(Use when sanding or grinding rust to avoid inhaling particles)
- Wire brush(Stiff-bristled brush for initial rust removal)
- Steel wool or abrasive pads(Coarse grade for heavy rust; finer grades for finishing)
- Sandpaper (grits 80-120 for heavy, 180-320 for finishing)(Progressively finer grits to smooth the metal surface)
- Plastic scraper or putty knife(For lifting loose rust and debris without gouging the metal)
- Degreaser or dish soap(Remove oils/grease before rust treatment)
- White vinegar or lemon juice(Natural acid options for initial rust loosening)
- Baking soda(For mild abrasion and paste form for gentle cleaning)
- Rags or microfiber cloths(For cleaning and drying surfaces)
- Rust converter or rust-inhibiting primer(Apply after rust removal if using converters or primers)
- Paints/clear sealants(Topcoat to prevent future rust; ensure compatibility with metal type)
Steps
Estimated time: 2-4 hours
- 1
Inspect and prep the work area
Identify rusted regions and assess metal integrity. Clear a workspace, protect surrounding surfaces with tape, and gather all tools. This pre-check helps prevent surprises during cleaning and ensures you choose the right method for each area.
Tip: Take photos of heavily corroded spots to track progress and guide future maintenance. - 2
Wear safety gear and degrease
Put on gloves and eye protection. Clean the surface with a degreaser or dish soap to remove oil, grease, and dust, then rinse and dry completely. A clean surface ensures rust removers work effectively and protects you from chemical splashes.
Tip: If using chemicals, work in a well-ventilated area and keep pets away. - 3
Choose a removal method (mechanical, natural, or chemical)
Decide based on rust depth and surface finish. Mechanical methods work well for surface rust on tools; natural acids are good for light rust; chemical removers are efficient for heavy rust. You may combine methods for best results.
Tip: Test a small area first to confirm compatibility with the metal. - 4
Apply treatment and let it dwell
Apply the chosen rust-removal product (or natural paste) and allow it to sit for the recommended dwell time. This dwell period lets the product penetrate rust and loosen it from the surface.
Tip: Set a timer and avoid re-wetting the area during dwell. - 5
Scrub and rinse thoroughly
Use a brush or abrasive pad to scrub off loosened rust. Rinse with clean water and dry completely before proceeding to finish. Residual moisture can promote new rust if left untreated.
Tip: Wipe with a dry cloth and finish with a heat source if necessary to ensure complete drying. - 6
Neutralize and inspect
If your product requires neutralizing, follow with the recommended rinse or neutralizing solution. Inspect for remaining rust and repeat treatment if necessary.
Tip: Check near joints and crevices where rust can hide. - 7
Apply protective coating
Once clean and dry, apply a rust converter, primer, or topcoat suitable for the metal. This final layer helps seal and protect against moisture and air exposure.
Tip: Choose a coating compatible with the metal and environment (indoor vs outdoor). - 8
Cure and test
Allow the coating to cure fully as per label directions. After curing, test for rust reoccurrence by exposing the area to light moisture and inspecting for discoloration or staining.
Tip: Schedule periodic maintenance checks every few months. - 9
Maintain and store properly
Store items in dry, ventilated spaces. Regular cleaning and occasional reapplication of protective coatings keep rust at bay for longer periods.
Tip: Avoid storing metal in damp basements or outdoors without protection.
Questions & Answers
What is the safest method to remove rust from stainless steel?
For stainless steel, start with mechanical cleaning to avoid damage to the passivation layer. If rust persists, use a specialized stainless-steel-safe rust remover or a mild acidic cleaner, then rinse and dry thoroughly. Finish with a protective coating designed for stainless surfaces.
Use gentle mechanical cleaning first, then a stainless-safe remover if needed.
Can natural methods really remove heavy rust?
Natural methods can address light surface rust effectively, such as vinegar or lemon juice with gentle scrubbing. Heavy rust may require chemical removers or professional intervention. Always test on a small area first to avoid damage.
Natural methods work well for light rust; heavy rust often needs stronger treatments.
Will rust removal ruin paint or coatings?
Some rust removal methods can affect painted or plated finishes. Always test first, choose milder methods when possible, and protect adjacent areas with tape. After treatment, recoat with appropriate primer and sealant to restore protection.
Test first and protect nearby finishes before cleaning.
How long does rust converter take to cure?
Cure times vary by product; follow label instructions. Most converters require several hours to full cure before painting, with some needing 24 hours or more in humid conditions.
Follow the product’s cure time for best results.
Is it okay to use household vinegar for rust removal on tools?
Vinegar is effective for light surface rust on non-coated tools. Soak or apply and scrub, then rinse and dry. Do not use vinegar on sensitive finishes or coated surfaces without testing first.
Vinegar can work for light rust on uncoated tools.
What should I do after rust removal to prevent recurrence?
Dry thoroughly, apply a protective primer or sealant, then maintain with regular cleaning. For outdoor items, reapply protective coatings periodically and store in a dry place to reduce moisture exposure.
Dry, protect, and maintain to keep rust away.
Watch Video
The Essentials
- Identify rust type before treatment
- Choose the right removal method for each area
- Dry thoroughly and apply protective coating
- Test on a small area first to avoid damage
- Maintain surfaces to prevent future rust
- Follow safety guidelines for all chemicals