Best Way to Clean a BBQ Grill: A Practical Home Guide
Discover the best way to clean a bbq grill with a practical, step-by-step guide. Safe tools, simple routines, and maintenance tips to keep flavors fresh and your grill looking like new.

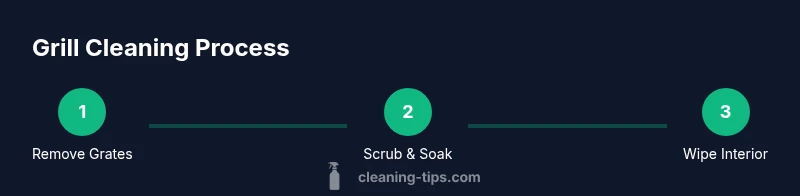
Clear the grill area, remove the grates, and gather supplies. The best way to clean a bbq grill uses a staged approach: heat to loosen residue, scrub with a stiff brush, soak grates if needed, then wipe the interior and exterior, and finish with a light oil on the grates. This routine minimizes buildup and extends grill life.
Why Regular Grill Cleaning Matters
Regular maintenance is not just cosmetic; it protects safety, flavor, and longevity. The best way to clean a bbq grill combines controlled heat, detergent, and careful scrubbing to prevent grease buildup and carbon deposits. According to Cleaning Tips, neglecting routine cleaning leads to uneven heating, flare-ups, and off flavors. A clean grill also makes post-cook cleanup faster and reduces the risk of grease fires. Understanding how a grill works—vents, grates, burners, and trays—helps you tailor your cleaning routine to your model, whether gas, charcoal, or electric. In practice, aim for a light wipe-down after each use and a deeper cleaning after several uses or at the end of a grilling cycle. The goal is to keep heat consistent, protect cast iron components, and maintain a safe cooking environment. For porcelain-coated grates, avoid harsh metal scrubbing to prevent scratches, and use nylon pads instead when needed. A well-maintained grill performs better and lasts longer, saving time and money over the season.
This article provides a complete, step-by-step approach that works for most grill types, with model-specific tips where applicable. The Cleaning Tips team emphasizes safety first—disconnect gas lines, if applicable, and ensure all parts cool completely before handling.
note
Tools & Materials
- Long-handled grill brush(Stiff bristles; avoid wire-only brushes on porcelain-coated grates)
- Bucket or spray bottle with warm water(For rinsing and loosening grime; add a drop of dish soap if needed)
- Dish soap or grill cleaner(Non-abrasive; avoid chlorine-based cleaners on food-contact surfaces)
- Non-abrasive scrub pad or nylon sponge(Use nylon on coated grates to avoid scratching)
- High-heat cooking oil or cast-iron conditioner(Season cast-iron components after cleaning)
- Protective gloves(Heat-resistant if handling warm parts)
- Aluminum foil ball(Helpful for scrubbing hard-to-reach areas)
- Vinegar or baking soda (optional non-toxic cleaner)(Good for natural deodorizing and gentle scrubbing)
- Cloths or paper towels(For drying and wiping surfaces)
Steps
Estimated time: 30-45 minutes
- 1
Remove grates and loosen debris
Power down and cool the grill completely. Take out the grates, heat shields, and trays. Use a dry brush to knock loose debris, then set parts aside for pre-soak if heavy grime is present.
Tip: Pro tip: Lay a tarp or sheet on the ground to catch debris and simplify cleanup. - 2
Soak grates and scrub loose residue
Fill a basin with warm soapy water and place the grates inside to soak for 10–15 minutes. After soaking, scrub with a nylon pad to remove baked-on grease without scratching.
Tip: Pro tip: If you have porcelain-coated grates, avoid metal scourers that can scar the surface. - 3
Clean interior surfaces
Wipe down the interior walls, burner covers, and the drip tray with a damp cloth. For stubborn spots, use a vinegar solution or a grill cleaner, then rinse and dry thoroughly.
Tip: Pro tip: Keep a damp cloth handy to wipe away cleaner residue before it dries. - 4
Clean burners and vents
Check burner ports for clogs; use a skewer or brush to clear debris gently. Vacuum or wipe vent openings to ensure proper airflow after cleaning.
Tip: Pro tip: Never poke aggressively into burner holes; loosen debris with a soft brush first. - 5
Rinse, dry, and reassemble
Rinse all components with clean water, dry completely to prevent rust, and reassemble the grill. Inspect gaskets and seals for wear and replace if needed.
Tip: Pro tip: Drying completely reduces rust risk; leave lid open for a few minutes if needed. - 6
Oil and season grates
Apply a light coat of high-heat oil to grates after drying. If using cast-iron components, follow seasoning steps per your model to maintain nonstick properties.
Tip: Pro tip: Wipe away excess oil to avoid smoking during the first grill session after cleaning. - 7
Burn-off and final wipe
Heat the grill for 10–15 minutes with the lid closed to burn off residual cleaners and debris. Turn off, let cool slightly, then wipe clean again and perform a final oiling.
Tip: Pro tip: Perform this step outdoors or in a well-ventilated area to manage fumes.
Questions & Answers
How often should I clean my grill?
Clean after each use with a quick wipe and brush, and perform a deeper clean after several uses or at season end to prevent buildup and ensure safe operation.
Clean after you cook, and do a deeper clean every few uses to prevent buildup.
Can I use bleach or strong cleaners on a grill?
Avoid bleach or harsh cleaners on food-contact surfaces. Use non-toxic cleaners, rinse thoroughly, and dry completely before using the grill again.
Avoid bleach; stick with non-toxic cleaners and rinse well before cooking.
Is it better to clean a gas grill or a charcoal grill differently?
The core steps are similar, but gas grills require more attention to burner tubes and vent cleanliness, while charcoal grills focus on ash removal and grate maintenance.
Gas grills need burner tube checks; charcoal grills emphasize ash removal.
What should I do about porcelain-coated grates?
Use nylon scrub pads and avoid metal brushes to prevent scratches. Clean in gentle motions and dry thoroughly.
Be gentle with porcelain grates and dry them well.
Do I need to season my grates after cleaning?
Seasoning with a light layer of high-heat oil helps prevent sticking and rust, especially on cast-iron grates.
Season grates with a light oil after cleaning.
What about cleaning the interior of the grill after every cook?
Wipe interior surfaces, remove ash and debris, and perform a quick burn-off to reset the cooking chamber.
Do a quick wipe and burn-off after each cook.
Watch Video
The Essentials
- Start with safety and prep to prevent accidents.
- Use the right brush and non-abrasive pads for your grate type.
- Deep-clean at least between grilling cycles to prevent buildup.
- Season cast-iron components to maintain nonstick surfaces.
- Finish with a light oil to reduce sticking and corrosion.