How to Clean a Gas Fireplace: A Step-by-Step Guide
Learn how to clean a gas fireplace safely and effectively with Cleaning Tips. This comprehensive guide covers safety, tools, step-by-step procedures, maintenance, and common mistakes to keep your unit clean and efficient.

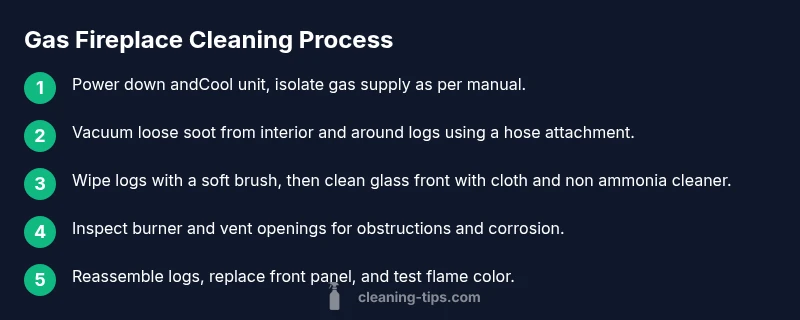
This guide shows you how to clean a gas fireplace safely, remove soot from the interior and glass, inspect the burner and vent, and maintain proper flame quality. The process emphasizes safety, correct tool use, and following manufacturer guidelines to protect your home and prevent gas leaks or soot buildup. You will complete a thorough cleaning and reduce risks with proper technique.
Understanding why you should clean a gas fireplace
A clean gas fireplace not only looks better, it burns more efficiently and reduces indoor air pollutants. Soot and dust can settle on the burner and logs, reducing flame quality and increasing the risk of soot buildup on glass and surfaces. Regular cleaning helps maintain oxygen supply, prevents obstruction of vents, and lowers the chance of carbon monoxide hazards. According to Cleaning Tips, homeowners who schedule a light annual cleaning experience fewer cold starts and smoother operation. A visually clean unit also means fewer surprises when you light it in the cold season, which is especially important for households with children or pets. In this guide you will learn a practical, step by step approach that respects manufacturer guidelines and keeps your family safe while enjoying the ambiance of a clean gas fireplace. This section reinforces the why behind the task and sets expectations for a thorough, safe cleaning routine.
In addition to safety, regular cleaning supports better heat output and longer equipment life. When dust and soot accumulate, the burner can misfire, reducing efficiency and increasing maintenance needs. By following the steps here, you will create a safer environment and maintain comfort in your living space while preserving the aesthetic appeal of your gas fireplace.
The Cleaning Tips team emphasizes that a well maintained gas fireplace can operate reliably year after year, especially when combined with periodic professional inspections. The goal is a clean, efficient flame that delivers ambiance without compromising safety.
Safety first: before you start
Safety is non negotiable when dealing with gas appliances. Before touching any component, turn off the gas supply at the shutoff valve and allow the unit to cool for at least 15 minutes. If your ventilation system includes a chimney damper, close it to prevent drafts while you clean. Wear protective gloves and safety goggles to guard against sharp edges and soot. Keep a working flashlight handy and never use water or cleaners on a hot surface. If you smell gas, leave the area immediately and contact your gas provider or a licensed technician. By following these precautions you reduce the risk of fire, burns, and gas leaks. The Cleaning Tips team recommends reviewing your owner’s manual for model specific warnings before starting.
A thoughtful preparation phase lowers the chance of accidental exposure to gas, and it creates a safer work environment for subsequent steps. Remember that even routine maintenance can have unexpected risks if the unit is not fully cooled or the gas supply is not isolated. If you are ever unsure, err on the side of caution and seek professional assistance. Your family’s safety comes first.
To maximize safety, designate one clean workspace, keep children and pets away, and wear a dust mask if you are sensitive to soot. After you complete these prep steps, you are ready to gather tools and begin the cleaning process with confidence.
Tools and materials
Before starting gather these essentials so you can work efficiently and safely. - gloves (chemical resistant) - safety goggles - vacuum with hose attachment - soft nylon brush - microfiber cloths - mild dish soap and water - glass cleaner designed for non ammonia use - bucket or spray bottle - flashlight - manufacturer approved cleaning cloths or logs (if available) - replacement parts recommended by the manual (optional)
Note: not all gas fireplaces require the same tools; check the manual for any model specific precautions. Use only non abrasive cleaners on glass surfaces and never scrub the logs with force. If your unit has a gas shutoff valve near the unit, keep a safe distance and avoid bending lines. Having the right tools reduces risk and speeds up the process, making a big difference in the final result.
Inspect the gas logs and burner
Remove the glass front only if manufacturer instructions permit. Use the soft brush to examine each log for cracks or crumbling surfaces. If you see damage, stop and contact a professional; moving damaged logs can clog the burner or change flame behavior. Inspect the burner ports for dust or obstruction. A pale yellow flame or lazy flame indicates incomplete combustion; this is a sign to stop and call for service. Check the burner for corrosion or loose connections; avoid dislodging any parts. Take photos to document the state before reassembling. A careful inspection can prevent soot factory resets and identify issues early. In some models you may need to remove the logs to access the burner; follow the manual precisely to avoid misplacing components.
This step is critical because misplacing logs or disturbing the burner can affect performance and safety. If you notice any signs of damage, do not attempt to repair it yourself. Contact a licensed technician for assessment and replacement parts if needed.
Cleaning the glass front safely
Open the glass panel according to manual. Use a microfiber cloth and non ammonia cleaner to wipe the interior and exterior surfaces. Do not spray cleaner directly onto the logs or burner area; spray onto cloth first. Dry with a second clean cloth to prevent streaks. If you notice fine soot on the glass, use a small amount of water and a rag, then wipe clean. Avoid abrasive cleaners that could scratch heat resistant glass. For best results, clean with the unit cool and avoid cleaning while the glass is hot. This helps protect the reflective surface and ensures a clearer view of the flame. Maintaining a spotless glass front improves heat perception and the overall look of your fireplace.
If the glass shows stubborn buildup, use a dedicated glass cleaning cloth and repeat the wipe until you have a clear, even shine. Always follow the manufacturer guidelines when choosing glass cleaners to safeguard coatings and seals.
Cleaning the vent and exterior components
Clear any debris from the exterior vent cap and chase. Use a soft brush and vacuum to remove spider webs, dust, and leaves from around the vent area. Do not use water to clean the vent areas that may enter the firebox; instead use dry wipe. If your fireplace has a surround, wipe it with a damp cloth. Exterior cleaning reduces the chance of dust infiltrating the firebox and helps maintain a neat appearance. While cleaning the exterior, avoid disturbing attachments or the vent hood.
Regular exterior maintenance also helps you notice corrosion or wear early. Use a dry microfiber cloth for the finish and a damp cloth for any stubborn marks, always ensuring the unit is completely powered down and cooled first. Cleaning the exterior can be a quick weekly routine during heavy use seasons.
Cleaning the interior components
With logs removed, carefully vacuum the interior skirting and the burner housing. Gently wipe the burner and pilots with a damp cloth. Do not soak any metal parts; moisture can cause corrosion. Inspect the thermocouple and gas valve for any signs of wear. Do not attempt to adjust gas pressure; only a qualified technician should do this. Avoid forcing parts back into place; if something feels stuck, take a photo and consult the manual or a professional. Cleaning the interior reduces soot buildup and promotes better flame stability.
A calm, methodical approach preserves the integrity of the flame and prevents accidental displacement of components. If you notice any unusual noises, flickering, or heat changes after cleaning, pause and call for professional support. A careful interior clean is the foundation for safe operation.
Reassemble and test the flame
Reposition logs in their original configuration, following the order indicated in the manual. Replace the glass front and reattach securely. Reignite the pilot according to the manufacturer’s instructions; observe the flame color; a healthy flame should be bright blue with small yellow tips. If the flame is orange or flickers, turn off the unit and consult a pro. After reassembly, check for gas smell, and if present leave the area and call the gas provider. This step confirms that your cleaning effort did not disturb gas flow or venting and ensures the unit lights reliably. A proper test also validates that the glass front seals correctly to prevent drafts and soot leakage.
Complete the test once you are sure everything is back in place. Never rush through this step; a slow, deliberate test is safer and more accurate.
Maintenance tips to prevent buildup
Schedule a light cleaning every 6 to 12 months depending on use and environment. Vacuum logs and burner gently between seasons; keep the surrounding area clean to minimize dust entering the firebox. Consider installing a carbon monoxide detector in the same room for extra safety. Have an annual professional inspection to verify venting and gas connections. Keep manufacturer guide handy for any model specific maintenance. Regular maintenance preserves efficiency and ensures safe operation during peak use periods. A proactive approach reduces the likelihood of unexpected outages during cold weather and saves money on major repairs.
Common mistakes and warnings
Don't move logs out of sequence; improper log placement can disrupt flame and create soot. Avoid using household cleaners on glass unless specified; ammonia can damage some coatings. Never spray cleaner directly into the gas control area; moisture and cleaners can cause corrosion or misalignment. Do not attempt major gas repairs yourself; working with gas lines requires a licensed technician. Common mistakes also include ignoring odors or gas smells, skipping safety steps, or failing to turn off the gas supply before cleanup. Adhering to the manual and manufacturer recommendations reduces risk and extends the life of your unit.
Tools & Materials
- gloves (chemical resistant)(Protect hands from soot and cleaners)
- safety goggles(Protect eyes from dust and debris)
- vacuum with hose attachment(Remove loose soot and dust)
- soft nylon brush(Gently lift debris from logs and burner)
- microfiber cloths(Wipe surfaces without scratching)
- mild dish soap(Dilute for interior cleaning)
- water(Mix for soapy solution)
- non ammonia glass cleaner(Clean glass front safely)
- bucket or spray bottle(Hold cleaning solution)
- flashlight(Improve visibility inside the firebox)
- manufacturer approved cleaning cloths(Use as directed by manual)
Steps
Estimated time: 90-120 minutes
- 1
Power down and cool unit
Turn off the gas supply and allow the unit to cool for at least 15 minutes. This prevents burns and reduces the risk of accidental ignition during cleaning.
Tip: Never clean a hot surface; heat can warp parts and cause injury. - 2
Vacuum loose soot
Use a vacuum with hose attachment to remove loose soot from the interior and around the logs. Avoid applying force that could displace components.
Tip: Keep the vacuum away from the vent openings to prevent drawing debris deeper into the system. - 3
Remove and inspect logs
If the manual allows, remove logs and inspect for cracks or crumbling surfaces. Photograph the arrangement before removal to ensure correct reassembly.
Tip: Do not sweep logs with force; damaged logs should be replaced rather than cleaned. - 4
Clean logs with care
Gently brush logs with a soft nylon brush to remove dust. Do not apply liquids directly to logs unless specified by the manufacturer.
Tip: Log integrity is crucial; use minimal moisture near the logs. - 5
Wipe the burner area
Wipe the burner area with a damp cloth to remove dust while avoiding contact with gas ports. Ensure ports stay clear.
Tip: Never scrub ports; a gentle wipe maintains proper airflow. - 6
Clean the glass front
Clean interior and exterior glass fronts with a non ammonia cleaner on a cloth. Dry thoroughly to avoid streaks.
Tip: Spray the cleaner onto cloth, not directly onto glass. - 7
Inspect vent exterior
Check exterior vent cap and chase for debris; remove obstructions but do not wet the interior areas.
Tip: Dry wiping is preferred around electrical and gas components. - 8
Reinstall logs and reassemble
Place logs back in the correct orientation as pictured in your manual. Reattach the glass front securely.
Tip: A precise reassembly prevents flame irregularities. - 9
Relight and test flame
Follow manual to relight and observe the flame color; blue with brief yellow tips is typical. Look for any gas odors during operation.
Tip: If flame is yellow or flickers, power down and contact a pro. - 10
Document and schedule maintenance
Record the cleaning date and notes for future reference. Schedule professional inspection annually or per usage.
Tip: Regular logs of maintenance help you track performance and safety.
Questions & Answers
Can I clean a gas fireplace myself, or should I hire a professional?
Basic cleaning following safety guidelines and the manufacturer manual is suitable for many homeowners. For complex issues or gas line work, hire a licensed professional.
You can do basic cleaning yourself, but for any gas line work or complex issues, hire a licensed professional.
How often should I clean a gas fireplace?
At least once a year, and more often if the unit is heavily used or in a dusty environment.
Clean at least annually, more often if you burn the unit a lot.
Is it safe to use glass cleaner on the glass front?
Yes, use a non ammonia cleaner designed for high heat surfaces and spray onto a cloth, not directly on the glass.
Yes, with a non ammonia cleaner applied to a cloth, not directly on the glass.
What should I do if I smell gas after cleaning?
Leave the area immediately and call your gas provider or emergency services. Do not operate switches or lighting until assessed.
If you smell gas, leave the area and call for help right away.
Why is the flame color important and what is normal?
A healthy gas flame should be blue with small yellow tips. A yellow or flickering flame can indicate incomplete combustion and a service check is needed.
Blue flame is normal; yellow means something may be off and should be inspected.
Do I need to disconnect the unit before cleaning?
Turn off the gas supply and allow cooling. Follow manufacturer instructions; some models require professional service for disassembly.
Turn off gas, wait to cool, and check the manual—some models need a pro for disassembly.
What common mistakes should I avoid?
Avoid moving logs out of order, using ammonia cleaners on certain glass coatings, and spraying cleaners near gas controls. Never perform major gas repairs yourself.
Avoid moving logs out of order and never tamper with gas controls; call a pro for repairs.
When should I call a professional?
If you notice gas odors, yellow or inconsistent flames, damaged logs, or any signs of venting issues, contact a licensed technician.
Call a professional if you smell gas or flames look off, or if you see damage.
Watch Video
The Essentials
- Turn off gas and cool unit before cleaning
- Inspect logs and burner for damage prior to cleaning
- Clean glass safely and avoid direct spray on logs
- Reassemble logs exactly as manual shows
- Schedule annual professional inspection for safety