How to Dry Clean at Home: A Practical Step-by-Step Guide
Learn how to safely dry clean at home with a kit or compact machine. This guide covers prep, fabrics, solvents, cycle steps, and aftercare—perfect for refreshing delicate garments without a trip to the cleaners.

Dry cleaning at home is achievable with a consumer dry-cleaning kit or a small at-home appliance. This quick answer outlines the steps, safety checks, and fabric care tips to refresh delicate garments without a trip to the cleaners. You’ll need a kit, proper ventilation, and careful label reading to ensure reliable results.
Why dry cleaning at home matters
If you’re aiming to extend the life of delicate fabrics without a trip to the cleaners, a dry clean machine at home can be a practical option. This approach is particularly useful for refreshing wool blazers, silk blouses, or tailored dresses between professional visits. According to Cleaning Tips, home dry-cleaning solutions can deliver noticeable results while helping you manage stains and wrinkles in a controlled setting. The key is to follow manufacturer instructions, read care labels carefully, and maintain a well-ventilated workspace. In this article, you’ll learn how to assess fabrics, pick the right kit or appliance, and perform a safe, efficient cycle that minimizes fiber stress. We’ll also cover aftercare steps that help garments regain their shape and color, and we’ll highlight common pitfalls to avoid. Whether you’re a renter needing to refresh a few outfits or a homeowner who wants quick turnover of seasonal items, home dry cleaning can be a practical addition to your cleaning toolkit.
Why this matters for your home: saving time, reducing trips to cleaners, and preserving fabric integrity when done with care. By following best practices, you can achieve professional-looking refreshes without leaving your house.
The Cleaning Tips team understands that homeowners want reliable, safe methods for occasional refreshing. This guide provides practical, tested steps you can apply today, with emphasis on fabric safety and ventilation to minimize solvent exposure.
Safety and ventilation considerations
Working with dry-cleaning solvents requires respect for air quality and personal safety. Always perform the process in a well-ventilated area—ideally with a window or exhaust fan—to minimize inhalation of fumes. Keep flammable sources away from the workspace and never operate solvents near open flames. Wear protective gear such as gloves and, if needed, a mask to reduce skin contact and inhalation risk. Read garment care labels first; some fabrics may be unsuitable for home dry cleaning, and certain embellishments or coatings can be compromised by solvents. If you have small children or pets, choose a separate space where they cannot access treated items until they’re fully aired out. This section emphasizes practical safety steps so you can proceed with confidence when using a dry-cleaning kit at home.
Key safety takeaway: never substitute household solvents for kit-recommended products, and always ventilate the area during and after the cycle. If you notice strong odors or irritation, stop the process and move to a better-ventilated space before continuing. This approach aligns with general guidance from Cleaning Tips on reducing exposure to chemical cleaners in home environments.
Understanding home dry-cleaning methods
Home dry cleaning relies on controlled solvent exposure and a circulation cycle that loosens soils without saturating the fabric. Consumer kits typically come with a solvent reservoir, absorbent cleaning cloths, and a guiding bag or garment shuttle. A dedicated home dry-cleaning machine or a compact, kit-compatible appliance creates a closed-loop environment that limits solvent evaporation and dispersal. The kit’s instructions will specify fabric compatibility, cycle duration, and temperature. It’s important to distinguish between a do-it-yourself refresh and a full professional dry cleaning; the home approach is best for light soil, mild stains, or odor refresh, not heavy soils or delicate items with color transfer risk. By understanding these limitations, you can choose the method that matches your garment’s fabric type and finish. Always begin with a spot test on an inconspicuous area to gauge colorfastness and texture response before committing the entire item to a cycle.
In short: home dry-cleaning methods are designed to refresh, not fully restore, fabrics. Planning ahead and respecting fabric labels ensures safer, more reliable results.
Choosing the right kit and solvents
Selection matters more than you might expect. Start with a reputable home dry-cleaning kit that matches your fabric types (wool, silk, synthetics) and the kit’s safety guidelines. Most kits include a prescribed solvent and absorbent pads; some add a pretreat pen for stains. Read the ingredient list and verify that the solvent is appropriate for the colors and finishes of your garments. Avoid household solvents like gasoline or paint thinners, which can cause irreversible damage or fumes. If you’re unsure about a stain, consider a dedicated stain remover compatible with your fabric, but always test on a hidden seam first. Store solvents in a cool, dry place away from heat or direct sunlight. By choosing the right kit and solvent, you protect fabric integrity while achieving a clean, fresh result at home.
Note: If your garments are leather, suede, or have special finishes, home dry cleaning may not be suitable. In those cases, seek professional advice before proceeding.
Preparation and garment evaluation
Preparation is the secret to a successful at-home dry-clean. Start by gathering your garments and inspecting care labels for explicit warnings. Sort items by fabric type and colorfastness, setting aside those with a ‘do not dry clean’ symbol or coatings that could be compromised. Look for signs of heavy staining, old odors, or finish issues like shrinking or pilling. Pretreat small, visible stains with an agreed-upon stain remover and test on an inside seam. Empty pockets, fasten buttons, and remove jewelry that might snag during cycling. Place moisture- and stain-prone items in separate bags or the designated garment shuttle supplied with your kit. Finally, read the kit instructions for load size and cycle duration to avoid overloading or under-cleaning the garments.
This step-by-step preparation reduces the chances of surprises during the cycle and improves overall results. Safety and fabric compatibility hinge on thorough evaluation before you begin the cleaning process.
Step-by-step overview of the home dry-cleaning process
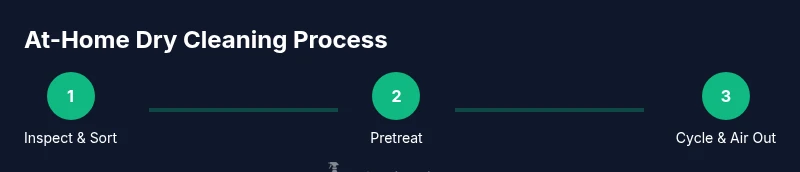
The home dry-cleaning process follows a simple but precise sequence: gather garments, pre-treat, set up the kit, run the cycle, and air out. Begin with a careful inspection, then pretreat stains with colorfast test. Load items evenly and avoid overloading the bag or drum. Run the prescribed cycle length and keep the environment ventilated. After the cycle, remove garments promptly, hang them to air out, and inspect for odor or moisture. If needed, run a brief refresh cycle on delicate fabrics. Finally, brush off any lint and re-check seams and hems. This process emphasizes dry-cleaning kit instructions and fabric-safe handling, helping you achieve a nice refresh without professional equipment.
Practical tip: always use the exact kit directions for solvent quantities and cycle duration to ensure safety and effectiveness. Long cycles or excessive solvent can flatten textures or color-bleed on some fabrics.
Fabric-specific tips and stain handling
Fabrics differ in how they respond to home dry-cleaning methods. Delicate silks and lames benefit from shorter cycles and gentler solvents, while wools may tolerate slightly longer cycles if colorfast. Check colorfastness first with a small patch, as color migration is a common issue with some dyes. Treat stains with the kit’s recommended pretreatment and avoid rubbing vigorously, which can cause pilling or fiber damage. For heavily soiled areas, consider spot-cleaning or professional cleaning rather than a full home cycle. Always keep your kit’s solvent usage within recommended limits and never mix solvents, which can create dangerous fumes. After the cycle, allow garments to air completely before wearing or packing, as solvents can linger in fibers and cause skin sensitivity for some people.
Understanding fabric-specific constraints helps you tailor your approach and protect the garment’s finish while achieving a fresh look.
Aftercare and extending garment life
Post-cycle care is just as important as the cleaning itself. Hang clothes on wide, padded hangers to maintain shoulder shape, and avoid crowded closets that trap odors. If fibers still feel slightly damp, give them a final air-out period in a well-ventilated area rather than placing them in a heated dryer. Brush gently to restore nap on wool or fleece and use a garment steamer on low heat to remove wrinkles without direct contact with fibers. For future cycles, store cleansed items in breathable garment bags or cotton covers to prevent re-soiling. Keep a log of which fabrics were treated and when, so you can space out refresh cycles appropriately. Regular, mindful use of home dry-cleaning methods can extend fiber life and keep your wardrobe looking sharp without frequent professional visits.
Troubleshooting common results
If results fall short, review whether the cycle duration, solvent amount, or temperature matched the fabric’s needs. Some fabrics may experience color fading or texture changes if the colorfastness test was insufficient. Revisit care labels and consider a shorter cycle or a gentler solvent; in some cases, a stain may require a different pretreatment approach. Odors lingering after a cycle are common and often resolve with airing and a light refresh cycle. If you notice unusual sheen, stiffness, or fiber damage, stop using the kit on that item and consult the garment’s care label or a professional cleaner. With careful preparation and faithful adherence to kit instructions, most home dry-cleanable garments respond well to this at-home approach.
Tools & Materials
- Home dry-cleaning kit (solvent, absorbent cloths, garment bag)(Follow kit instructions; ensure fabric compatibility)
- Nitrile gloves(Protect hands from solvents; ensure snug fit)
- Soft-bristle brush or lint roller(Pre-clean surface; remove loose debris)
- Ventilated workspace or window fan(Maintain air quality and reduce solvent exposure)
- Hangers or a drying rack(Support garments after cycle; avoid creasing)
- Color-safe stain remover (optional)(Test on hidden area first; use sparingly)
- Measuring cup or kit-provided scoop(Accurate solvent quantities per kit instructions)
- Garment bags or masking tape (optional)(Protect delicate items from snagging)
Steps
Estimated time: 60-90 minutes
- 1
Inspect care labels and sort garments
Read each care label carefully to identify fabrics that are safe for home dry cleaning and separate items with special finishes or embellishments. Sort by fabric type and color stability, placing risky items aside for professional care. This helps prevent color transfer and fiber damage during the cycle.
Tip: Test a hidden seam with the kit solvent on a small area before full treatment. - 2
Pretreat stains and spot-check colorfastness
Apply a small amount of pretreatment product to any visible stains and gently blot. Do a colorfast test on an inconspicuous area—wait the recommended time, then check for color transfer or dye running. If color appears to bleed, avoid treating that item at home.
Tip: Work from the outside of the stain toward the center to minimize spreading. - 3
Prepare garments for the kit
Close zippers, fasten hooks, and turn items inside out if possible to reduce wear on outer fabrics. Place garments in the kit’s bag or shuttle as directed, ensuring items aren’t crammed together. This helps solvents circulate evenly and reduces friction damage.
Tip: Leave space between items; crowded loads reduce cleaning efficiency. - 4
Run the cycle as directed by the kit
Set the cycle time and temperature per the kit’s instructions. Keep the workspace ventilated and monitor the process for unusual odors or overheating. Avoid pausing or modifying settings beyond what the kit specifies, as deviations can affect results or safety.
Tip: If the kit allows a brief refresh cycle, start with the gentlest option first. - 5
Unload, air out, and inspect
Carefully remove garments and hang them to air in a well-ventilated area away from direct heat. Check for residual odors or moisture; if present, give items additional airing time or a brief secondary cycle if fabric permits. Ensure no solvent residue remains on the surface before wearing.
Tip: Use a wide-shouldered hanger to maintain shape. - 6
Final check and storage
Once completely dry, inspect seams, hems, and finished surfaces. Lightly brush or steam to restore texture. Store in breathable covers or hangers in a closet with adequate space to prevent re-soiling. Keeping a simple log of cleaning dates helps you plan refresh cycles without overdoing it.
Tip: Avoid plastic garment bags for long-term storage; they trap moisture and odors.
Questions & Answers
Is it safe to dry clean at home?
Yes, it can be safe when you follow the kit instructions, use proper ventilation, and wear protective gear. Home dry cleaning is best for light soils and fabrics labeled as safe for at-home treatment. Always test on a hidden seam first and stop if you notice any adverse effects.
Yes, it can be safe if you follow the kit directions, ventilate properly, and test first. If you see issues, stop and seek professional help.
What fabrics can I dry clean at home?
Most lightweight synthetics, some wools, and delicate blends can be refreshed at home using a kit, provided the care label permits home dry cleaning. Silk and leather may require special care or professional services. Always verify fabric compatibility before starting.
Most synthetics and some wools and blends are fine at home, but always check the label and test first.
Will home dry-cleaning kits remove tough stains?
Kits can handle light stains and odors, but stubborn or set-in stains may not fully come out. Pretreat following the kit’s guidelines and assess results after the cycle. For persistent stains, professional cleaning is recommended.
They help with light stains, but tough stains may need a pro.
How often should I dry clean at home?
Use home dry cleaning as a refresh between professional cleanings or for light soil. Overusing solvents can wear fabrics; aim for periodic refreshing rather than frequent full cycles. Follow care labels and kit recommendations.
Refresh between professional cleanings—don’t overdo it.
Can I dry clean leather or wool at home?
Leather typically requires specialized cleaners and conditioning; most home kits aren’t suitable. Wool may be treated for refresh if labeled for home use, but test first and avoid heavy soils. When in doubt, seek professional care.
Leather usually needs pros; wool may be okay if labeled for home use.
What should I do if a garment is damaged after a home cycle?
If you notice color loss, texture change, or pilling, stop using the kit on that item. Check the care label, test on a hidden area, and consider professional assessment for restoration or repair. Document what happened to inform future decisions.
If damage occurs, stop, test again, and consult a pro if needed.
Are home dry-cleaning kits as effective as professional services?
Home kits provide a convenient refresh for many fabrics, especially light soils, but professional cleaning may achieve deeper soil removal and fabric restoration for certain garments. Use home methods for maintenance and reserve professional cleaning for complex fabrics or stubborn stains.
They're great for maintenance, not always a replacement for professionals.
What should I do if I smell fumes after the cycle?
If you detect strong solvent odors, increase ventilation, open windows, and allow more airing time before handling the garment. If odors persist, do not wear the item immediately; seek further guidance or professional cleaning.
Ventilate more and air out longer if you smell solvent fumes.
Watch Video
The Essentials
- Check care labels before starting any home dry-cleaning step.
- Ventilate the workspace to minimize solvent exposure.
- Follow kit instructions exactly for solvent quantities and cycle times.
- Air out garments thoroughly after the cycle to prevent odor buildup.
- Test a hidden seam for colorfastness before treating the whole item.