Dry Clean: A Practical Guide to Safe Fabric Care
Learn how to dry clean fabrics safely at home, when to use professional services, and tips to extend garment life with practical, step-by-step guidance.

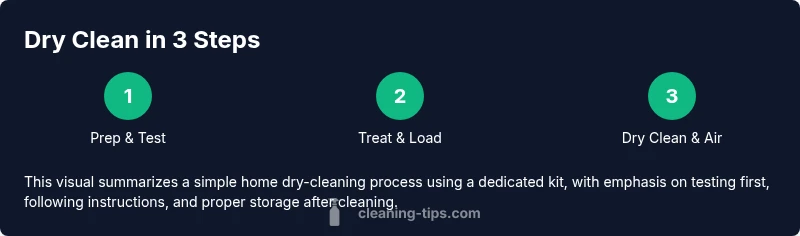
Dry cleaning uses solvents to remove oils and soils from fabrics with minimal water. This guide explains when to dry clean, how to use home kits safely, and tips to extend garment life. You’ll learn essential prep, safe methods for common fibers, stain pretreatment, and storage best practices. By following these steps, you can maintain fabrics while protecting their fit and color.
What 'dry clean' means and how it works
Dry cleaning is a fabric care method that uses solvents rather than water to dissolve oils and soils. In professional settings, garments travel through machines that apply solvent, heat, and gentle agitation to lift dirt from the fibers without saturating them in water. The term 'dry clean' is a bit of a misnomer—there is always some solvent and air exposure—but the goal is to minimize water contact to protect fabrics that shrink, pill, or bleed color. According to Cleaning Tips, understanding the basics helps homeowners decide when DIY options are appropriate and when to reserve a professional service. The key idea is that you’re using a low-moisture process that relies on selective chemistry to release soils while maintaining fabric integrity. For many garments, this method yields fresh results with less risk of shrinkage compared to hot water washing. However, not all fabrics tolerate solvents equally, so always check the care label before attempting any dry clean approach.
When to dry clean vs. machine washing
Deciding between dry cleaning and washing hinges on fabric type, colorfastness, and the garment’s construction. Garments labeled "dry clean only" should almost always be sent to a professional cleaner or treated with a specialized home kit designed for that solvent type. Others may tolerate hand washing or gentle machine cycles, but always perform a spot test first. Color-sensitive fabrics—such as certain silks or wool blends—can bleed or shrink with water or harsh agitation. In general, structured pieces with linings, adhesives, or embellishments are safer with professional care. Environmental considerations also matter: frequent dry cleaning increases solvent exposure, so weigh the benefits against frequency and garment value. The bottom line is to respect care labels and choose the method that preserves fit, color, and texture over time.
Tools and materials for dry cleaning at home
A practical at-home approach relies on a dedicated dry-cleaning kit or a comparable low-moisture system. You will want to gather a few essentials before you start:
- Home dry-cleaning kit (solvent-safe bag and stain pretreat)
- Lint-free cloth for blotting and color testing
- Protective gloves to minimize skin contact with solvents (optional but recommended)
- A hanger or breathable garment bag for storage after the cycle (optional)
- Mild spot-clean solution for pre-treatment (optional, per kit instructions)
Having these items on hand helps you perform a safe, controlled process without resorting to full professional service for every item in your wardrobe.
Step-by-step overview: professional vs at-home
Professional dry cleaning delivers controlled solvent chemistry, machine cycles, and post-cleaning finishing that can restore shape and sheen with minimal effort on your part. At home, you rely on a kit and careful preparation to achieve similar results on select fabrics. The central difference is control and scale: professionals can handle multiple garments quickly and calibrate solvents and temperatures for each item; home kits require you to follow directions meticulously and accept some variability in outcome. If a garment is valuable, heavily soiled, or labeled "dry clean only," a professional service is generally the safest path. If you choose DIY, follow the kit instructions precisely, test a hidden seam, and monitor the cycle closely to protect color and texture.
Pretreatment and stain handling
Stains should be addressed before the main cleaning cycle to improve outcomes. Blot—never rub—a stain with a clean, white cloth to lift excess soil. Apply a kit-provided pretreatment to the stain and work gently from the outside in, using light pressure. For grease or oil-based stains, a targeted solvent from the kit can help dissolve the oil; test on a hidden area first. If the stain remains, treat again after an initial brief cycle, or consider professional service for stubborn marks. Always follow the product’s guidelines and avoid mixing solvents or applying heat directly to damp fabrics.
Delicate fabrics and fiber-specific tips
Delicate fibers—such as silk, wool, rayon, and certain blends—require extra care. Silk and wool can shrink or lose luster if overexposed to heat or aggressive agitation, while rayon blends may irritate if wetted heavily. For these fabrics, use gentle cycles and lower solvent exposure, or opt for a professional setting if the label instructs “dry clean only.” Pre-test colorfastness on an inconspicuous area before any cleaning attempt. When in doubt, treat a small area first and observe color transfer and fiber response. Always communicate any concerns to the cleaner or follow kit instructions to minimize risk.
Post-cleaning care: airing, pressing, and storage
After the dry-cleaning cycle, air garments in a well-ventilated area away from direct sun to dissipate any solvent odors. If necessary, use a low heat setting with a pressing cloth to remove wrinkles, never applying direct heat to delicate fabrics. Store cleaned garments on hangers inside breathable garment bags to reduce dust and moisture buildup. Avoid plastic covers for long-term storage, as they trap humidity and can promote odor retention. Regularly inspect stored pieces for changes in texture or color and return to care as needed.
Common mistakes and how to avoid
Common errors include overloading the kit bag, using heat on damp fabrics, skipping colorfastness testing, and ignoring care labels. Always start with a small patch test and follow the kit’s directions precisely. Do not substitute products or solvents from other kits, and never mix solvents in the same bag. If a garment has embellishments, be mindful of snagging and weight distribution in the bag. Finally, avoid relying on DIY methods for heavily soiled or structured items that require professional finishing.
Environmental and safety considerations
Solvent-based dry cleaning releases volatile organic compounds; adequate ventilation and appropriate disposal are important for safety and environmental reasons. Choose reputable services that follow solvent containment practices or use eco-friendly, consumer-grade kits designed to minimize emissions. If you are cleaning at home, work in a well-ventilated area and avoid breathing fumes directly. When possible, select professional cleaners with transparent safety data and environmentally responsible practices. Cleaning Tips recommends balancing convenience with health and environmental factors to protect your living space and family.
How to decide between DIY dry cleaning and professional services
Making the right choice depends on fabric type, garment value, soiling level, and your tolerance for trial and error. For everyday items made from sturdy blends, DIY dry cleaning can be a reasonable option when used sparingly and correctly. For high-value or delicate fabrics, or items labeled strictly “dry clean only,” professional services are usually the safer bet. Consider cost, time, and recovery of shape and color when deciding. Cleaning Tips suggests evaluating each garment individually and saving home methods for items that tolerate water-based care or low-moisture alternatives.
Tools & Materials
- Home dry-cleaning kit (solvent-based)(Includes solvent-safe bag, stain pretreat, and finishing options.)
- Lint-free cloth(For blotting stains and moisture removal.)
- Protective gloves(Minimize skin contact with solvents.)
- Hanger or breathable garment bag(Protects items during and after the cycle.)
- Mild spot-clean solution (optional)(Use only if kit recommends and test first.)
- Ventilated workspace(Ensure good airflow during the process.)
Steps
Estimated time: 60-90 minutes
- 1
Check care labels and choose method
Review the garment’s care label to determine if dry cleaning is recommended or prohibited. If marked 'dry clean only', plan to use a professional service or a home kit that matches the label's solvent type. If safe to wash, consider other options after evaluating fabric sensitivity.
Tip: Always respect the label; missteps can damage fibers. - 2
Test colorfastness on a hidden area
Dampen a white cloth and press it on an inconspicuous seam or hem. If color transfers, do not attempt color-safe home dry cleaning on that garment. This prevents dye bleed and protects your wardrobe.
Tip: Run the test on a seam or underarm area to avoid visible damage. - 3
Pretreat stains according to kit directions
Apply the kit’s pretreatment to stains as directed, using a blotting motion from the outside in. Avoid scrubbing, which can spread soil and abrade fibers. Allow the pretreat to work briefly before the main cycle.
Tip: Use a light hand and always follow product instructions. - 4
Load garment into the kit and secure
Place the garment inside the kit bag or pouch, ensuring it lies flat and not tangled with other items. Seal or close according to instructions to prevent leakage and ensure even exposure.
Tip: Do not overload the bag; space helps solvents reach soils evenly. - 5
Run the cycle per kit instructions
Follow times and temperature guidelines provided with the kit. Keep the area well-ventilated, and avoid high heat that can damage delicate fibers or adhesives.
Tip: Monitor the cycle and avoid leaving the bag unattended for long periods. - 6
Air out, inspect, and repeat if needed
After the cycle, air the garment in a ventilated space away from heat or direct sun. Check for any remaining soils, odors, or tackiness. If necessary, re-treat a small area following the same steps.
Tip: A fresh scent isn’t proof of complete cleaning—look for soil and sheen return. - 7
Store properly to preserve results
Hang cleaned garments on appropriate hangers and cover with a breathable bag. Store in a cool, dry area away from direct sunlight to maintain color and shape.
Tip: Avoid plastic sleeves for long-term storage to prevent moisture build-up.
Questions & Answers
What fabrics are safe for dry cleaning at home?
Most common dry-clean fabrics include wool, silk, acetate, and rayon, but results vary by garment. Always check the care label and perform a small fabric test before proceeding.
Most dry-clean-suitable fabrics include wool, silk, acetate, and rayon, but test first and follow the label.
Can I substitute washing with a home dry-cleaning kit?
A home dry-cleaning kit is not a universal substitute for washing. It works best for light soils and special fibers; heavily soiled garments or items labeled 'dry clean only' should be professionally cleaned.
A home kit helps with light soils on select fabrics, but don’t rely on it for heavily soiled or 'dry clean only' items.
How often should garments be dry cleaned?
Frequency depends on wear, soil exposure, and fiber type. Delicate or high-value garments often benefit from professional cleaning every season or as needed, while everyday items may only need periodic care.
Clean based on wear and soil; delicate items may need regular professional cleaning, while others can be done less often.
Are home solvents safe for me and the environment?
Many consumer kits are designed with safety in mind, but solvents can irritate skin and eyes and release VOCs. Use them in well-ventilated areas and follow disposal guidelines provided by the manufacturer.
Solvents can irritate skin and release fumes, so use in a ventilated space and follow disposal rules.
What if a stain remains after dry cleaning?
If a stain persists, avoid rubbing and try a second targeted treatment per kit instructions. For stubborn stains, take the garment to a professional cleaner for specialized removal.
If a stain remains, re-treat carefully or seek professional help for stubborn marks.
How should I store garments after cleaning?
Store on a hanger in a breathable garment bag in a cool, dry area. Avoid plastic covers for long-term storage to prevent moisture buildup.
Hang clean garments in breathable covers, in a cool, dry place.
Watch Video
The Essentials
- Read care labels before attempting dry clean.
- Test colorfastness on a hidden area first.
- Follow kit directions precisely; avoid heat on delicate fibers.
- Store cleaned garments in breathable covers.