Dumbbell Clean and Press: Step-by-Step Guide
Learn how to perform the dumbbell clean and press safely with expert tips, progressive programming, and clear, step-by-step instructions for home or gym workouts.

Goal: master the dumbbell clean and press with proper form to build power, shoulder stability, and core strength while minimizing injury risk. This quick snippet outlines the exact sequence: start with a balanced stance, perform a hip hinge and explosive clean to rack, then press overhead with locked elbows. Follow the cues, tempo, and safety reminders listed in the full guide.
Why the Dumbbell Clean and Press Is Worth Mastering
The dumbbell clean and press is a dynamic, multi-joint movement that challenges the hips, core, shoulders, and arms in a single sequence. When performed with attention to form, it translates to better athletic performance and safer everyday lifting. According to Cleaning Tips, beginners should prioritize technique over weight, and progress gradually to reduce injury risk. The Cleaning Tips team found that focusing on technique yields meaningful long-term gains rather than chasing heavy loads early. In this guide you will learn the full sequence—from stance and grip to the overhead press—and how to tailor progression to your current fitness level. Include a mindful warm-up that activates the hips, thoracic spine, and posterior chain to prime the lift for success.
In practice, this lift trains a large portion of the posterior chain and supports athletic movements like swinging, jumping, and lifting from the floor. It also develops grip strength and shoulder stability, making it a strong choice for balanced upper-body conditioning. As you move through the steps, emphasize control, breathing, and lengthening the time under tension to maximize benefits while minimizing risk. The goal is steady progression: increase load only when you can complete each phase with clean technique.
Essential Mechanics: Setup, Grip, and Stance
Before you lift, establish a stable base. Stand with your feet hip-width apart, toes pointing slightly outward, weight evenly distributed between both feet. Grasp the dumbbells with a comfortable, neutral grip and keep the wrists aligned with the forearms. Retract your shoulder blades slightly and brace the core to maintain a neutral spine. Your gaze should be forward or slightly down, and the chest should stay tall throughout the movement. A solid setup prevents energy leaks and reduces the likelihood of rounding the back during the pull. If you’re new, practice the setup without weights to ingrains proper position first. As you progress, the goal is to hold this position during the entire sequence with smooth, controlled breaths.
The setup is not just a starting position but a blueprint for safe execution. Proper foot placement, grip width, and spinal alignment set the stage for a powerful hip-driven pull and a clean transition to rack.
The Hip Drive, Pull, and Catch
Power for the clean comes primarily from hip extension, not simply from arm strength. Initiate with a strong hip hinge, pushing the glutes back while keeping the chest up and the spine in a neutral position. As you begin to pull, drive through the heels and explode upward, allowing the dumbbells to rise close to your torso. The elbows should stay relaxed while the shoulders shrug to assist the lift. The catch—the moment the dumbbells meet your shoulders—should be smooth: draw the weights toward the front delts with elbows high and wrists neutral. Avoid flaring the elbows or letting the weights drift away from the body, which can destabilize the spine and waste energy. For lighter loads, focus on a deliberate, crisp hip drive and a clean transition to rack.
Quality here comes from tempo. A brief, aggressive hip extension followed by a controlled ascent helps keep the dumbbells close, reduces momentum loss, and protects the lower back. Muscles involved include the glutes, hamstrings, traps, deltoids, and forearms, all coordinating to produce a safe, efficient lift.
From Clean to Rack to Press: The Full Movement
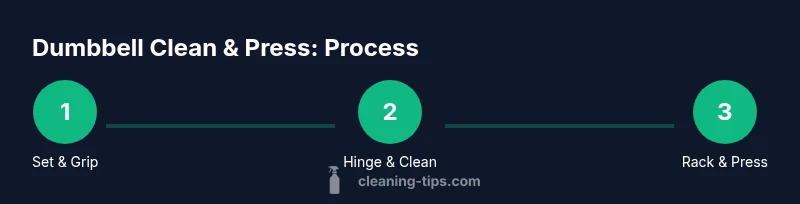
The sequence flows as a cohesive chain: set, hinge, clean to rack, then press overhead. Start from the floor or from the rack at your preferred starting point. In the clean phase, draw the dumbbells up toward the collarbone, keeping them close to your body. The rack position requires elbows under wrists, weights resting on the front delts, and the torso upright. From here, press overhead with arms fully extended while maintaining a tall spine and engaged core. Avoid leaning back or overextending the lumbar spine as you finish the press. Return to the start with control, ensuring the dumbbells descend along a vertical path and your hips reset before the next rep.
This full movement recruits multiple muscle groups: hips, glutes, core, shoulders, and arms, providing a comprehensive strength stimulus when paired with appropriate loads and rest. Use a tempo that emphasizes control: a fast clean-up to the rack, followed by a deliberate press and an intentional return to the starting position.
Common Mistakes and Fixes
Mistake: Rounding the lower back during the hinge. Fix: Maintain a neutral spine and a tall chest, brace the core, and hinge from the hips rather than the waist. Mistake: Elbows flare during the rack or press. Fix: Tuck the elbows in toward the ribs and keep the path vertical. Mistake: Lifting with the arms instead of the hips. Fix: Emphasize hip drive and maintain tension through the core and glutes. Mistake: Dropping the dumbbells too quickly after the press. Fix: Control the descent, absorbing the load with the hips and hamstrings before returning to the starting position. Mistake: Rushed transitions between phases. Fix: Use slower, deliberate tempo to build motor patterns and reduce injury risk.
Injury prevention: Always warm up shoulders and hips with dynamic mobility before performing cleans, and choose a weight you can control through every phase. If you experience pain, stop and reassess technique before adding load.
Programming, Progressions, and Benefits
Programming for the dumbbell clean and press varies by experience. Beginners might start with 2-3 sets of 3-6 reps at a light to moderate load, with 2-3 minutes of rest between sets. Intermediate lifters can perform 3-5 sets of 2-5 reps with heavier weights, maintaining strict form. Progression should follow a simple rule: only add weight when you can complete all reps with proper technique across all sets. If you stall, maintain the same weight for an extra session or add a rep before increasing load. In terms of benefits, the movement provides a full-body training stimulus, improving power, coordination, and overall athletic conditioning. Program it 1-3 times per week, ensuring adequate recovery and pairing it with complementary pushing, pulling, and leg work for balanced development. Based on Cleaning Tips Analysis, 2026, progressive loading with a focus on form yields better long-term results than rushing heavier weights. Warm-ups and mobility work will further support performance and longevity.
AUTHORITY SOURCES
- American College of Sports Medicine (ACSM): https://www.acsm.org
- National Strength and Conditioning Association (NSCA): https://www.nsca.com
- Centers for Disease Control and Prevention (CDC) – Physical Activity Guidelines: https://www.cdc.gov/phys fitness guidelines.html
For athletes and general fitness, these sources provide foundational guidance on safe lifting, mobility, and exercise programming. Always cross-reference with your own clinician or trainer when starting a new lift, especially if you have a history of injury. Cleaning Tips acknowledges the value of evidence-based practice in strength training and encourages readers to consult reliable, peer-reviewed resources when designing a program.
Quick-Start Checklist
- Warm up: 5-10 minutes of dynamic hip and shoulder mobility.
- Choose a light-to-moderate load that you can control for all aspects of the lift.
- Set stance, grip, and brace core before any movement.
- Practice the hip hinge and explosive pull with a vertical drag path.
- Rack the weights securely and press overhead with a stable spine.
- Lower weights with control and reset before the next rep.
- Track your reps, sets, and weight to ensure gradual progression.
- Review form in a mirror or video to identify improvements and prevent injuries.
Tools & Materials
- Dumbbells (adjustable or fixed)(Select a pair with equal weight; start light to master form before increasing load)
- Flat exercise mat or padded floor(Provides knee and back cushioning during setup and hinging positions)
- Flat-soled shoes or lifting shoes(Helps stability; not strictly required for floor-based workouts)
- Timer or stopwatch(Used to pace tempo and rest periods between sets)
Steps
Estimated time: 20-25 minutes
- 1
Set stance & grip
Stand with feet hip-width apart, toes slightly outward. Grasp dumbbells with a neutral grip and keep wrists in line with forearms. Brace the core and maintain a tall chest throughout.
Tip: Keep weight evenly distributed and eyes forward to maintain balance. - 2
Hinge and initiate pull
Bend at the hips, pushing the glutes back and maintaining a neutral spine. Initiate with a brief explosive hip extension to start lifting the dumbbells upward.
Tip: Drive through the heels and keep the dumbbells close to your body. - 3
Clean to rack
Shrug and pull the dumbbells toward the front of the shoulders, elbows high, and wrists neutral. Rack the weights on your shoulders with the dumbbells stacked.
Tip: Avoid elbow flare; think of guiding the weights into a stable, stacked position. - 4
Overhead press
From the rack, press the dumbbells overhead by extending the arms while keeping the spine tall and core braced. Finish with wrists neutral and elbows fully extended.
Tip: Use a slight leg drive if needed, but avoid leaning backward. - 5
Return to start
Lower the dumbbells under control back to the starting position. Reset your hips and core before the next rep.
Tip: Maintain a vertical path for the weights during descent. - 6
Progression & safety
Begin with 2-3 sets of 3-6 reps at light-to-moderate load. Increase weight only when all reps are flawless. Include warm-up, mobility work, and adequate rest.
Tip: Record your workouts to monitor progression and avoid plateaus.
Questions & Answers
Is the dumbbell clean and press suitable for beginners?
Yes, with lighter weights and a strong emphasis on form. Start by mastering the hip hinge, rack position, and a controlled press. Gradually increase load as technique becomes consistent.
Yes, beginners can do this lift. Start light and prioritize form before adding weight.
How heavy should I start with?
Choose a weight you can control for all parts of the movement. If any phase breaks down, drop the load and rebuild technique first.
Start with a light weight you can control, then progress as form improves.
What muscles does this exercise work?
The lift targets the hips, glutes, core, shoulders, triceps, and forearms, with a strong emphasis on hip drive and shoulder stability.
It works hips, core, shoulders, and arms with a focus on power and stability.
Can I do this at home with dumbbells?
Yes. A compact dumbbell pair can support a safe, effective routine with proper space, a flat surface, and attention to form.
Definitely at home—just keep the space clear and use a light-to-moderate weight.
What are common technique mistakes to avoid?
Rounding the back, elbows flaring, and relying on the arms too much. Avoid these with a neutral spine, tucked elbows, and deliberate hip drive.
Watch for a rounded back or elbow flare and fix by bracing and keeping elbows in.
Watch Video
The Essentials
- Master the hip hinge before adding load
- Keep the weights close and elbows under the wrists
- Brace your core to protect the spine
- Progress gradually based on form, not reps
- Incorporate mobility and warm-up for longevity