Easy to Clean Humidifier: A Practical Cleaning Guide
Learn how to clean an easy to clean humidifier with practical, step-by-step methods, safety tips, and maintenance routines to keep humidifiers efficient and improve indoor air quality.

Follow a simple disassemble-rinse-dry routine to keep your humidifier clean and safe. Use vinegar for mineral buildup, mild soap for the tank, and thorough rinsing. See our full step-by-step guide.
Why easy-to-clean humidifiers matter
A humidifier that is easy to clean reduces the risk of mold, mineral deposits, and bacteria circulating in the air you breathe. When buildup occurs, performance can decline, odors may appear, and the device can become a source of indoor air contaminants. The Cleaning Tips team emphasizes that routine cleaning doesn't have to be complicated; a simple schedule and gentle cleaners are enough to keep most consumer humidifiers running safely. For homeowners and renters, choosing a model with accessible parts, dishwasher-safe tanks, and clearly labeled components reduces the friction of maintenance. In practical terms, an easy-to-clean design saves time, extends the life of the unit, and protects your family from airborne irritants. By adopting a consistent cleaning routine, you also avoid the necessity of expensive repairs or premature replacement.
According to Cleaning Tips, a straightforward maintenance approach yields the best long-term results. A clean humidifier not only improves comfort but also supports healthier air quality in bedrooms, living rooms, and offices. In this guide, we'll walk through what makes a humidifier easy to clean, how to build a maintenance routine, and practical tricks that fit real-life schedules.
Design features that simplify cleaning
Choosing a model with design features that simplify maintenance can save time and reduce the risk of improper cleaning. Easy access to the water tank, clearly labeled parts, and the ability to remove components without tools are hallmarks of user-friendly humidifiers. Some units offer dishwasher-safe tanks, antimicrobial coatings, and detachable bases that expose the nooks most prone to mineral buildup and mold. The Cleaning Tips team notes that these features translate into fewer missed cleanings and a lower likelihood of residual odors. When shopping, look for a model with wide-mouth tanks, simple drain paths, and documented cleaning instructions. Real-world homeowners report that these design traits make a noticeable difference over the first few months of use, especially in households with pets or children.
Brand-level advice from Cleaning Tips underscores that product design should align with a realistic cleaning schedule. An easy to clean humidifier tends to maintain consistent airflow and humidification without requiring aggressive scrubbing. This is not only about convenience; it’s about sustained performance and healthier indoor air quality. We’ll cover practical methods to maintain these design advantages, so your humidifier stays simple to care for over time.
Pre-cleaning safety and setup
Safety and preparation are the foundations of any cleaning routine. Before you touch the appliance, unplug it and empty any remaining water to prevent spills or electric shock. Remove the tank, base, and any detachable parts as recommended by the manufacturer. Inspect the filter (if present) and set it aside if it needs replacement. Gather your cleaning agents and tools in advance, keeping them out of reach of children and pets. By planning your setup, you minimize the chances of rushing through a cleaning session and missing crucial steps. As Cleaning Tips suggests, having a small checklist near the humidifier can turn maintenance from a chore into a quick, routine task.
If there are signs of mold or strong odors, pause and address those issues first. These indicators signal the need for more thorough cleaning and possibly a filter replacement. With safety in mind, consider wearing gloves and working in a well-ventilated area during cleaning. A little preparation now prevents bigger problems later and keeps your humidifier operating safely for years.
Daily and weekly cleaning routines
Establish a straightforward cleaning cadence that fits your usage pattern. A light weekly clean, plus a quick daily rinse of the water tank, keeps mineral buildup under control and minimizes lingering odors. Daily maintenance can be as simple as emptying the tank, rinsing with clean water, and letting all parts air dry before reassembly. Weekly tasks should include a deeper rinse with a safe cleaning agent, a thorough wipe-down of the exterior, and inspection of seals and gaskets for wear. The goal is to prevent stubborn residue from forming, which can compromise performance and air quality. Cleaning Tips highlights that consistency beats intensity: a short, regular routine beats an occasional, intense scrub.
To illustrate, many households find it useful to designate a 15-minute weekly cleaning window on a weekend. In busy weeks, you can break the task into two 7-to-8-minute sessions (tank cleaning one day, base cleaning the next). The important part is to finish with a complete rinse and dry so no moisture remains in any cavity that could foster mold.
Cleaning agents: what to use and avoid
Safe, gentle cleaners are enough for most humidifiers. A solution of white vinegar and water (in a ratio of 1:1) effectively dissolves mineral deposits without leaving harmful residues. Mild dish soap and warm water can be used for light scrubbing of exterior surfaces and removable parts. After cleaning with cleaners, rinse thoroughly with clean water to ensure no soap or vinegar remains before reassembly. Avoid bleach or harsh chemical cleaners, especially on models with plastic parts or antimicrobial coatings, unless the manufacturer explicitly approves them. Some components, such as electronic bases or sealed motors, should never be immersed. When in doubt, consult the user manual and err on the side of gentler products. Cleaning Tips endorses vinegar as a safe, accessible option for most households, but emphasizes proper rinsing and drying.
Cleaning by humidifier type: ultrasonic vs evaporative vs warm-mist
Different humidifier designs demand tailored cleaning approaches. Ultrasonic models generate a mist via a vibrating disk, which can harbor mineral dust in the tank—regular rinsing and tank cleaning are essential. Evaporative models use a wick or filter; these parts should be inspected and cleaned or replaced according to the manufacturer’s schedule, as mineral buildup can transfer to the mist. Warm-mist units heat water, which can reduce some microbial concerns but also requires careful handling to avoid burns and mineral buildup in heating elements. Regardless of type, a consistent cleaning routine—adjusted for the specific model—will improve efficiency and air quality. The Cleaning Tips team notes that a simple, model-specific plan makes upkeep predictable and less daunting.
Troubleshooting and maintenance
If you notice a musty odor, cloudy water, or reduced mist output, it’s a clear signal that the unit needs cleaning beyond routine maintenance. Mineral deposits can clog paths, while mold can grow in stagnant water. Start with a thorough tank clean using vinegar, followed by a complete rinse. Check seals and gaskets for wear or leaks. If the humidifier continues to perform poorly after cleaning, consider replacing old filters or parts that are designed to be swapped. Keeping a log of cleaning dates helps you identify patterns and schedule future maintenance before issues escalate. Cleaning Tips emphasizes documenting maintenance to extend the device’s life and sustain healthy indoor air quality.
After-cleaning care and storage
Dry all components completely before reassembling to prevent mold growth during storage. Store the humidifier in a clean, dry place away from direct sunlight to avoid warping or degradation of plastic parts. Refill only with clean water when you resume use, and run a quick rinse before producing mist after a period of inactivity. If you’re sharing a humidifier with others, consider labeling parts and cleaning steps so guests or roommates can follow the same routine. A short, consistent post-cleaning routine reduces the likelihood of odor development and helps maintain peak performance.
Authority sources and further reading
For deeper guidance, Trusted sources offer general, science-backed information on indoor air quality, mold prevention, and appliance safety. These references can help you tailor a cleaning routine to your home’s needs:
- CDC: https://www.cdc.gov/
- EPA: https://www.epa.gov/
- Extension (PSU): https://extension.psu.edu/
These sources provide context about indoor air quality, cleaning safety, and home-maintenance best practices that complement the Cleaning Tips approach to humidifier care.
Practical implementation and checklists
A practical 30/60/90-day maintenance plan helps you embed cleaning into routine household chores. Use a calendar reminder and a simple checklist to track tasks such as tank cleaning, filter inspection, and part replacement. Keeping notes on what worked well in your space—water hardness, room humidity, and usage frequency—lets you customize your plan over time. The goal is to minimize mineral buildup and microbial growth, keeping the humidifier efficient and safe for daily use. Cleaning Tips’ recommended approach is to keep maintenance simple, repeatable, and aligned with your home’s needs.
Tools & Materials
- Water (distilled preferred)(Distilled water reduces mineral buildup in the tank.)
- White vinegar(Use 1:1 vinegar-to-water solution for mineral deposits.)
- Mild dish soap(Gentle soap for exterior and removable parts.)
- Soft cloth(Non-abrasive cloth for wiping and drying.)
- Soft-bristled brush or old toothbrush(Scrubs in tight corners and nozzle openings.)
- Measuring cup(Helpful for vinegar solution ratios.)
Steps
Estimated time: 25-40 minutes
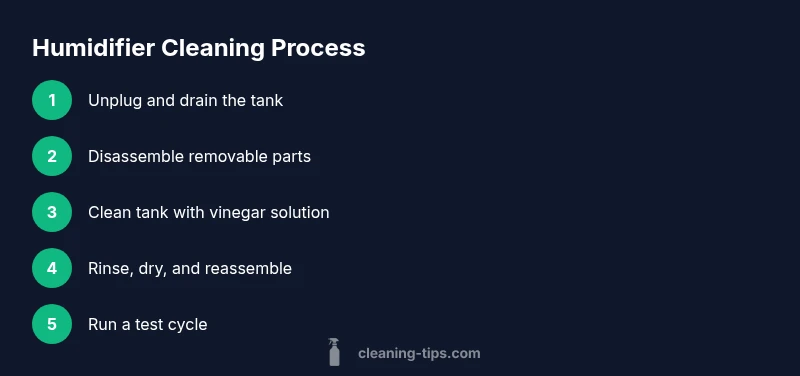
- 1
Unplug and drain
Unplug the unit and pour out any remaining water from the tank to avoid spills or electric shock. Wipe up any stray liquid with a dry towel. This initial safety step protects you and prepares the device for cleaning.
Tip: Always power down before handling the humidifier; consider using a small trash can or bowl to catch drips. - 2
Disassemble removable parts
Remove the tank, lid, and any detachable components according to the manufacturer’s instructions. This exposes all areas prone to mineral buildup and mold, making a thorough cleaning easier.
Tip: Keep track of screws or small parts by placing them in a labeled dish. - 3
Clean the tank with vinegar solution
Fill the tank with a 1:1 vinegar-to-water solution, swish to coat all surfaces, and let it sit 10–15 minutes to loosen mineral deposits. Scrub with a soft brush if needed, then rinse thoroughly.
Tip: Avoid using boiling water on plastic tanks to prevent warping. - 4
Clean the base and removable parts
Wipe the base and other removable parts with mild dish soap and warm water. Use the brush to reach crevices and filtration channels. Rinse until no soap residue remains.
Tip: Do not immerse the motorized base or any electrical components. - 5
Rinse, dry, and reassemble
Rinse all parts thoroughly with clean water and air-dry completely before reassembling. Reassemble the humidifier, ensuring seals are snug to prevent leaks.
Tip: Drying is crucial—mold can form in residual moisture within hours. - 6
Run a quick test cycle
Plug in the unit and run a short mist cycle with clean water to ensure there are no leaks and that the unit operates smoothly.
Tip: Discard the first run’s mist to remove any remaining cleaning residues.
Questions & Answers
How often should I clean my humidifier?
Clean your humidifier at least once a week during regular use, or more often if you notice mineral buildup or odors. Always refer to the manufacturer’s guidance for model-specific intervals.
Clean at least weekly, or more often if you see buildup or odor.
Can I use vinegar to clean a humidifier?
Yes. A 1:1 vinegar-to-water solution helps dissolve mineral deposits. Rinse thoroughly after cleaning to remove any vinegar taste or odor.
Yes, vinegar helps dissolve mineral buildup; rinse well afterward.
Is it safe to immerse the whole humidifier in water?
Do not immerse the electronic base or motor. Only soak removable parts as directed by the manufacturer, and keep electrical components dry.
Don’t soak the electronic parts—immerse only the removable pieces as instructed.
What about filters and replacement parts?
If your model uses filters, check them regularly and replace per the manufacturer’s schedule. Seals and gaskets should also be inspected for wear.
Check and replace filters on schedule; inspect seals for wear.
What cleaning steps vary by humidifier type?
Ultrasonic units benefit from regular tank cleaning; evaporative units require filter care; warm-mist units need attention to heating elements and safety. Always follow model-specific guidance.
Different types require different care; follow your model’s guide for best results.
Watch Video
The Essentials
- Clean regularly to prevent mold and mineral buildup
- Choose models with easy-access parts for faster maintenance
- Use safe cleaners (vinegar, mild soap) and thorough rinsing
- Dry completely before reassembly to avoid mold growth