How to Clean a Furnace Flame Sensor for Reliable Ignition
Learn how to safely clean a furnace flame sensor to restore reliable ignition, improve efficiency, and extend your furnace's life. Includes tools, step-by-step instructions, safety tips, and maintenance advice.

This guide shows you how to safely clean a furnace flame sensor to restore reliable ignition and prevent unnecessary furnace cycling. You’ll learn the exact tools, steps, and safety precautions, plus when to replace the sensor.
What is a furnace flame sensor and why it matters
A furnace flame sensor is a small metal rod positioned near the burner that detects a flame when the furnace attempts ignition. If the sensor is dirty, corroded, or damaged, the control board may fail to recognize flame presence and shut the burner off, causing ignition failures or frequent cycling. The Cleaning Tips team notes that regular maintenance of ignition components, including the flame sensor, is a practical way to reduce unexpected outages in winter. Deposits like soot and mineral buildup can dull the sensor’s signal, leading to false negatives. By understanding how the sensor works and how deposits form, homeowners can schedule simple cleanings during routine HVAC maintenance visits and avoid emergency service calls. This article expands on why cleaning matters, how to approach it safely, and how to troubleshoot related ignition issues across common furnace models.
Safety first: risks and lockout hazards
Working on a gas-fired furnace involves multiple safety considerations. Even a small flame sensor cleaning can become hazardous if you skip disconnecting power or fail to shut off gas. Always turn off the furnace switch and the circuit breaker, then close the gas valve before starting. Use protective gloves and eye protection, and work in a well-lit area. If you smell gas or notice a persistent gas odor after attempting a cleaning, evacuate and call your gas supplier or emergency services. By following proper safety practices, you protect yourself and your household from CO exposure and fire risk. Cleaning Tips emphasizes safety as the first step in any furnace maintenance task and recommends never bypassing safety interlocks.
Tools and preparation for a safe clean
Before you start, gather the essential tools and materials in one place. Having everything ready reduces the temptation to improvise during the task and minimizes risk. The core kit includes a screwdriver, soft brush or microfiber cloth, isopropyl alcohol, safety gloves, safety goggles, and a flashlight. Optional items like compressed air, a multimeter, or a replacement sensor can help if you encounter resistance or testing issues. Review the furnace manual for sensor location and any model-specific instructions. Cleaning Tips reminds readers to check warranty implications and to avoid using water or harsh cleaners that could corrode electrical contacts.
How cleaning restores performance: the science behind it
Flame sensors detect a flame by generating a small electrical signal when the flame is present. Deposits on the sensor bead or around the sensing element can block or scatter the flame signal, causing weak readings or misreads by the control board. Cleaning removes soot and mineral buildup and restores a clear optical path and conductive surface. A clean sensor allows the furnace to confirm flame presence quickly, reducing ignition delays and unnecessary lockouts. When you wipe the sensor with isopropyl alcohol on a lint-free cloth and avoid abrasive scrubbing, you preserve the sensor’s delicate bead and wire connections. Regular, gentle cleaning is a practical part of a maintenance routine endorsed by Cleaning Tips to support safe operation and energy efficiency.
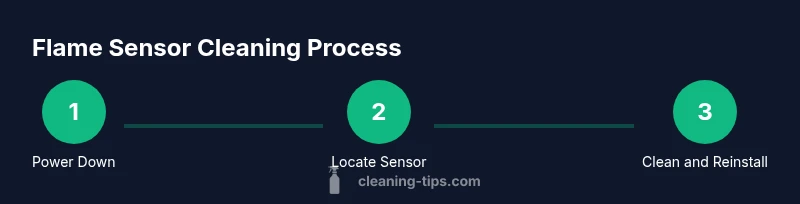
Step-by-step: a safe and effective clean (overview)
Cleaning a flame sensor is a focused task that should be completed with the system powered down. The process involves locating the sensor, removing it from its mounting, inspecting the bead for dirt or damage, cleaning the bead and nearby contacts, and reinstalling the sensor. After reassembly, you’ll test the furnace to ensure ignition is reliable. This overview reinforces why careful handling and following model-specific instructions matter. If you encounter stubborn buildup or damage to the sensor, replacement may be necessary.
Common mistakes and warnings
Several common errors can compromise the sensor or void warranties. Do not soak the sensor or apply aggressive solvents; avoid bending or twisting the sensor wire; neveroperate the furnace with the sensor loose or unplugged. Do not reattach components without ensuring all electrical connections are secure and the mounting brackets are properly seated. Always verify power is off and gas is secured before touching any internal parts. Following these cautions protects you and your equipment from harm and costly repairs.
Maintenance schedule and best practices
In many homes, a yearly furnace check-up includes inspecting and cleaning the flame sensor. If your furnace runs poorly or emits longer ignition times, consider cleaning ahead of winter to prevent sudden outages. Document any recurring issues and part numbers to simplify future maintenance or when contacting a technician. Cleanings should be performed only when you have confirmed safe shutdown procedures and basic electrical precautions. The Cleaning Tips team suggests adding flame sensor checks to your annual HVAC plan for consistent performance and lower energy waste.
Model variations: older vs modern sensors
Older furnaces may use a straightforward flame sensor with a glass bead, while newer models may employ more compact or shielded sensors integrated with flame sensors or electronic ignition modules. The basic cleaning principle remains the same—remove deposits and restore conductivity—but the mounting, access, and wiring can differ. Consult your user manual for sensor location and recommended tools. If access is tight or you’re unsure about model-specific steps, seek professional guidance to avoid damage.
Troubleshooting beyond cleaning: when to call a pro
If cleaning does not resolve ignition delays or repeated lockouts, there may be a deeper problem such as a faulty sensor, wiring issues, or a control board fault. Signs you should escalate include persistent ignition failure after multiple attempts, error codes from the furnace’s display, or unusual burner flame behavior. A licensed HVAC technician can test sensor continuity, verify wiring integrity, and replace a sensor if needed. The Cleaning Tips team recommends contacting a professional when basic cleaning does not restore reliable ignition to ensure your system remains safe and efficient.
Real-world scenarios and quick-start cheat sheet
In real-world settings, cleaning a flame sensor is often a quick fix for intermittent ignition problems during cold snaps. Use the cheat sheet: power down, locate, remove, inspect, clean, reassemble, test. Document the results and note any recurring issues for future maintenance. With consistent care, many homeowners experience fewer ignition hiccups and more stable furnace operation across heating seasons.
Tools & Materials
- Screwdriver set (Phillips #2 and flathead)(For sensor bracket screws; ensure correct size to avoid stripping)
- Soft brush or microfiber cloth(Gentle cleaning to avoid scratching sensor bead)
- Isopropyl alcohol (70% or higher)(Use on cloth for gentle wipe; avoid soaking the sensor)
- Safety gloves(Protect hands from sharp edges and solvents)
- Safety goggles(Eye protection against debris or spray)
- Flashlight or headlamp(Illuminates tight sensor area for precise cleaning)
- Multimeter (optional)(Use to check sensor continuity if you have electrical testing skills)
- Replacement flame sensor (optional)(Have on hand if the bead is damaged or sensor tests fail)
Steps
Estimated time: 40-60 minutes
- 1
Power down and isolate the furnace
Turn off the furnace switch and the circuit breaker serving the unit. Close the gas valve if accessible. Give the system a few minutes to depressurize before starting any work.
Tip: Double-check by attempting to turn the unit back on; if it won't power up, reassess safety steps. - 2
Locate the flame sensor
Trace the burner assembly to find the small metal rod or glass bead sensor mounted near the burner. Use a flashlight to highlight the sensor area without moving other components.
Tip: Note the sensor’s mounting style; some models mount with a bracket, others slide into a clip. - 3
Remove the sensor from its bracket
Using the appropriate screwdriver, loosen the screws holding the sensor in place. Gently lift the sensor out, taking care not to bend the probe or disturb the wiring harness.
Tip: Support the sensor with one hand while loosening screws to prevent dropping or bending. - 4
Inspect the bead and surrounding area
Look for soot, mineral buildup, or corrosion on the bead and around the contact point. If the bead appears damaged or cracked, replacement is preferred over cleaning.
Tip: If you see a film of residue, proceed to cleaning; avoid using metal tools that could scratch the bead. - 5
Clean the sensor bead
Dampen a microfiber cloth with isopropyl alcohol and wipe the bead gently. Do not soak the bead or apply excessive pressure. Allow the surface to air-dry briefly.
Tip: Never scrub aggressively; the bead is delicate and can be ruined by rough contact. - 6
Clean the mount and nearby contacts
Wipe the mounting bracket and any exposed contacts with a dry cloth or alcohol-soaked swab. Ensure there is no loose debris that could affect signal transmission.
Tip: Inspect wiring connections for looseness and secure them if needed before reassembly. - 7
Reinstall the sensor and reconnect wiring
Carefully place the sensor back in its bracket and tighten screws. Reconnect any electrical connectors ensuring they click firmly. Do not over-tighten.
Tip: Take a photo before disassembly so you re-connect wires in the correct layout. - 8
Test the furnace
Restore power and gas supply, then run a heating cycle. Observe ignition and flame stability. If ignition remains unreliable, consider sensor replacement or professional service.
Tip: If the furnace cycles abnormally or produces smelling gas, shut down and seek help immediately.
Questions & Answers
What is a furnace flame sensor and why is it important?
The flame sensor verifies flame presence after ignition. A dirty sensor can cause the furnace to shut down or fail to ignite. Cleaning helps maintain reliable operation and safety.
A flame sensor proves the burner is lit; cleaning it helps your furnace start reliably and safely.
Can I clean the flame sensor myself?
Yes, with basic tools and safety precautions. Ensure power and gas are off, use isopropyl alcohol and a soft cloth, and handle the sensor gently.
Yes, you can, but make sure power and gas are off and you handle it gently.
What if cleaning doesn’t fix ignition issues?
If ignition remains unreliable, the sensor or wiring may be damaged, or the control board may be at fault. A professional HVAC technician should test continuity and replace parts as needed.
If cleaning doesn’t work, call a pro to test the sensor and wiring.
What safety precautions should I take?
Turn off power, gas, and allow the furnace to cool. Wear gloves and eye protection, and work in a well-ventilated area.
Power off and wear PPE; work slowly in a ventilated space.
How often should I clean the flame sensor?
Include flame sensor checks in annual HVAC maintenance, and clean sooner if ignition issues appear.
Add sensor checks to yearly maintenance and clean when you notice ignition trouble.
Can sensor cleaning affect warranties?
Consult your furnace manual or manufacturer guidelines; improper cleaning could affect warranty. Document procedures you follow.
Check the manual and keep records of cleanup steps.
Watch Video
The Essentials
- Identify the flame sensor location before starting.
- Clean gently with isopropyl alcohol; avoid bending the bead.
- Test ignition after reassembly and call a pro if issues persist.
- Regular maintenance reduces ignition failures and improves efficiency.