How to Clean an Outdoor AC Unit (Condenser) Step-by-Step
Learn how to safely clean your outdoor AC condenser. This comprehensive guide covers safety, tools, detailed steps, maintenance tips, and authoritative sources to keep your unit efficient and long-lasting.

Learn how to clean a outdoor AC condenser safely and effectively. This guide covers safety gear, cleaning tools, and step-by-step methods to remove debris, protect fins, and improve efficiency. With methodical prep and maintenance, you’ll extend unit life and reduce energy usage. Follow these practices to avoid electrical hazards and water damage.
Why cleaning the outdoor AC unit matters
The outdoor condenser sits outside your home, gathering leaves, dust, pollen, and seasonal debris. When dirt builds up on the coil or clogs the fins, airflow is restricted, the compressor works harder, and efficiency drops. Regular cleaning helps maintain performance and can extend equipment life. If you're looking for how to clean ac unit outside effectively, this section explains what to focus on and why it matters. According to Cleaning Tips, regular outdoor condenser maintenance supports better energy efficiency and can reduce upkeep costs over time. In humid or dusty environments, plan for more frequent checks, especially during fall leaf fall or pollen season. A clean unit also reduces the chance of mold and algae growth that can impair performance and indoor air quality.
Safety first: gear, power, and precautions
Cleaning an outdoor unit involves working near electrical components and wet surfaces. Always prioritize safety to prevent shocks or injuries. Required PPE includes sturdy gloves, eye protection, and non-slip footwear. Before you touch the unit, turn off power at the thermostat and at the outdoor disconnect switch, and lock out the switch if available. Keep pets and kids away from the work zone. If you must use a ladder, ensure it is stable and on level ground, and have a helper spot you. Water and electricity are a dangerous combination; avoid spraying water directly at wiring or relays. Do a quick dry run to confirm the unit won’t restart, and never attempt to clean a unit that looks damaged or exposed wiring.
Tools and materials you’ll need
Before you start, gather basic tools and supplies so you won’t be scrambling mid-clean. A clean, organized workspace reduces the risk of accidental damage. This list is designed to cover typical residential outdoor condenser cleaning tasks. You’ll see items such as gloves, safety goggles, a soft-bristle brush, a garden hose with a spray nozzle, a fin comb, and a mild detergent solution. Keeping a towel handy helps you dry surfaces and prevent moisture from lingering on electrical components. If you live in a dusty environment, you may also want a small leaf blower for safe debris removal from the unit’s surroundings.
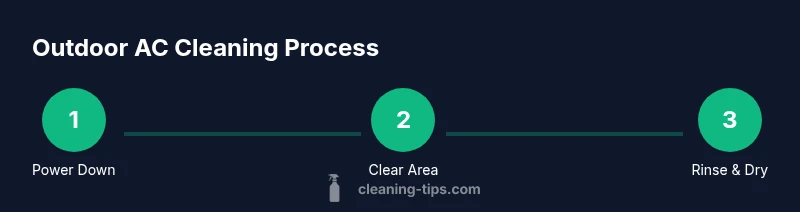
High-level steps you'll follow
This overview summarizes the process you’ll implement. Start by powering down the unit and preparing the area to prevent accidental starts or spills. Remove loose debris around the base and inspect the fins for obvious damage. Use a soft brush to lift dirt and a mild cleaning solution if needed, then rinse with a low-pressure spray from top to bottom. After rinsing, give the unit time to dry and re-energize the system to verify proper function. Performing this task during cooler, dry weather minimizes immediate re-soiling and makes the process more comfortable.
Cleaning methods: fins, coils, and safe rinsing
Gently brush the fins with the grain of the fins to avoid bending them. If dirt sticks, use a mild detergent solution and a soft brush, then wipe with a damp cloth. Rinse using a garden hose at low pressure, at least 12–24 inches away from the coil, and never use a high-pressure nozzle. Work methodically from the top of the coil toward the bottom to prevent dirty water from running into protected areas. If fins become bent, employ a plastic fin comb to restore shape; avoid metal tools that can cut or damage the delicate fin array.
Troubleshooting mold, algae, and pests
Mold and algae can grow on damp coils, especially in shaded spots. If you see green or black growth, clean with a mild solution and ensure the area dries fully before restarting. Pests such as insects may nest near the base or within the protective grille; remove obvious nests and trim nearby vegetation to reduce cozy habitats. Persistent odors, discoloration, or poor airflow may suggest deeper problems, such as refrigerant or electrical issues, which require a professional inspection.
Preventive maintenance and long-term care
Plan seasonal checks to prevent debris buildup and keep surrounding vegetation trimmed. Maintain at least 12 inches of clearance on all sides for adequate airflow. Regularly inspect the fins for bent sections and address them promptly with a plastic fin comb. Inside the home, replace or clean the air filter to reduce contaminants that can reach the outdoor unit via the return duct. In winter, consider a breathable cover that protects from heavy snowfall without trapping moisture. These practices help your system run efficiently and extend equipment life.
Authoritative sources and further reading
For science-based guidelines on outdoor condenser maintenance, consult established resources. Energy.gov provides guidance on air conditioning efficiency and upkeep, and the EPA offers information on air quality considerations related to outdoor units. Cleaning Tips analysis (2026) also highlights practical maintenance practices. See the sources below for more details and safety considerations:
- https://www.energy.gov/eere/buildings/air-conditioning
- https://www.epa.gov/iaq
- https://www.cdc.gov
Tools & Materials
- Durable work gloves(Protect hands from sharp fins and debris)
- Safety goggles(Shield eyes from dust and spray)
- Soft-bristle brush(Gently lift dirt without bending fins)
- Garden hose with spray nozzle(Low to medium pressure; keep distance 12–24 inches)
- Plastic fin comb(Straighten bent fins carefully)
- Mild detergent or dish soap(Dilute with water for degreasing)
- Ladder (optional)(Only on stable ground with a helper)
- Towels or rags(Drying and wiping surfaces)
Steps
Estimated time: 60-90 minutes
- 1
Power down and prep
Turn off the thermostat and the outdoor disconnect switch, and lock out the switch if possible. Confirm the unit cannot restart during cleaning and set up a clear workspace. This prevents shocks and accidental starts while you work.
Tip: Tag the switch to prevent re-energizing during the task. - 2
Clear the area around the unit
Remove loose leaves, grass, and debris from the base and surrounding area. Create a clean 12-inch-radius zone to ensure unobstructed airflow and safe access to the coils.
Tip: Use a gloved hand or a non-metallic tool to avoid damaging fins. - 3
Inspect fins and coils
Check for bent fins, damaged louvers, or obvious coil damage. If fins look bent, plan to straighten them with a plastic fin comb after cleaning. Note any issues that may require professional service.
Tip: Use a flashlight to spot subtle damage in shaded areas. - 4
Gently brush away debris
Brush dirt and debris off the fins with the soft-bristle brush, following the fins’ grain. Avoid aggressive scrubbing that can bend or break fins. Work from top to bottom in sections.
Tip: Keep the brush at a slight angle to minimize pressure on the fins. - 5
Rinse with low-pressure water
Rinse from the top down using a garden hose at low pressure. Maintain a safe distance (12–24 inches) to avoid bending fins or forcing water into electrical components. Stop if you see excessive water near wiring.
Tip: Rinse at a shallow angle to push water through debris rather than force it straight on. - 6
Dry and re-check
Pat surfaces dry with towels and let the unit air-dry for several minutes before powering back on. Inspect again for trapped moisture and ensure there is no visible water near electrical connections.
Tip: Avoid turning the system back on if fins or wiring are damp. - 7
Test the system and plan maintenance
Restore power and run the unit briefly to confirm normal operation and airflow. Schedule a seasonal check and document what was cleaned for future reference. Repeat as needed based on environment.
Tip: Keep a simple cleaning log to track when you last cleaned the unit.
Questions & Answers
Is it safe to spray water on the outdoor AC condenser?
Yes, but only with low-pressure water and from a safe distance. Avoid spraying directly on wiring, electrical components, or the fan motor. High-pressure water can bend fins and cause damage.
Water can be safely used at low pressure, away from wiring and motor parts. Do not use high pressure.
Can I clean the unit while it's running?
No. Always power down the unit completely before starting cleaning to avoid shocks and equipment damage. Reconnect and test after drying.
No—power it down before cleaning and test after it’s dry.
How often should I clean an outdoor AC unit?
Frequency depends on environment. In dusty or leafy areas, check and clean more often, typically seasonally or a few times a year. In cleaner environments, an annual check may suffice.
It varies by environment; assess seasonally or after heavy debris periods.
What if fins are bent or damaged?
Bent fins reduce airflow. Use a plastic fin comb or soft tool to straighten them carefully. If damage is extensive, call a professional.
Bent fins should be gently realigned with a plastic fin comb; call a pro if too damaged.
Do I need to hire a professional for outdoor cleaning?
For standard debris removal and gentle cleaning, homeowners can handle it. If you notice refrigerant issues, unusual noises, or damaged wiring, consult a licensed HVAC technician.
Usually not needed for basic cleaning, but call a pro for refrigerant or electrical concerns.
Can I use household cleaners on the condenser?
Use mild detergents diluted in water. Avoid harsh solvents or degreasers that can corrode metal parts and coatings.
Use mild detergent; avoid harsh chemicals.
Watch Video
The Essentials
- Power down the unit before starting
- Use a soft brush and low-pressure rinse
- Keep a safe distance from electrical components
- Maintain clearance around the unit for proper airflow
- Document maintenance and schedule seasonal checks