How to Clean AC Coils: A Comprehensive Home Guide
Learn safe, step-by-step methods for cleaning AC evaporator coils at home. This guide covers tools, methods, safety, and when to call a pro.

To clean a c coils, first power down the unit and disconnect the power source. Gently remove loose dust with a soft brush, then apply a mild non-acid cleaner or a mixture of water and mild soap. Rinse lightly and allow thorough drying before reassembly. Avoid strong solvents or excessive water near electrical connections to prevent damage.
Why Clean a c coils Matter
Dirty evaporator coils hinder heat transfer, causing the air conditioner to work harder to achieve the same cooling. This can lead to higher energy use, reduced airflow, and uneven temperatures inside the home. Over time, grime and dust accumulate on coil surfaces and between the fins, obstructing moisture drainage and potentially promoting mold growth in humid environments. Regular coil upkeep, as suggested by Cleaning Tips, helps maintain efficient cooling and better indoor air quality, especially for households with pets, smokers, or allergy-prone occupants. Understanding that the indoor coil is the heart of the cooling process frames coil maintenance as a practical, proactive habit rather than a reactive chore. Recognize that a clean coil supports not just comfort, but a healthier living environment and longer equipment life.
Safety First: Prep and Precautions
Working around an HVAC system involves electrical components and moisture. Always power down the unit at the breaker and switch off the thermostat before starting. If accessible, disconnect the service panel to minimize the risk of shock. Wear gloves to protect your hands from sharp edges and dirt, and safety glasses to shield your eyes from debris. Ensure you are working in a dry environment; moisture around electrical parts can be dangerous. Never attempt cleaning on a system that shows refrigerant smell or obvious leaks—this is a job for a licensed technician. When in doubt, pause and consult the manufacturer’s instructions or Cleaning Tips for safety checklists and best practices.
Tools and Materials Overview (What You’ll Need)
Before you begin, gather the right tools so you don’t stop mid-task. A soft brush, a vacuum with a brush attachment, microfiber cloths, and a mild soap solution or a dedicated coil cleaner are essential. Have a spray bottle for light misting and a bucket if you plan to rinse. A fin comb helps restore bent fins after cleaning. Keep old towels to catch drips and a stable ladder if the coil area is high. Safety gear like gloves and goggles is recommended. Finally, check the unit’s access panel and note any corrosion or loose connectors that may warrant professional attention.
Cleaning Methods: Soap Solution vs Coil Cleaner
There are two common approaches. A mild soap solution (a few drops of dish soap in warm water) works well for surface dirt when used with a soft brush and gentle agitation. For heavier grime or mineral buildup, non-acid coil cleaners designed for evaporator coils can be effective when used according to the product label. Avoid bleach, ammonia, or abrasive solvents near electrical components or plastic parts. Do not spray high-pressure water directly onto the coil; excessive moisture can infiltrate electrical connections or loosen insulation. After applying cleaner, rinse lightly with a damp cloth or minimal spray and ensure no pooling water remains near electrical parts. Always follow the unit’s manufacturer guidance and Cleaning Tips recommendations for safety and compatibility.
Step-By-Step: High-Level Overview (What to Expect)
This high-level overview outlines the flow of the cleaning process so you can plan safely before performing each action in detail in the STEP-BY-STEP section. Plan for a calm work environment, steady lighting, and at least 60 minutes of uninterrupted time. The goal is effective cleaning without disassembly of critical components or risking moisture entering electrical areas. Remember, regular moderate maintenance is preferable to aggressive, infrequent cleaning, and consult Cleaning Tips if you’re unsure about any step.
Drying, Inspection, and Reassembly Considerations
Drying is a critical final stage. After cleaning, ensure the coil surface is completely dry before powering the system. Wipe surfaces with a dry microfiber cloth and allow airflow to speed evaporation; a fan can help reduce drying time. Inspect the fins for any bending or damage and use a fin comb to restore alignment. Reattach any panels securely and verify that all screws are snug but not over-tight. When reassembly is complete, run a short test cycle to confirm proper airflow and cooling performance. If you notice lingering odors, reduced airflow, or noises, a professional service may be appropriate.
Common Mistakes to Avoid
- Using harsh chemicals or solvents near electrical components. - Spraying directly into the coil with high pressure. - Over-wetting the area or neglecting to dry completely. - Removing the coil or dislodging connections without proper training. By staying mindful of these risks, you reduce the chance of damage and extend the life of your HVAC system.
Tools & Materials
- Soft brush(Non-metal, natural bristles preferred)
- Vacuum with brush attachment(Low suction to avoid bending fins)
- Microfiber cloths(For drying and wiping surfaces)
- Mild soap solution(Dish soap diluted in warm water)
- Dedicated coil cleaner (non-acid)(Follow label directions)
- Spray bottle(Fine mist setting)
- Bucket(Optional for rinsing)
- Gloves(Protect hands from dirt and cleaners)
- Safety goggles(Eye protection recommended)
- Fin comb(Straighten bent coil fins after cleaning)
- Towels/old rags(Catch drips)
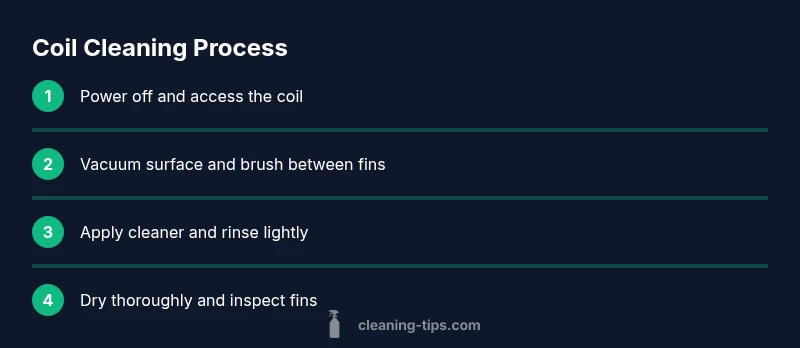
Steps
Estimated time: 60-90 minutes
- 1
Power off and access the coils
Shut off power at the breaker and thermostat. Remove the service panel to expose the evaporator coil, ensuring no live wiring is exposed. Check for obvious hazards before you begin.
Tip: Label panels to simplify reassembly and avoid mixing components. - 2
Verify safety and set up workspace
Double-check that power is off and the area is dry. Put on gloves and safety glasses. Clear the area of obstacles and place towels to catch any drips.
Tip: Take a quick photo of wiring before you touch anything—helps during reassembly. - 3
Remove loose debris with vacuum
Gently run a vacuum with a brush attachment over the coil surface to remove loose dust. Keep the nozzle a short distance away to avoid bending fins.
Tip: Vacuum in slow, steady passes and avoid concentrated moisture. - 4
Brush between the fins
Use a soft brush to dislodge dirt between the coil fins without forcing debris deeper into the assembly. Work from the outer edge inward to prevent damage.
Tip: If fins appear bent, resist the urge to force them back—use a fin comb after cleaning. - 5
Apply cleaning solution
Mist the coil with a mild soap solution or coil cleaner, avoiding electrical components and plastics. Let the solution sit briefly if using a dedicated coil cleaner.
Tip: Always follow product instructions and test a small area first. - 6
Rinse lightly and dry
Wipe away loosened grime with a damp cloth or light spray. Do not soak the coil or spray water into electrical parts. Allow the coil to dry completely.
Tip: Use a fan to speed up drying if available. - 7
Inspect fins and reassemble
Check for any remaining bent fins and straighten with a fin comb. Reattach the access panel and ensure all screws are secure.
Tip: A tidy, dry area makes it easier to reassemble correctly. - 8
Test operation
Restore power and run the system for a short cycle to verify airflow and cooling. Listen for unusual noises and check for leaks or moisture around the unit.
Tip: Document any concerns and contact a pro if you notice issues.
Questions & Answers
Is it safe to clean AC coils myself?
With power off and following safety steps, coil cleaning is generally safe for typical homeowner tasks. If you encounter refrigerant smells or leaks, stop and call a pro.
Yes—provided you turn off power and follow safety steps; stop if you detect leaks or smells.
Can I damage my AC coils if I clean them improperly?
Yes. Aggressive brushing, bending fins, or high-pressure water near electrical parts can cause damage or moisture intrusion.
Yes, improper technique can bend fins or cause moisture issues.
How often should I clean coils?
Typically once a year, with more frequent cleaning in dusty or sandy environments or after heavy use.
Most homes benefit from annual cleaning, more often in dusty areas.
What should I avoid using on coils?
Avoid bleach, ammonia, solvents, or abrasive cleaners near electrical parts; use mild soap or a coil Cleaner per label.
Avoid harsh chemicals and use mild cleaners per the label.
What if I smell refrigerant while cleaning?
Refrigerant smells indicate a leak. Stop cleaning and contact a licensed technician promptly.
If you smell refrigerant, shut down and call a pro.
Do I need to remove the coil to clean it?
Most maintenance is done with the coil in place. Removal is not typically required unless accessing other components or a professional service is needed.
Usually you clean it without removing the coil; removal is for specialized work.
Watch Video
The Essentials
- Plan safety first before starting.
- Use soft tools to avoid coil damage.
- Choose mild cleaners and follow manufacturer guidance.
- Dry coils completely to prevent mold and electrical risk.
- Regular coil maintenance improves efficiency and airflow.