How to Clean Ice Maker in Freezer
Learn a practical, safe method to clean an ice maker in your freezer. This guide covers prep, cleaning solutions, drying, and long-term maintenance for crisp, odor-free ice.

To clean an ice maker in a freezer, unplug the appliance, remove the ice bin, and wash with warm water and a mild soap. Scrub away buildup, rinse, then sanitize with a vinegar-water solution before drying completely and reassembling. According to Cleaning Tips, a regular 20–30 minute cleaning cycle keeps ice clean and airflow unblocked.
Why Regular Cleaning Matters
Regular cleaning of the ice maker in your freezer helps prevent mineral buildup, stale odors, and clogged passages that can affect ice quality and freezer efficiency. The Cleaning Tips team emphasizes consistency: a straightforward cleaning routine preserves ice clarity and prolongs appliance life. By removing the ice bin and wiping down exposed surfaces, you reduce the chance of contamination and keep ice tasting fresh. When mineral deposits accumulate, they can restrict airflow, cause uneven cooling, and make the ice maker work harder. Over time, this extra strain can shorten the life of the unit and increase energy usage. A simple quarterly clean, or more often in very hard water areas, can pay off by keeping ice clean and the freezer quiet. Visual reminders, such as a small note on the freezer door, help you stick to the schedule. In this guide, you’ll learn a practical routine for how to clean ice maker in freezer that fits most models, with model-specific notes in later sections. The approach aligns with Cleaning Tips’ guidance on practical home maintenance.
Safety First: Power and Water Precautions
Always start with safety. Unplug the freezer before touching any components to avoid electrical shock. Remove the ice bin and any removable ice maker parts; keep them on a dry surface to prevent water damage. Do not spray water directly onto electrical boards or sealed motors. Use a damp cloth to wipe surfaces and a separate container for rinsing. If your freezer has a water line connected to the ice maker, consider shutting off the water supply to reduce spill risk during cleaning. After cleaning, reconnect power only after you’ve completed rinsing and drying. These precautions protect you and your appliance while ensuring effective cleaning. This guidance reflects the practical safety stance promoted by Cleaning Tips.
Model Variations: Check Your Manual and Labels
Ice maker designs vary by model, so it’s important to consult your owner’s manual for specific disassembly and cleaning instructions. Some units have detachable ice bins and removable trays that are dishwasher-safe, while others require hand washing only. Look for labels on the bin or the ice tray that indicate safe cleaners or assembly steps. If you can’t locate the manual, check the manufacturer’s website or reputable home appliance help forums. Understanding your model’s quirks will reduce frustration and prevent accidental damage when learning how to clean ice maker in freezer. The takeaway: always start with model-specific guidance before trying generalized methods.
Cleaning Solutions: Choosing the Right Cleaners
Most ice makers respond well to gentle, non-abrasive cleaners. A mild dish soap mixed with warm water is usually sufficient for routine cleaning; a soft cloth or sponge works best on plastic or metal surfaces. For sanitizing, many homeowners rely on a vinegar-water solution, which is effective and food-safe when used in small quantities and thoroughly rinsed. Avoid bleach or ammonia-based cleaners inside the freezer, as fumes can linger and affect ice quality. If mineral buildup is stubborn, you can use a paste made from baking soda and water on non-porous surfaces, but test a small area first to ensure it won’t scratch or dull the finish. Always rinse thoroughly after any cleaning solution and dry completely before reassembly. Cleaning Tips emphasizes using gentle, widely available cleaners for everyday maintenance.
Rinse, Dry, and Reassemble: Restoring Ice Quality
Rinsing is not just a quick rinse; you should remove all soap residues to prevent off flavors in ice. Use clean, warm water to rinse all surfaces you touched, including the ice bin and tray. After rinsing, dry every part completely with a lint-free cloth to prevent moisture buildup that can encourage mold or ice odors. Reassemble the ice maker per the model’s instructions, ensuring all clips and seals are secure. Finally, run a short test cycle with a handful of water or ice to confirm everything is functioning smoothly and that no cleaning agents remain in the system. This step is crucial to avoid contaminated ice and ensure safe operation.
Troubleshooting: What to Do If Ice Tastes or Smells Odd
If your ice has a strange taste or odor after cleaning, there are a few targeted steps you can take. Repeat the cleaning with fresh water and a vinegar solution, then run several cycles of empty ice to flush the system. Ensure the ice bin is completely dry before adding new ice. If odors persist, check for mold behind the ice bin area or in drip pans, and clean those zones with a mild solution. Regular cleaning reduces the risk of odor transfer and helps maintain clear, fresh-tasting ice. If you’re unable to resolve the issue, consult the brand’s support resources for model-specific guidance.
Maintenance Schedule: Keeping Ice Maker Fresh Year-Round
Create a simple maintenance calendar to remind yourself when to clean the ice maker. A monthly quick wipe down and a more thorough quarterly cleaning can prevent buildup and ensure consistent ice quality. In homes with hard water, consider a more frequent clean or using a descaling product recommended by the appliance manufacturer. Documenting your maintenance, including dates and model details, helps you track what works best and makes future repairs easier. The goal is to keep the ice maker functioning quietly and producing clean ice with minimal effort.
Final Thoughts: Cleaning Tips That Help You Stay on Track
A regular cleaning routine for the ice maker in your freezer is an important part of household maintenance. By following a safe process, using the right cleaners, and drying thoroughly, you minimize odors, mineral buildup, and operational stress on the ice-making system. This guide outlined practical steps, safety considerations, and maintenance strategies to help you succeed at cleaning how to clean ice maker in freezer. Remember: consistency beats intensity, and a little regular care goes a long way toward better ice quality and freezer longevity. The Cleaning Tips team stands by this approach and encourages you to adapt the routine to your household needs.
Tools & Materials
- Soft microfiber cloths(For wiping surfaces and drying)
- Small bowl(Mix cleaning solution)
- Mild dish soap(Dilute in warm water for cleaning)
- White vinegar(For sanitizing (optional, diluted))
- Warm water(Rinse and dilute cleaners)
- Spray bottle(Optional for applying solutions)
- Soft-bristle brush(For stubborn buildup)
- Rubber gloves(Protect hands)
Steps
Estimated time: 30-45 minutes
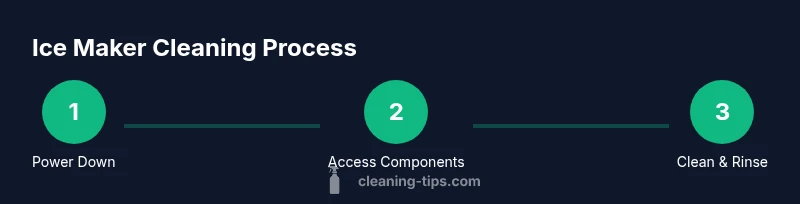
- 1
Power Down and Access Ice Maker
Unplug the freezer to eliminate electrical risk. Remove the ice bin and any removable trays, keeping them on a dry surface. This gives you clear access to all surfaces that contact ice. If your model has a separate ice maker motor housing, wipe around the exterior with a damp cloth before proceeding.
Tip: Keep the ice bin handy but dry to prevent water pooling. - 2
Empty and Inspect
Discard any melted ice and inspect the bin, tray, and ice-making passages for mineral buildup or stuck ice. Note any areas that look corroded or discolored. This helps you target stubborn spots during cleaning and prevents recontamination when reassembling.
Tip: Take a quick photo of the bin area if you’re unsure about reassembly. - 3
Prepare Cleaning Solution
In a small bowl, mix warm water with a few drops of mild dish soap to create a gentle cleaning solution. Avoid harsh cleaners that could leave residues in the ice system. If you prefer sanitizing, have a separate vinegar-water mix ready for after rinsing.
Tip: Test your soap on a hidden area first to ensure no dyes or finishes are affected. - 4
Clean Surfaces
Dip a cloth into the soapy solution and wipe all accessible surfaces of the ice maker, including the bin housing, ice tray, and any exposed channels. For crevices, use a soft-bristle brush to loosen buildup without scratching. Rinse the cloth frequently to prevent spreading residue.
Tip: Do not soak electrical components; keep moisture to non-electrical zones. - 5
Rinse Thoroughly
Wipe the cleaned areas with a cloth dampened in clean warm water to remove soap residue. Rinse the ice bin and tray separately to ensure no soap remains. A thorough rinse prevents soapy flavors from transferring to ice.
Tip: Finish rinsing with a final wipe using a dry cloth. - 6
Sanitize and Dry
Optionally apply a diluted vinegar solution to sanitize interior surfaces, then wipe away and rinse again with fresh water. Dry every surface completely with a lint-free cloth to prevent mold or odors. Leave components in a warm, dry area to air-dry if needed.
Tip: Do not leave damp components overnight in the freezer. - 7
Reassemble and Test
Reinstall the ice bin and trays according to your model’s instructions. Reconnect power and run several cycles of ice or water to confirm proper operation and ensure the system is clear of any cleaner residue.
Tip: Listen for unusual noises during the first test run; if heard, stop and re-check seals. - 8
Document and Maintain
Note the date of cleaning and any observations about ice quality. Schedule your next cleaning based on water quality and usage. Regular maintenance helps prevent buildup and keeps ice tasting fresh.
Tip: Keep a small cleaning log near the freezer for quick reminders.
Questions & Answers
Can I use bleach to clean an ice maker?
Bleach is not recommended for ice makers due to strong fumes and potential residue. Use mild soap and vinegar, and rinse thoroughly. If odor remains, repeat the cleaning and consider a deeper rinse or model-specific guidance.
Bleach isn’t advised here. Use soap and vinegar, then rinse well; repeat if odors persist.
Is vinegar safe to use around ice makers?
Yes. White vinegar is a common, food-safe sanitizer when diluted and thoroughly rinsed. Avoid inhaling strong fumes and always rinse completely after use.
Yes, vinegar is safe if diluted and rinsed well.
How often should I clean the ice maker?
For many households, a quick wipe weekly and a thorough clean every 1–3 months works well. Adjust the frequency based on usage and mineral-rich water.
Most people clean weekly with a deeper clean every few months.
Do I need to shut off the water line before cleaning?
If your unit is plumbed, shut off the water supply and disconnect the line when possible to prevent leaks during cleaning. Reconnect after drying and testing.
Yes, shut off the water supply if you can, then reconnect after drying.
What if odors persist after cleaning?
Re-clean with fresh water and vinegar, run several empty cycles, and check for hidden mold behind the ice bin or in drip pans. If unresolved, consult the manufacturer’s resources for model-specific guidance.
If odors stick around, re-clean with vinegar and run empty cycles, then check for hidden mold.
Watch Video
The Essentials
- Unplug before you start and remove the ice bin.
- Use mild soap and vinegar for safe cleaning and sanitizing.
- Rinse thoroughly and dry all parts before reassembly.
- Follow model-specific guidelines to avoid damage.
- Maintain a regular cleaning schedule for best ice quality.