What Clean Battery Corrosion: A Safe Home Cleaning Guide
Learn how to safely identify, assess, and clean battery corrosion at home. This step-by-step guide from Cleaning Tips covers hazards, tools, methods, and prevention to keep electronics and appliances running reliably.

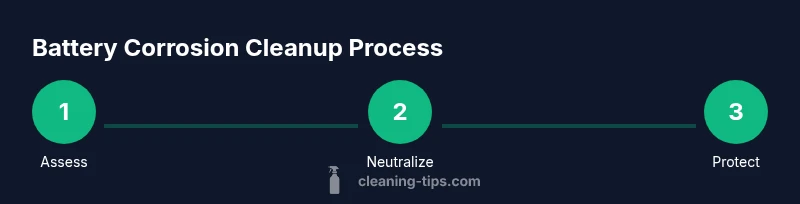
What clean battery corrosion means is identifying and safely removing mineral deposits around terminal connections, then protecting those connections to prevent future buildup. This quick guide outlines the essential safety steps, the tools you’ll need, and the general order of operations for common household batteries. Follow these steps to reduce risk and preserve device performance.
What is battery corrosion and why it happens
Battery corrosion refers to the white, blue-green, or powdery residue that forms on or around the terminals of a battery. This buildup is usually caused by chemical reactions at the terminal connection, exposure to moisture, or leakage from acidic or alkaline components inside the battery. In many household devices—think remote controls, cordless phones, and car batteries—the corrosion disrupts electrical contact, which can cause intermittent failures or reduced performance. According to Cleaning Tips, understanding the basics of corrosion helps you decide whether a cleaning approach is appropriate or if replacement is a safer option. The phrase what clean battery corrosion captures a common concern for homeowners: how to safely restore connection without damaging components. Before you begin, make a quick assessment of the area, ensure the device is powered down, and plan to work in a well-ventilated space. Remember that the acidity of many batteries can irritate skin and eyes, so proper protection is essential.
Health and safety: hazards and precautions
Working with corroded batteries can expose you to chemical residues and hydrogen gas, which can be hazardous in confined spaces. Wear protective gear: chemical-resistant gloves, safety goggles, and a long-sleeve shirt to minimize skin exposure. Work in a ventilated area and keep a bucket of water and baking soda handy to neutralize spills. Do not mix cleaning agents; never use metal tools that can gouge terminals or puncture the battery casing. If you notice a strong odor, swelling, or active leakage, stop and consult a professional. The Cleaning Tips team emphasizes safety first: never attempt to clean a damaged battery in a sealed space or while connected to a powered device.
Assessing corrosion severity and when to clean or replace
Light residue around terminals is often removable; heavy buildup or signs of cracking, bulging, or leakage indicates a higher risk and may require replacement rather than cleaning. Corrosion around battery clamps can sometimes be neutralized with baking soda solution, but persistent green or white crust that reappears after cleaning suggests the connection is compromised. In such cases, replacing the battery or terminals is usually the safer option. Cleaning Tips notes that taking photos before disassembly helps track orientation and reassembly, reducing the risk of incorrect connections. If your device relies on a sealed battery, consult the manufacturer’s recommendations before attempting any cleaning.
Tools, materials, and workspace: what you’ll need
Before you start, gather a few essential items: gloves, safety goggles, baking soda, white vinegar, a non-metal brush or old toothbrush, microfiber cloths, isopropyl alcohol, a small container for mixtures, and a disposable towel or tray to catch drips. You may also need a non-conductive tool for gently loosening corrosion while avoiding contact with the electrolyte. Work on a non-slip surface and keep pets and children away. Cleaning Tips recommends having a digital camera or smartphone handy to document the process for future maintenance records.
Authority sources
For safety guidelines and best practices on battery handling, you can consult reputable sources such as OSHA's battery safety guidelines, NIOSH resources on battery handling, and energy-related safety information. These references provide general safety principles that complement household cleaning steps. Always cross-check product-specific instructions from the device manufacturer before proceeding. Cleaning Tips believes in linking to authoritative resources to support informed, safe decisions.
How to prevent future corrosion and maintain reliability
Prevention is simpler than remediation. After cleaning and reassembly, apply a small amount of dielectric grease or terminal protectant to reduce moisture ingress and prevent future oxide formation. Keep batteries dry and free from moisture exposure, and avoid mixing old and new batteries within a device. Regular inspections, especially in humid environments or with devices that sit unused for extended periods, help catch early signs of corrosion before performance is affected. Cleaning Tips recommends including a brief maintenance note in your home cleaning journal to establish a routine.
Tools & Materials
- Safety goggles(Wraparound style preferred; safety glasses are not enough if splashes are possible)
- Chemical-resistant gloves(Nitrile or rubber gloves; ensure a snug fit)
- Baking soda(Used to neutralize battery acid; keep dry when not in use)
- White vinegar(Optional neutralizing agent; use only if recommended for your battery type)
- Non-metal brush or old toothbrush(Soft-bristled; avoids puncturing components)
- Microfiber cloths(Lint-free; for wiping and drying)
- Isopropyl alcohol (70%+)(For quick surface cleaning; allow to dry completely)
- Disposable towels or tray(Catch drips; prevents spreads)
- Dielectric grease or terminal protectant(Helps prevent future corrosion)
- Camera or smartphone(Document setup and reassembly orientation)
Steps
Estimated time: 45-75 minutes
- 1
Identify power status and safety gear
Power down the device and remove any connected power sources if safe to do so. Put on safety goggles and chemical-resistant gloves before handling the battery. If you’re unsure about the device, consult the manufacturer’s guidance first.
Tip: Always start with unplugging or turning off the device and remove batteries if possible. - 2
Gather tools and protect the workspace
Lay out your materials on a non-conductive surface away from metal, and place a tray to catch spills. Open windows or use a fan for ventilation. Keep a bucket of water nearby for quick rinsing in case of contact with skin.
Tip: Double-check the area is dry and free of flammable materials. - 3
Disconnect the battery safely
If the battery is removable, detach it using non-metallic tools when instructed by the device manual. Do not force connectors and avoid touching the electrolyte. If the battery is hard-wired, do not attempt disassembly unless you’re trained.
Tip: Never short a terminal while removing the battery. - 4
Neutralize corrosion with baking soda solution
Create a paste or light solution of baking soda and water and apply it to the corroded areas to neutralize acidic compounds. Let it sit for a few minutes to react with the corrosion, then gently wipe away with a damp cloth.
Tip: Avoid creating a thick paste that can spill into device internals. - 5
Scrub gently with a soft brush
Using a non-metal brush, lightly scrub the terminals and clamps to loosen crusts. Do not apply excessive pressure that could damage connectors. Rinse with a small amount of clean water if available.
Tip: Pat, don’t rub, to prevent spreading the residue. - 6
Rinse and dry completely
Wipe away any remaining residue with microfiber cloths. Allow all components to air-dry or use a fan to speed evaporation. Do not reassemble while still damp.
Tip: Moisture remaining can cause immediate re-corrosion. - 7
Inspect connectors and apply protectant
Check for pitting, pitting, or exposed copper. If connectors look compromised, consider replacing the battery or connectors. Apply a thin coat of dielectric grease or terminal protectant to seals and connectors.
Tip: Use only a small amount of protectant to avoid attracting dust. - 8
Reassemble and reconnect the battery
Carefully reinsert the battery and reconnect any terminals according to the device’s orientation. Ensure a snug fit without forcing connections. Reattach any covers or casings as per the manufacturer guidance.
Tip: Take a photo of the before state to guide reassembly. - 9
Test device and monitor for signs of continued corrosion
Power the device and observe for proper operation. If you notice continued corrosion, swelling, or poor performance, power down and seek professional help. Keep monitoring for a few days to ensure no new residue forms.
Tip: If in doubt, err on the side of replacement rather than prolonged cleaning. - 10
Dispose of waste and used materials safely
Place used rags and disposable materials in a sealed bag and discard according to local regulations for chemical waste. Do not toss contaminated items into regular trash. Clean and store tools for future use.
Tip: Don’t reuse contaminated materials on other devices. - 11
Document maintenance and schedule future checks
Record the date, device, and observations in your home maintenance log. Schedule a follow-up inspection, especially in humid environments or with devices regularly stored in garages or basements.
Tip: Regular checks help you catch corrosion early. - 12
Review safety steps and update your process
Reflect on what worked well and what could be improved. Update your checklist for future cleanings. Share lessons learned with family members to maintain a safe home environment.
Tip: Continuous improvement reduces risk over time.
Questions & Answers
What causes battery corrosion around terminals?
Corrosion typically results from chemical reactions at the terminal, moisture exposure, and leakage of battery contents. Regular exposure to air and humidity accelerates oxide formation and crust buildup.
Corrosion happens when terminals react with moisture and battery contents, forming crusts that impair contact.
Is it safe to clean battery corrosion at home?
Cleaning corrosion at home can be safe if you follow proper protective gear, ventilation, and device-specific guidance. If the battery is damaged, swollen, or leaking, do not attempt cleaning and seek professional help.
Yes, with proper safety gear, but if the battery is damaged, stop and get help.
What solution should I use to neutralize corrosion?
A baking soda and water solution is commonly used to neutralize alkaline or acidic residues around terminals. Avoid strong acids or bleach, and rinse with clean water where possible.
Baking soda and water is usually safe for neutralizing residue.
Can I reuse my device after cleaning?
If the connectors look clean and there is no lingering corrosion, you can attempt reassembly and test. If corrosion recurs quickly, replace the battery or consult a technician.
You can reassemble if it looks clean, but watch for recurrence.
What should I do with a heavily corroded battery?
Heavy corrosion or damage usually warrants replacement rather than cleaning. Do not attempt to repair a severely corroded battery.
Replace the battery rather than trying to repair heavy corrosion.
How often should I inspect battery terminals?
Inspect terminals every few months if you use devices frequently or store them in humid areas. Quick visual checks catch early signs before performance drops.
Check terminals every few months to catch early signs.
Watch Video
The Essentials
- Identify corrosion and assess safety first
- Use baking soda neutralization and gentle brushing
- Protect connectors with a light coating of terminal protectant
- If in doubt, replace damaged parts rather than repair
- Document maintenance for future prevention