How to Clean Bathtub Drain: A Practical Guide
Learn how to clean bathtub drain effectively with a proven, gentle approach. This guide covers mechanical clearing, safe chemical options, maintenance tips, and when to call a plumber to keep baths draining freely.

This guide shows you how to clean a bathtub drain safely and effectively, combining mechanical cleaning with safe chemistry and preventive steps. You’ll learn when to clear hair by hand, how to use a drain auger, and how to finish with a flush that keeps drains clear. Includes safety tips and materials to have on hand.
Why a clean bathtub drain matters
According to Cleaning Tips, a clean bathtub drain is essential for a healthy bathroom. Slow drainage isn’t simply inconvenient; it signals buildup of hair, soap scum, and mineral deposits that can trap odors and promote mold in damp spaces. Regular maintenance keeps baths comfortable, limits the need for harsh cleaners, and preserves the home’s plumbing health. If you rent, document recurring clogs promptly and follow your landlord’s guidance. Understanding the drain’s components—cap, stopper, tailpiece, and p-trap—lets you clean with confidence rather than guesswork. A well-maintained drain also reduces residual moisture that encourages mildew around the tub. In short: a clear drain speeds up showers, minimizes odors, and supports a healthier, drier bathroom.
This section sets the foundation for a practical cleaning routine you can repeat monthly or after heavy use. It also highlights the balance between mechanical methods and safer chemical options, so you don’t over-rely on aggressive cleaners that can damage pipes or irritate skin. By the end, you’ll know how to approach your tub drain with a calm, methodical plan that protects your plumbing and your family’s health.
How drains clog: common culprits
Bathtub drains clog for similar reasons across homes: hair, soap scum, and mineral buildup combine with bathroom products to form gunk that sticks to pipe walls. Hair strands form dense clumps in the trap and pipe bend, especially if a hair catcher is missing or undersized. Soap residue acts like glue, catching minerals from hard water and forming a crust that narrows the flow path. In households with long hair or infrequent cleaning, clogs can form quickly, sometimes within a few weeks. Oils from shaving or skincare products can also contribute by coating surfaces and trapping debris. Finally, household debris like toilet paper scraps or bath products should never be flushed or poured down the drain, as they add friction and resistance. Recognize the signs early: a slower drain than usual, gurgling sounds, or standing water after baths.
Understanding these culprits helps you choose the right approach—whether a quick mechanical clear or a longer-term maintenance plan. A steady routine, including a hair catcher and a monthly flush, can prevent most clogs from becoming a bigger problem. The goal is to keep your drain moving freely without relying on harsh chemicals that can harm PVC pipes or septic systems over time.
Tools and materials you’ll need
Preparation is half the job. Gather a small set of reliable tools so you can work efficiently without scrambling mid-cleaning. A basic hair catcher or stopper replacement is invaluable, as is a handheld drain snake for deeper clogs. A plunger with a flange can be surprisingly effective on moderate blockages, especially after loosening hair clumps with your hands (wear gloves). Keep a bucket or old towel handy to catch debris and a pair of gloves to protect your hands. For chemical-free maintenance, have baking soda and white vinegar on hand for a fizzing flush that can help break up soft gunk and deodorize. If you prefer enzymatic cleaners, choose a product labeled safe for septic systems and follow the label directions. Finally, boil water in advance for a thorough flush if your pipes tolerate hot temperatures. Having these tools ready reduces downtime and keeps the process smooth.
Note: Use nitrile gloves or household gloves if you have sensitive skin, and always keep cleaners out of reach of children and pets. A prepared area also minimizes water splashes and cleanup time.
Mechanical cleaning methods that actually work
Mechanical methods focus on physically dislodging and removing the clog rather than relying on chemical reactions alone. Start with a practical approach: remove the drain stopper to access the trap. Use your gloved hands or a small tool to pull out visible hair and debris. A handheld drain snake can reach deeper hair nests; insert a few inches at a time and rotate the handle to grab and break up the obstruction. If you don’t have a snake, a plunger designed for sinks and tubs can still generate the suction and pressure needed to loosen material near the drain opening. Work gradually and test the drain frequently by running water to see if the flow improves. After you feel the clog loosening, remove any loose material and proceed to a flush. Patience is key here—forcing the snake too quickly can push debris further into the line.
With persistent hair clogs, you may need to repeat the process a couple of times. Once the drain flows freely, clean the stopper and any surrounding surfaces to prevent recontamination. Keep spare gloves handy for the next round and consider installing a hair catcher to minimize future buildup.
Enzymatic and chemical options: safe and effective use
If your clog remains after mechanical cleaning, you can consider safer chemical options that are gentler on pipes than strong caustics. Baking soda followed by white vinegar creates a fizzy reaction that can help loosen organic material when used in small, repeated doses. Pour about a half cup of baking soda into the drain, followed by a cup of white vinegar. Cover the drain to keep the fizz contained for about 10 minutes, then flush with hot water. If you prefer a ready-made enzymatic drain cleaner, choose a product designed for household use and following the label directions. Enzymatic cleaners work gradually by digesting organic matter, so you may need to repeat treatment after a few days. Avoid mixing different cleaners, especially chlorine bleach with ammonia or other caustics, as this can produce harmful gases.
Important safety note: do not expose skin to strong chemicals and ensure proper ventilation. For metal components or older homes, use caution with boiling water and hot flushes, as extreme heat can affect seals and fittings.
Preventive maintenance and best-practice habits
Prevention is easier than fixing a stubborn clog. Install a high-quality hair catcher and empty it regularly to prevent hair from entering the trap. Establish a simple monthly routine: remove the stopper, clear visible hair, flush with hot water, and run the tub to test drainage. For households with hard water, mineral buildup accelerates clogs; occasionally soaking the trap area with a vinegar-water solution and flushing with hot water can reduce scale. Use a mild, drain-safe cleaner only as needed, and never mix cleaners in the same drain. Consider scheduling a semi-annual check of visible pipes if your home is older or has a questionable plumbing history. Finally, educate household members about what should and should not go down the drain to minimize future problems.
When to call a plumber: red flags and decisions
Most bathtub drain clogs respond to a well-executed combination of mechanical cleaning and safe chemical treatment. However, certain situations require professional help. If multiple fixtures drain slowly in the same area, if water backs up into the tub during showers, or if you hear banging noises or smells of gas near the plumbing, contact a licensed plumber. Persistent clogs that reappear after two or three cleaning attempts may indicate a deeper problem in the main line or a more complex trap issue. If you’re renting and the drain problem is severe or recurring, inform your landlord promptly to avoid potential liability. A plumber can inspect for broken pipes, improper slope, or tree root intrusion, issues that DIY methods can’t reliably fix.
Common mistakes to avoid and quick checks
Avoid using harsh chemical drain cleaners as your first option; they can damage pipes and fixtures over time. Do not pour boiling water down PVC pipes if you’re unsure of the pipe temperature tolerances, and never mix different cleaners. Always wear gloves and eye protection when handling cleaners or tools, and never force a tool into the drain. After cleaning, always run hot water to verify that the drain remains clear and look for signs of leaks around joints. If odors persist after a cleaning routine, inspect for mold growth around the tub area and consider a more thorough bathroom venting plan.
Tools & Materials
- Rubber gloves (nitrile recommended)(Protect hands from germs and cleaners)
- Drain snake / hair auger(3-6 ft length works for most bathtubs)
- Plunger with a flange(Use with caution near tub edges)
- Screwdriver or channel-lock pliers(To remove stopper or pop-out cap)
- Bucket or old towel(Catch water and debris; keep area clean)
- Baking soda (sodium bicarbonate)(Used for fizzing and deodorizing)
- White vinegar(Combine with baking soda for safe fizzing action)
- Boiling water(Flush after treatment; ensure it won’t damage fittings)
- Enzymatic drain cleaner (optional)(Safer for septic systems; follow label)
- Old towels or rags(For cleanup and surface protection)
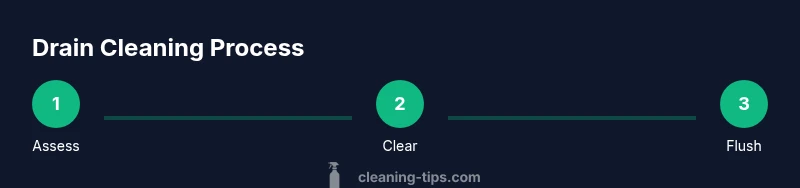
Steps
Estimated time: 45-75 minutes
- 1
Gather supplies and prepare the area
Lay out gloves, bucket, stopper removal tools, and cleaners where you can reach them. Inspect the stopper mechanism and confirm you can remove it without forcing parts. Set towels to catch water and hair so cleanup is minimal.
Tip: Having everything within reach reduces interruptions and keeps the workflow steady. - 2
Remove the stopper and access the trap
Use the screwdriver or pliers to release the stopper or cap, then gently pull it out to expose the trap and the head of the drain. Clear any obvious hair from the opening with gloved hands or a retrieval tool.
Tip: Keep the stopper in a labeled container to prevent misplacement. - 3
Clear visible hair and debris
Grab hair and obvious debris by hand or with a small hooked tool. Dispose of it in a trash bag, not down the drain. Wipe the interior with a cloth to remove soap scum and slime.
Tip: Work in short bursts to avoid re-depositing debris back into the drain. - 4
Insert drain snake and clear deeper clog
Insert the snake into the drain and rotate the handle to break up the clog. Pull back slowly to reel out hair and gunk. Repeat as needed until you feel resistance release.
Tip: Do not force the snake; if it binds, back out a bit and rotate again to avoid pipe damage. - 5
Flush with hot water and baking soda/vinegar
Pour about ½ cup baking soda down the drain, followed by 1 cup white vinegar. Wait 10 minutes with a plugged drain if possible, then flush with hot (not boiling) water to help clear remaining residues.
Tip: Avoid mixing with other cleaners; this fizz helps soften organic material without harsh chemicals. - 6
Reassemble, test drainage, and clean area
Reinsert the stopper, secure any caps, and run water to test drainage. If flow is slow, repeat mechanical clearing or flush again. Wipe surfaces and store tools properly.
Tip: Keep a routine: a quick monthly check prevents major clogs. - 7
Prevent future clogs with simple habits
Install a hair catcher and educate household members about what goes down the drain. Consider a monthly maintenance routine with baking soda and hot water to deter buildup.
Tip: A lightweight preventive habit saves time and plumbing headaches.
Questions & Answers
What causes bathtub drains to clog?
Most bathtub clogs come from hair, soap scum, and mineral buildup that accumulate in the trap and bend of the pipe. Over time, these materials create a dense barrier that slows drainage. Regular maintenance and using a hair catcher greatly reduce the frequency of clogs.
Hair and soap scum are the usual culprits, so a hair catcher helps a lot and maintenance keeps it from building up.
Can I use chemical drain cleaners?
Chemical drain cleaners can be effective for stubborn blockages but can be harsh on pipes and the environment. Use them sparingly, follow label directions, and avoid mixing chemicals. For PVC and septic systems, enzymatic cleaners are often safer and gentler choices.
You can use chemical cleaners, but pick safer enzymatic options if you have a septic system or sensitive pipes.
Is hot water safe for PVC pipes?
Boiling water can be risky for some PVC configurations. Use hot water instead of boiling when flushing after a cleaning, and allow the pipes to cool if you notice any softening or creaking. When in doubt, test a small amount first or consult a plumber.
Hot water is usually fine, but avoid boiling water if your pipes are PVC that might deform.
How often should I clean the drain to prevent clogs?
A monthly lightweight flush and monthly hair-catching routine reduces buildup. If your household produces more hair or soap scum, consider more frequent checks. Regular maintenance minimizes the need for aggressive treatments.
Try a monthly upkeep schedule to keep clogs from forming.
What if there’s a strong smell after cleaning?
Persistent odors may indicate mold or a deeper blockage. Ventilate the bathroom, wipe down surfaces, and recheck the trap for trapped gunk. If odors persist after another cleaning, consider a plumber inspection.
If smells linger after cleaning, a more thorough inspection may be needed.
Watch Video
The Essentials
- Identify clog causes to choose the right method
- Combine mechanical clearing with safe chemical options
- Prevent future clogs with hair catchers and routine maintenance
- Only call a plumber for stubborn or recurring issues
- Test drainage after every cleaning pass