Mold Clean: Safe, Step-by-Step Removal Guide
Learn safe, effective mold clean methods at home with PPE tips, alternatives to bleach, and prevention strategies. Cleaning Tips provides a practical step-by-step guide.

Learn how to safely clean mold at home with a step-by-step approach. This guide covers PPE, ventilation, and safer cleaners beyond bleach, plus when to call a pro. You’ll get a practical, minimum-splash method suitable for common indoor mold growth and prevention tips to keep it from returning.
What is mold and why it grows
Mold is a type of fungus that thrives in damp, poorly ventilated spaces. It appears as green, black, or white spots and can grow on walls, ceilings, wood, fabrics, and insulation. A successful mold clean starts with understanding moisture as the primary driver. Wherever water intrusion, condensation, or high humidity persists, mold spores will find a hospitable environment. In many homes, the most common hotspots are bathrooms, basements, kitchens, laundry rooms, and closets. To perform a practical mold clean, you must address both visible growth and the moisture source. However, not every patch requires prosthetic removal—small spots under a square foot can often be managed with DIY methods, while larger or deeply embedded growth may need professional assessment. The key is stopping moisture and preventing re-growth, not just scrubbing surface mold. Safety matters: if you have severe allergies, asthma, or immune concerns, minimize disturbance and seek expert help. With the right approach, mold clean can be achievable without costly denials or extended downtime.
Safety first: PPE, containment, and ventilation
Before starting a mold clean, assemble PPE and establish containment to protect your health and limit cross-contamination. Wear an N95 respirator or better, non-porous gloves, and protective goggles or a face shield. Long sleeves and a breathable coverall help keep your skin protected from spores. Ventilate the area by opening windows and running a local exhaust fan if available, but avoid blowing contaminated air into clean zones. Use plastic sheeting to seal off the affected space and create a clean boundary. If you suspect hidden mold behind walls, pause and assess with a moisture meter or seek professional guidance. Remember to unplug or turn off HVAC systems in the affected zone to reduce airborne spores. Proper setup reduces the risk of exposure during a mold clean and contributes to a more predictable, successful outcome.
Cleaning options: when to use bleach vs safer cleaners
Bleach is effective for disinfecting non-porous surfaces like ceramic tiles, glass, and enamel, but it does not reach mold roots embedded in porous materials. For most household mold clean tasks on porous surfaces (drywall, wood, fabric, insulation), safer alternatives like hydrogen peroxide or white vinegar are recommended first. For non-porous surfaces, a dilute household bleach solution (about 1 cup of bleach per gallon of water) can be used with caution, ensuring good ventilation and skin protection. Always test cleaners on a hidden patch before full application. Never mix cleaners with ammonia or other cleaners, as toxic fumes can form. If the area is larger than a few square feet or if the mold smell persists after cleaning, seek professional remediation. By choosing the right cleaner for the job, you improve results and reduce health risks during a mold clean.
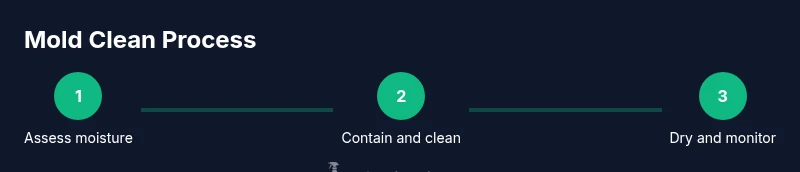
Step-by-step mold clean process (overview)
A practical mold clean combines assessment, cleaning, and drying in a safe sequence. Start by isolating the room and mapping the affected surface, then apply the chosen cleaner, scrub away visible growth, rinse or wipe, and finish with thorough drying. The steps below are designed to work for typical indoor mold on walls, ceilings, or non-porous furniture; follow the dedicated Step-by-Step section for precise actions and tips. Throughout the process, monitor humidity and air movement, and avoid disturbing patches that seem to be deeply attached or spreading spores. A well-executed process yields cleaner surfaces and minimizes discomfort for residents and pets.
Drying, humidity control, and prevention strategies
Drying is a critical part of any mold clean. After cleaning, use fans to circulate air and a dehumidifier to bring indoor RH (relative humidity) down to 50-60%. Keep doors and windows open if possible, but only in dry, safe weather. Check for damp spots within 24-48 hours and re-run drying if needed. Long-term prevention means moisture control: fix leaks promptly, improve bathroom ventilation with exhaust fans, and consider a lightweight moisture barrier in crawl spaces. Regularly inspect problem areas, especially after rain or flooding. Maintaining a stable humidity level reduces the chance of mold returning and ensures your mold clean remains effective over time.
When to hire a professional and common mistakes to avoid
DIY mold clean is feasible for small, clearly defined patches, but larger infestations or growth behind walls require professional remediation. If you notice recurring growth after a DIY attempt, persistent musty odors, or health symptoms among occupants, contact a licensed mold remediation specialist. Do not attempt to extract mold from structural materials yourself; improper removal can spread spores and worsen damage. Common mistakes include delaying action after water intrusion, using the wrong cleaners on porous materials, and skipping proper containment. By recognizing limits and following best practices, you protect health and property while reducing the likelihood of future mold growth.
Tools & Materials
- N95 respirator(Close-fitting respirator with proper filtration)
- Protective gloves (nitrile preferred)(Chemical-resistant; long cuffs)
- Protective eyewear(Goggles or face shield)
- Protective clothing(Long sleeves; coveralls if possible)
- Spray bottle(Label and pre-fill with cleaner)
- Bucket(For rinsing and disposal)
- Scrub brush or sponge(Stiff-bristle for porous surfaces)
- Fan or dehumidifier(Assist drying; do not place directly on wet surfaces)
- White distilled vinegar(Can inhibit growth on some surfaces)
- Hydrogen peroxide 3%(Alternative cleaner for porous materials)
Steps
Estimated time: 90-120 minutes
- 1
Assess moisture and contain area
Survey the affected space, note extent of visible growth, and identify moisture sources. Close doors, seal vents, and lay plastic sheeting to prevent spores from spreading to clean areas.
Tip: Do not disturb mold aggressively; containment reduces contamination. - 2
Protect yourself with PPE
Put on an N95 mask, eye protection, and gloves. If you must use the space while cleaning, ensure good ventilation.
Tip: Change PPE if it becomes damp or contaminated. - 3
Choose a cleaner for the surface
Decide on a cleaner appropriate for the surface. For non-porous areas, diluted bleach is possible; for porous materials, avoid bleach and use hydrogen peroxide or vinegar.
Tip: Test cleaner on a small patch first. - 4
Apply cleaner and scrub
Apply cleaner to the moldy area and scrub with a brush until visible growth is removed. Work from outer edges toward the center.
Tip: Do not scrub dry; keep area damp to prevent spores from becoming airborne. - 5
Rinse and wipe
Rinse with clean water or wipe with a damp cloth to remove residue. Dry the surface promptly to minimize moisture retention.
Tip: Avoid over-wetting porous materials. - 6
Dry and monitor
Run a dehumidifier or fan to thoroughly dry the area within 24-48 hours. Recheck for regrowth daily for the next two weeks.
Tip: If mold returns or growth persists, stop and call a professional.
Questions & Answers
Can I clean mold with bleach?
Bleach can disinfect non-porous surfaces, but it does not eliminate mold roots in porous materials. Use safer cleaners or consult a professional for porous materials and large areas.
Bleach can disinfect non-porous surfaces, but it won't remove mold roots in porous materials. Safer cleaners or a professional may be required.
When should I hire a professional?
If mold covers more than 10 square feet, or if growth returns after DIY cleaning, or you have health concerns, hire a licensed mold remediation specialist.
If growth is large or recurring, it's best to hire a professional.
Is mold cleaning dangerous?
DIY mold cleaning can expose you to spores and toxins. Always use PPE, ventilate, and avoid disturbing large patches. Seek medical advice if you experience symptoms.
It can be risky; protect yourself and seek help if symptoms arise.
How long does remediation take?
DIY cleaning can take 1-2 days for small areas, but total remediation may require additional drying time and moisture control to prevent re-growth.
It often takes a day or two for small areas, plus drying.
What surfaces can be cleaned for mold?
Non-porous surfaces like tiles and glass are easier to clean; porous materials like drywall or wood may require removal and replacement to fully eliminate mold.
Non-porous surfaces are easier to clean; porous ones may need replacement.
How can I prevent mold after cleaning?
Fix leaks promptly, reduce indoor humidity, improve ventilation, and monitor bathrooms and basements regularly to stop mold from returning.
Fix leaks, reduce humidity, and ventilate to prevent mold return.
Watch Video
The Essentials
- Wear PPE before touching mold
- Use safer cleaners when possible
- Dry thoroughly within 24-48 hours
- Address moisture sources to prevent recurrence