Mold Clean Up Near Me: Step-by-Step Guide
Comprehensive, actionable advice for mold cleanup near me. Learn when to DIY, essential safety gear, step-by-step methods, drying strategies, and when to call pros to protect health and home.

Whether you’re searching for mold clean up near me or cleaning a small patch yourself, start with moisture control, proper PPE, and cleaning non-porous surfaces with detergent followed by a disinfectant. For larger, hidden, or poorly accessible growth, hire a licensed remediation professional. Quick, safe action minimizes health risks and property damage.
Mold cleanup near me: understanding mold, risks, and when to DIY
Mold growth inside homes is usually driven by persistent moisture. The phrase mold cleanup near me often appears when homeowners notice patches after a leak, high humidity, or condensation. Mold itself isn't always visible in full strength; it can hide behind walls or under floors, releasing spores that irritate lungs and aggravate allergies. The Cleaning Tips team emphasizes that effective cleanup starts with stopping the moisture source and preventing spores from traveling to other rooms. Health risks vary with exposure and the mold type, so take any growth seriously, especially if occupants have asthma or immune issues. This guide walks you through practical, safe steps for handling small, contained outbreaks and distinguishes those scenarios from larger, professional remediation needs. By combining moisture management, appropriate cleaning agents, and thorough drying, you can reduce damage, improve air quality, and lower the chance of regrowth. According to Cleaning Tips, addressing moisture is the keys to long-term success in any mold remediation plan.
Quick pre-clean checks to avoid spreading spores
Before you touch any mold, confirm the area’s scope and moisture source. Start by locating the leak or humidity source and fixing it or drastically reducing humidity with a dehumidifier. Look for visible growth on walls, ceilings, or fabrics, and note any musty odors, which often indicate hidden mold. If the affected area is less than roughly 10 square feet and you can access it without disturbing compromised materials, you may proceed with DIY steps in a controlled, contained space. Always ventilate by opening windows if possible and avoid using fans that could push spores through the home. Keep pets and children away from the area during cleanup, and plan to run a HEPA-filter vacuum only after appropriate containment is in place.
Safety gear and containment basics
Safety first: mold spores can irritate the skin, eyes, and lungs. Wear an N95 respirator (or higher), protective glasses, disposable gloves, and a long-sleeve shirt with pants. Use disposable coveralls if you anticipate contamination, and seal clothing in a bag before leaving the area. Create containment by closing doors, covering door cracks with plastic sheeting and tape, and turning off HVAC in the affected space to prevent airborne spread. Place plastic ground covers to catch debris and prevent tracking mold to other rooms. A dedicated cleanup kit helps you stay organized and reduces cross-contamination.
Cleaning methods by surface type and cleaning agents
Different surfaces require different approaches. Non-porous materials like tile, glass, and sealed metal are cleaned with detergent and warm water, followed by a disinfectant that is safe for the surface. Porous materials such as drywall, insulation, ceiling tiles, and some fabrics may need removal and containment because mold can bake into the fibers. For cleanup, use a clean sponge or cloth, rinse, and avoid scrubbing too hard on delicate surfaces to prevent damage. Detergent-based cleaning is often sufficient for light growth; for stubborn spots, a diluted EPA-registered cleaner can help. If you choose bleach, apply it sparingly and never mix it with ammonia or other cleaners. Allow surfaces to dry completely between steps. Keep your work area dry and well-ventilated to minimize mold regrowth.
Drying, containment, and preventing recontamination
Drying is as important as cleaning. Use a dehumidifier and fans to circulate air away from damp areas, but ensure air isn't blowing directly across damp surfaces. Monitor moisture levels with a hygrometer or moisture meter and re-check after 24–48 hours. Do not reintroduce items or furniture into a space until the area is fully dry. Remove and bag any moldy porous materials for disposal according to local guidelines. Regularly inspect previously affected areas over the following weeks; continued dampness invites regrowth. The goal is to reach and maintain a dry, clean environment to prevent mold from returning.
When to hire professional help and what to expect
If mold covers more than small patches, recurs after cleaning, or involves HVAC, it’s time to call professionals. A licensed mold remediation contractor can perform a comprehensive assessment, containment, and remediation with specialized equipment. Expect a remediation plan, containment protocols, and post-remediation testing to verify removal. For sensitive populations—children, elderly, or those with respiratory conditions—professional intervention is especially prudent. Cleaning Tips notes that larger or complex projects demand professional resources to ensure safety and thorough cleanup.
Documenting progress and planning for long-term moisture control
Keep a cleanup diary: record moisture levels, dehumidifier settings, and the areas treated. Take before-and-after photos to monitor improvements and to support any future insurance or resale discussions. Develop a long-term moisture control plan that includes fixing leaks promptly, improving ventilation, and possibly installing exhaust fans or mold-resistant materials in high-humidity rooms. Regular maintenance—checking for condensation, run-off, and damp patches—helps prevent recurrence. The ongoing focus on moisture control aligns with Cleaning Tips recommendations for durable, low-risk mold prevention.
Tools & Materials
- N95 respirator or respirator with P100 filtration(Fit-tested if possible; replace after contamination)
- Protective eyewear/goggles(Wraparound style preferred)
- Disposable gloves (nitrile or latex)(Change if torn or contaminated)
- Protective clothing or disposable coveralls(Long sleeves and pants; change after use)
- Plastic sheeting and painter’s tape(To create containment and seal off area)
- HEPA vacuum cleaner(Use only after containment to avoid spreading spores)
- Buckets, brushes, and rags(Label to prevent cross-contamination)
- Detergent or mild soap(General cleaning agent for initial wash)
- EPA-registered mold cleaner or household bleach(Follow label directions; never mix with ammonia)
- Disinfectant spray or solution(Optional after washing for extra disinfection)
- Dehumidifier or portable fans(Aim to reduce humidity below 50%)
- Moisture meter or hygrometer(Helps track drying progress)
- Heavy-duty trash bags(Leak-proof for disposing contaminated materials)
Steps
Estimated time: Total time: 2-6 hours depending on area size and material removal
- 1
Inspect area and plan remediation
Walk the space to identify all visible mold and any hidden signs. Note moisture sources and document with photos to guide containment and cleanup strategy. This step sets expectations for safety and scope.
Tip: Create a simple map of affected zones to prioritize air-tight containment. - 2
Set up containment to prevent spread
Close doors, seal vents with plastic, and lay down plastic sheets to catch debris. Avoid opening further access points that could distribute spores during cleanup.
Tip: Label containment boundaries clearly and keep pets away. - 3
Put on PPE and prepare workspace
Don an N95 mask, eye protection, gloves, and protective clothing before touching any mold. Inspect PPE for damage and replace if contaminated.
Tip: Do not reuse disposable PPE after exposure; bag and discard appropriately. - 4
Clean non-porous surfaces with detergent
Wipe with soap and water, then rinse and dry. For stubborn spots, use a dedicated cleaner following label instructions. Do not splash onto surrounding areas.
Tip: Work from top to bottom to avoid recontamination. - 5
Disinfect and wipe down surfaces
Apply an EPA-registered cleaner or diluted bleach solution to sanitized areas. Let it sit briefly as directed, then rinse if recommended, and dry completely.
Tip: Never mix cleaners; ammonia and bleach produce hazardous fumes. - 6
Handle porous materials and damaged drywall
Seal and bag any moldy porous materials for disposal if cleaning is not feasible. Remove severely damaged drywall only if clearly contaminated and approved by containment guidelines.
Tip: Avoid scattering spores by handling materials slowly and sealed. - 7
Dry area and monitor moisture
Run a dehumidifier and fans to dry the space; monitor with a hygrometer. Reassess after 24–48 hours to ensure drying is complete and no new growth appears.
Tip: Aim for humidity below 50% for several days after cleanup.
Questions & Answers
What counts as a large mold infestation that should be handled by professionals?
If mold covers more than about 10 square feet or involves HVAC/air ducts, professional remediation is advised. They can contain spores and assess hidden damage safely.
If mold covers more than ten square feet or involves your HVAC, professionals should intervene.
Is DIY mold cleanup safe for homes with kids or pets?
DIY can be safe for small, contained areas if you follow proper PPE, containment, cleaning, and drying procedures. If in doubt, seek professional help.
For homes with kids or pets, consider professional help if the area is uncertain or large.
What are signs of hidden mold behind walls?
A musty odor, hidden stains, staining behind panels, or health symptoms can indicate hidden mold; moisture meters help confirm moisture problems behind walls.
Hidden mold may show as a musty odor or unseen staining behind walls.
Do I need to disinfect after cleaning mold?
Yes, disinfect surfaces after washing to reduce residual spores; ensure surfaces are dry before reoccupying the space.
After cleaning, disinfect and dry the area completely.
How long does it take to dry a mold-affected area?
Drying time varies with ventilation; expect several hours to days depending on humidity, airflow, and space size.
Drying usually takes hours to days depending on airflow and moisture control.
Can I remove mold-damaged drywall myself?
If drywall is heavily contaminated, removal and disposal may be necessary. Ensure containment and protective gear; assess whether removal is feasible before proceeding.
Heavy contamination may require removal and professional handling.
Watch Video
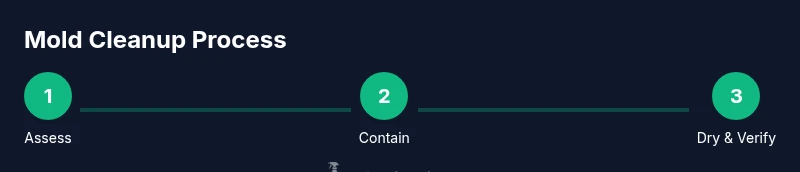
The Essentials
- Assess moisture sources before scrubbing any mold.
- Contain the area to prevent cross-contamination.
- Choose cleaning agents suited to each surface type.
- Dry thoroughly and recheck moisture levels.
- Call professionals for large, persistent, or uncertain cases.