Sewage Damage Clean Up: A Practical Step-by-Step Guide
Learn a practical, step-by-step approach to sewage damage clean up. This guide covers safety, containment, cleaning, disinfection, and when to call professionals for best results.

This guide teaches you how to perform sewage damage clean up safely and effectively. You’ll start with essential safety measures, then contain the spill, remove contaminated materials, and thoroughly disinfect affected areas. The article also explains when to pause and call licensed professionals to prevent health risks and further damage.
What sewage damage cleanup entails
Sewage damage clean up is more than a visible mess; it involves assessing health risks, stopping the source, removing contaminated materials, and restoring surfaces to a sanitary condition. In households, wastewater may carry bacteria, viruses, and mold spores that pose health hazards. This guide provides a practical, safety-first approach to manage the process, minimize cross-contamination, and protect occupants. According to Cleaning Tips, the first 24 hours are critical: rapid containment and proper PPE dramatically reduce the spread of contaminants. The Cleaning Tips team found that following a structured cleanup plan improves outcomes and reduces repair costs over time. Throughout the sewage damage clean up, you will need to document conditions, track what was removed, and communicate with your insurer or restoration professional. This block also clarifies what you should expect in terms of timing, materials, and required expertise. While some minor spills can be addressed by cautious homeowners, larger or connected plumbing failures should trigger professional assistance. Sewage damage clean up requires careful planning and adherence to safety guidelines to prevent health risks and further structural issues.
Immediate safety precautions you must take
Safety is the foundation of any sewage damage cleanup. Before entering the affected area, turn off electricity to avoid shock, and if you suspect a gas leak, evacuate and call the utility company. Put on appropriate PPE: nitrile gloves, eye protection, a long-sleeve shirt, protective coveralls, and a respirator if aerosols or strong odors are present. Open doors and run adequate ventilation only if it won’t spread contamination to other areas. Do not mix cleaners or attempt to sanitize with household bleach without reading the label—dangerous fumes can form. Keep children and pets away from the site. If you cannot seal the area or if standing water is extensive, evacuate and contact a professional immediately. This safety checklist helps reduce exposure to pathogens during the sewage damage clean up and sets the stage for effective restoration.
Containment, source control, and initial removal
Containment focuses on limiting the spread of wastewater to uncontaminated spaces. Seal off the affected room with plastic sheeting and tape, close doors, and, if possible, redirect airflow away from clean areas using portable fans positioned to exhaust outside. If you know the water source is active, shut it off at the main valve and fix the leak or call a plumber. Begin removing solid waste and damaged materials that cannot be salvaged, using sturdy gloves and sealed bags. Use a wet/dry vacuum rated for water only if you can evacuate water safely, or opt for professional equipment. Document what you remove and dispose of it per local regulations. The initial removal step reduces the amount of contaminated material the rest of the cleanup must process. This phase lays the groundwork for effective sanitation and minimizes ongoing exposure.
Cleaning, disinfection, odor control, and restoration
We now switch to cleaning surfaces, porous materials, and equipment, followed by disinfection and odor control. Clean hard surfaces with detergent and water, then disinfect using EPA-registered products labeled for sewage exposure. Absorb and remove moisture using towels and a wet/dry vac, then dry thoroughly with dehumidifiers and fans. Porous items such as carpets, textiles, and insulation may need to be discarded if contaminated. For deodorization, use activated carbon or odor absorbers and ensure proper ventilation. Replace any materials that cannot be sanitized effectively, and consider professional deodorization and content restoration services if odor persists. Throughout this phase, take notes for insurance claims and track costs and labor. Sewage damage clean up benefits from a methodical approach that maximizes safety and long-term restoration outcomes.
When to call professionals and next steps
Significant spills, complex plumbing issues, or contamination that extends into walls or HVAC systems require professional restoration contractors. Even small incidents can escalate if moisture remains, creating mold risks. If you feel unsure about safety, or if anyone in the home has weakened immune systems, contact a licensed plumber, a mold remediation contractor, or a restoration specialist promptly. After the work is complete, have the area re-inspected for hidden moisture and mold, and verify that electrical systems are safe before reoccupying the space. Cleaning Tips recommends documenting the entire process for insurance claims and future reference. In many cases, proactive professional involvement yields faster, safer, and more thorough restoration after sewage damage clean up.
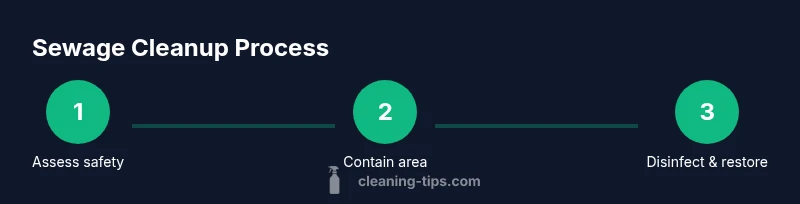
Quick reference: key steps at a glance
- Prioritize safety, containment, and source control before touching any contaminated materials.
- Use PPE, seal the area, and remove waste in leak-proof bags.
- Clean, disinfect, and dry all affected areas thoroughly to prevent mold growth.
- Call professionals for large spills or structural concerns; document everything for claims.
Tools & Materials
- Nitrile gloves(Thick, chemical-resistant)
- Goggles or face shield(Eye protection against splashes)
- Protective coveralls(Long sleeves, full-body coverage)
- N95 respirator or P100 respirator(Required if aerosols or strong odors)
- Plastic sheeting and tape(Create containment barriers)
- Wet-dry vacuum (water-rated)(For safe water removal with sealed bags)
- Mops, buckets, scrub brushes(General cleaning tools)
- EPA-registered disinfectant(Follow label for contact time)
- Heavy-duty trash bags(Leak-proof for contaminated waste)
- Dehumidifier or air mover(Aids drying)
- Moisture meter or hygrometer(Monitor dryness and prevent mold)
Steps
Estimated time: 6-12 hours
- 1
Assess safety and scope
Evaluate the area for electrical risks, structural damage, and potential biohazards. Decide whether to proceed with cleanup or call professionals based on contamination size and your comfort level.
Tip: If anyone in the home has a compromised immune system, default to professional restoration services. - 2
Shut water and secure utilities
Turn off the main water supply to stop the source of contamination. If you suspect electrical risk, avoid touching outlets and panels until cleared by a qualified person.
Tip: Label the area and keep others away until containment is in place. - 3
Contain the area
Seal off the affected space with plastic sheeting, close doors, and position exhaust fans to vent outside away from clean areas. This minimizes cross-contamination.
Tip: Create a clean-to-dirty workflow to prevent tracking contaminants. - 4
Don PPE and plan disposal
Put on all required PPE before any contact with contaminated materials. Plan disposal for contaminated waste in leak-proof bags, separating salvageable items when possible.
Tip: Double-bag the most contaminated waste for added containment. - 5
Remove standing water and irreparables
Extract standing water using the wet-dry vacuum if safe; remove and bag any materials that cannot be sanitized or salvaged.
Tip: Work from least contaminated to most contaminated areas to reduce spread. - 6
Clean and disinfect surfaces
Wash hard surfaces with detergent and water, then apply an EPA-registered disinfectant labeled for sewage exposure. Allow proper contact time per label.
Tip: Rinse and re-clean high-touch areas to ensure residue-free results. - 7
Dry, deodorize, and restore
Use dehumidifiers and air movers to thoroughly dry the space. Consider deodorization and professional restoration for persistent odors or hidden moisture.
Tip: Check moisture with a meter to prevent hidden mold growth. - 8
Document and plan next steps
Photograph damaged areas, log materials removed, and track cleaning costs for insurance. Schedule a follow-up inspection to confirm complete remediation.
Tip: Keep receipts and notes in one file for easy claims.
Questions & Answers
Is it safe for a homeowner to perform sewage damage cleanup?
Small spills with minimal contamination may be manageable by a prepared homeowner, but significant contamination or exposure to standing water often requires a professional restoration contractor. Always prioritize safety and consider health risks to household members.
Small spills might be doable for a prepared homeowner, but for larger contamination, professionals are recommended for safety and thoroughness.
What PPE is required for sewage cleanup?
Wear nitrile gloves, eye protection, a long-sleeve shirt with protective coveralls, and a respirator if aerosols are present. Proper PPE minimizes exposure to harmful pathogens during cleanup.
You should wear gloves, eye protection, coveralls, and a respirator if aerosols are involved.
How should I contain the spill to prevent spread?
Seal the area with plastic sheeting and tape, close doors, and use exhaust fans to direct air outside. Keep clean areas separate from contaminated zones to prevent cross-contamination.
Contain the spill by sealing the area and directing airflow away from clean spaces.
Can sewage damage affect electrical systems?
Yes. Water and sewage can compromise electrical outlets and wiring. Do not operate electrical devices in the affected area and consult an electrician if you suspect damage.
Electrical systems can be affected; avoid using electricals and get a qualified electrician if needed.
How long does disinfection take after cleanup?
Disinfection times vary by product and surface, but always follow label instructions for contact time. Allow surfaces to remain wet for the recommended period before drying.
Disinfection time depends on the product; follow the label for contact time.
Should pets be kept away during cleanup?
Yes. Pets should be kept out of the affected area to avoid exposure to pathogens and contamination during the cleanup process.
Yes, keep pets away from the cleanup zone for safety.
Watch Video
The Essentials
- Prioritize safety and containment first
- Use EPA-registered disinfectants with proper contact time
- Dispose of contaminated materials responsibly
- Call professionals for large spills or uncertain risks