Flood Cleanup: A Practical Guide for Home Restoration
A comprehensive, step-by-step flood cleanup guide from Cleaning Tips. Learn safety basics, moisture control, mold prevention, and how to restore your home after a flood with practical, DIY-focused guidance.

This guide teaches you how to safely clean up after a flood: stop the water source, remove standing water, dry and dehumidify, sanitize surfaces, and prevent mold. It covers safety gear, assessment, and when to call pros. Follow these steps to reduce damage, protect belongings, and speed up restoration. Always prioritize personal safety.
Understanding Flood Cleanup: Why Speed and Safety Matter
Floods bring more than water; they bring contaminants, structural risks, and mold expansion potential. A prompt, careful cleanup minimizes secondary damage and preserves more of your belongings. According to Cleaning Tips, speed combined with strict safety protocols dramatically reduces health risks and material loss. Before you begin, take a moment to assess the scene, identify hazards (wet electrical outlets, warped floors, hidden debris), and plan your approach. Establish a safe work zone, keep children and pets away, and wear PPE. This isn’t a cosmetic task—unaddressed moisture can lead to unseen damage that worsens over time. Your first actions set the stage for effective restoration: control moisture, prevent contamination from spreading, and document everything for insurance and future reference. The goal is to dry thoroughly, sanitize responsibly, and reduce the risk of mold and odors that can linger long after floodwater recedes.
Immediate Actions to Take Within the First Hour
In the initial hour after a flood, prioritize safety and containment. If it is safe to do so, shut off the main power switch to prevent electrical hazards and stop any ongoing water flow if you can access the source. Move valuable items to a dry area and start photographing damage for your records. Put on your PPE—gloves, N95 mask, eye protection, and waterproof boots—and avoid entering areas with standing water near electrical outlets. Ventilate by opening doors and windows if weather allows, and place a fan to push damp air toward a drying path. Remember, the goal is to reduce moisture quickly while preventing cross-contamination to uncontaminated areas. Do not mix cleaning chemicals, and never use heat sources that could ignite or spread contaminants.
Evaluating Contamination and Water Type: Clear, Gray, and Black Water
Floodwater can range from clean to highly contaminated. Clear water generally comes from broken plumbing, gray water from appliances or dirty sources, and black water from sewage or hazardous materials. Treat all floodwater as potentially dangerous; contamination can injure skin or eyes and spread through contact. Use appropriate PPE and avoid tracking contaminants to other areas. If you suspect black water or if you encounter strong odors, halt cleanup and seek professional help. Proper assessment helps you decide which materials are salvageable and which should be discarded, reducing long-term health risks and future mold issues.
Drying and Dehumidification: Stopping Additional Damage
Moisture is the silent destroyer after a flood. Quick drying minimizes swelling, warping, and mold growth. Start by opening exterior doors and windows when weather permits to promote cross-ventilation, and place multiple fans to create a consistent airflow path toward exits. A dehumidifier helps remove moisture from the air more effectively than fans alone. Position dehumidifiers away from walls to prevent moisture from seeping back, and monitor humidity levels with a hygrometer if available. The combination of airflow and controlled humidity reduces secondary damage and prepares surfaces for cleaning and sanitizing. Avoid placing heat sources directly on wet surfaces, as this can cause further damage or spread contaminants.
Cleaning and Sanitizing: Surfaces, Floors, and Walls
Once the area has begun to dry, clean all affected surfaces with appropriate cleaners. Start with removing visible debris, then wash with mild detergent and warm water. For sanitizing, use EPA-registered disinfectants following label instructions to ensure effective microbial control. Avoid mixing chemicals, especially bleach with ammonia or acids. Rinse surfaces where required and allow to air dry. Porous materials may require special attention; sanitize, dry thoroughly, and consider discarding items that remain damp for extended periods. This step reduces odors and slows mold growth, helping salvage more belongings over time.
Flooring and Carpets: What to Save or Replace
Flooring decisions depend on moisture level and material type. Non-porous floors (tile, sealed concrete) can often be dried and sanitized successfully. Porous flooring, carpets, and pad materials may retain moisture and contaminants and often require professional extraction. If carpet shows discoloration, persistent odor, or feels damp after drying attempts, replacement is usually the best option. If salvage is possible, professional carpet cleaning with hot-water extraction can help; however, significant saturation is a strong signal to replace. Protect the underlying subfloor by ensuring it dries evenly to prevent warping and structural issues.
Preventing Mold Growth: Identification and Prevention
Mold can begin growing within 24-48 hours in humid conditions, so preventing moisture rebound is critical. Inspect for visible mold in corners, under furniture, and along baseboards. Use a moisture meter if available to confirm dryness levels, especially in hidden spaces like wall cavities. Clean suspected areas with detergent and water, then disinfect to inhibit regrowth. If mold covers large areas or penetrates porous materials, professional remediation is advised. Maintain airflow, fix leaks, and keep humidity levels moderate to reduce the chance of mold returning.
Salvaging Furniture and Personal Items
Salvaging items depends on water type, material, and duration of exposure. Wood furniture and upholstered items absorb moisture quickly and can warp or mold if not dried promptly. Remove cushions and fabric items for separate cleaning or disposal. For metals, hardware, and non-porous surfaces, wipe down with disinfectant after drying. Electronics exposed to floodwater require professional assessment before reuse. Always document items as you salvage to support insurance claims and track what can be restored.
Electrical Safety and Appliances
Electrical safety is non-negotiable during flood cleanup. Do not operate outlets, appliances, or electrical devices until they have been inspected by a qualified electrician. If outlets or switches show signs of moisture or corrosion, shut off power at the main breaker from a safe location. Water and electricity are a dangerous combination; treat any damp area with caution and seek professional assistance for electrical components and cords.
Documentation and Insurance Claims
Thorough documentation speeds up insurance processing and recovery. Photograph all damaged areas, list each affected item, note the date and time of the flood event, and keep receipts for cleanup supplies. Create a detailed inventory and store digital copies where possible. Share documentation with your insurer and restoration contractor to ensure accurate estimates and coverage. Keeping organized records reduces back-and-forth and helps you recover more efficiently.
When to Call Professionals and What to Expect
If the area affected is large, water is contaminated, or you lack the tools for proper cleanup, professionals should be consulted. A flood restoration team will assess structural safety, remove standing water, dry the space, treat for mold, and guide you through the insurance process. Expect a multi-step process that may include water extraction, structural drying, mold remediation, and content restoration. Early coordination with pros minimizes health risks and accelerates your return to normal living conditions.
Post-Cleanup Maintenance: Prevent Future Flood Damage
After cleanup, implement prevention strategies to reduce future flood risk. Check and repair gutters and downspouts, seal basement walls, and install a suitable sump pump with a battery backup if applicable. Regularly inspect for leaks, address drainage issues, and maintain humidity control to deter mold growth. A small, proactive approach today can prevent costly damage tomorrow.
Tools & Materials
- Personal Protective Equipment (PPE) kit(gloves, N95 mask, goggles, waterproof boots)
- Water pump or wet-dry vacuum(removes standing water quickly)
- Fans and dehumidifier(promote airflow and humidity control)
- Mop, bucket, absorbent towels(initial cleanup and cleanup paths)
- EPA-registered disinfectant(for sanitizing surfaces per label directions)
- Plastic sheeting or tarps(to cover items or seal off areas)
- Moisture meter or hygrometer(monitor drying progress)
- Trash bags and sealable containers(dispose of damaged materials safely)
- Flashlight or headlamp(clear visibility in damp areas)
- Insulated gloves for electrical work(extra protection when in doubt)
Steps
Estimated time: varies by severity and space; typically a few days
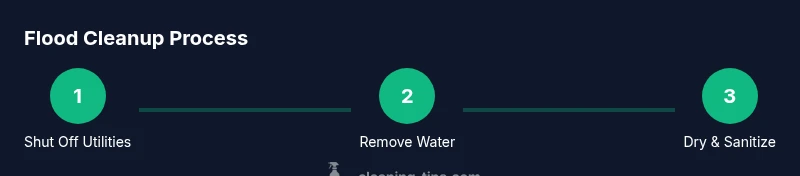
- 1
Shut off water and power safely
From a safe location, shut off the main water supply to stop more water from entering the space, and cut power to the affected area if you can do so without stepping on wet surfaces. This protects you from electrical shock and further damage.
Tip: If you cannot reach the main safely, wait for professionals rather than risk electrocution. - 2
Wear appropriate PPE
Put on an PPE kit including gloves, an N95 mask, goggles, and waterproof boots to protect against contaminants and sharp debris.
Tip: Always double-check for hidden hazards under debris before moving items. - 3
Remove standing water
Use a sump pump or wet-dry vacuum to extract standing water, starting from the outer edges and moving toward a controlled drain or exit. This reduces moisture quickly and minimizes damage.
Tip: Work in sections to maintain steady progress and avoid re-contamination. - 4
Document the damage
Photograph all affected areas and items before cleaning begins. Create a detailed list of damaged belongings for insurance and restoration contractors.
Tip: Keep a dated log of actions taken for reference during claims. - 5
Dry and ventilate the area
Set up fans to create an airflow path toward exterior exits and run a dehumidifier to steadily reduce humidity. Maintain ventilation while moisture levels drop.
Tip: Avoid placing fans too close to damp surfaces to prevent blowouts or scattering debris. - 6
Assess materials for salvage
Evaluate porous materials (drywall, insulation, carpet) for salvage. Remove and dispose of saturated items that cannot be effectively cleaned or dried.
Tip: Label removed materials to keep track of what’s been discarded. - 7
Clean and sanitize surfaces
Wash non-porous surfaces with detergent and warm water, then disinfect using an EPA-registered product following label directions. Rinse as required and allow to dry.
Tip: Never mix cleaners; this can produce toxic fumes. - 8
Treat carpets and fabrics
For heavily soaked carpets, remove and dispose of padding; consider professional extraction for the carpet itself. Clean salvageable textiles with appropriate methods and air-dry fully.
Tip: If in doubt, consult a professional cleaner for textiles. - 9
Check electrical systems and appliances
Do not operate electrical devices or outlets until a licensed electrician confirms safety after flooding. Inspect cords and outlets damaged by water.
Tip: If wiring or outlets appear corroded, delay restoration until inspected. - 10
Finalize and monitor for mold
Keep monitoring moisture levels for several days after cleanup. Add mold-prevention steps and reseal any areas that show signs of moisture retention.
Tip: Address any signs of mold promptly to avoid long-term health issues.
Questions & Answers
Is it safe to begin cleanup right after a flood?
Cleanup can begin when it is safe to do so. Prioritize turning off power if you can access the main switch safely, don PPE, and limit exposure to contaminated water. If you suspect hazardous conditions, consult a professional.
Yes, but only after assessing safety. Turn off power if safe, wear PPE, and avoid contaminated water. Contact professionals for uncertain conditions.
What equipment is essential for flood cleanup?
Key equipment includes PPE, a sump pump or wet-dry vacuum, fans, a dehumidifier, cleaning agents, scrub brushes, mops, and moisture meters. Use EPA-registered disinfectants and follow label instructions for safe use.
You’ll need PPE, water removal tools, airflow devices, disinfectants, and moisture monitoring gear to clean effectively.
When should I hire a professional for flood cleanup?
Hire a professional if the area is large, water is contaminated, structural damage is suspected, or you lack equipment to dry thoroughly. Professionals can handle water extraction, mold remediation, and insurance coordination.
Call a pro when the space is large, contamination is suspected, or you’re uncertain about safety or structural impact.
Can I salvage carpet and furniture after a flood?
Carpets and padding are often unsalvageable after heavy saturation. Non-porous furniture may be cleaned and dried, while porous items might need disposal. Always assess odor, discoloration, and drying progress before deciding.
Salvage depends on saturation; non-porous items can often be cleaned, but many porous textiles should be replaced when contaminated.
How do I prevent mold after a flood cleanup?
Mold prevention centers on rapid drying, humidity control, and thorough cleaning. Monitor moisture levels, fix leaks, and keep spaces well-ventilated. If mold appears, address it promptly with appropriate remediation.
Dry the space quickly, control humidity, and clean thoroughly to stop mold from taking hold.
What documentation is needed for insurance claims?
Take dated photos, inventory damaged items, keep receipts for cleanup products, and track all remediation steps. Share documentation with your insurer and the restoration contractor to streamline claims.
Document everything with dates and photos, and keep receipts for all cleanup expenses.
Watch Video
The Essentials
- Start safety-first: power off and PPE on before touching anything.
- Prioritize moisture removal to prevent mold and structural damage.
- Document damage early and thoroughly for insurance claims.
- Assess salvage vs replacement for carpets, drywall, and furniture.
- Call professionals when water contamination is suspected or area is large.