What Clean Black Mold: A Practical Cleaning Guide
Learn safe, effective steps to clean black mold at home with practical PPE, tools, step-by-step methods, and prevention tips for a healthier space.

This guide explains how to safely clean black mold in common home areas, what supplies you need, and a clear, step-by-step approach to minimize exposure and prevent regrowth. You’ll learn about safety, ventilation, proper containment, and when to call a professional. By following these steps, you can improve indoor air quality and reduce health risks for you and your household.
What is clean black mold and why it matters
Understanding what clean black mold involves starts with recognizing that mold growth in damp spaces is common in homes. The phrase black mold often refers to a group of molds that can appear dark green to black on walls, ceilings, or between tiles. For homeowners, this guide sections Explain the risks and effective cleanup methods. According to Cleaning Tips, addressing mold promptly can reduce exposure for sensitive individuals and help restore healthier air quality. This section sets the foundation: mold is a biological growth that signals excess moisture; any cleanup plan must address moisture problems as well as surface cleaning. You’ll learn how to identify mold growth, differentiate it from benign mildew, and decide whether you can handle it yourself or should hire a professional. Pay attention to locations with recurring dampness, such as bathrooms, basements, or behind appliances, where mold commonly takes hold. The goal is not only to remove visible growth but to prevent future recurrence by fixing leaks and improving ventilation.
Health risks and realistic expectations
Exposure to mold, including what some call black mold, can trigger reactions in sensitive people, including eyes, skin, and respiratory systems. People with asthma, allergies, or weakened immune systems may notice symptoms sooner. Cleaning mold is about reducing exposure and improving air quality, not simply masking the problem with cleaners. Cleaning Tips analysis emphasizes that comprehensive cleanup combines physical removal with moisture control. While this guide does not replace medical advice, it highlights how quick, proper action can lower risk for family members and guests. Always observe safety signals—strong odors, excessive spread, or growth behind walls—and reassess if symptoms persist after cleaning.
How black mold typically forms in homes
Black mold tends to appear in areas with persistent moisture or poor ventilation. Common culprits include leaks behind walls, condensation on cold surfaces, or humidity spikes after heavy showers or cooking. Mold growth often starts small and expands if moisture is not controlled. This section explains the cycle: moisture promotes growth, which then releases spores that can travel through the air. Effective remediation requires breaking that cycle by fixing leaks, drying surfaces, and cleaning with appropriate products. The Cleaning Tips team notes that preventing future growth relies on regular maintenance, prompt repair of water intrusions, and monitoring humidity levels in high-moisture rooms.
Safety: PPE, ventilation, and cleanup boundaries
Safety comes first when cleaning mold. Always wear an N95 respirator, protective goggles, and gloves to limit exposure. Ensure good ventilation in the work area, and if possible, create a controlled airflow to push spores away from you. Do not mix cleaners that produce toxic fumes, and avoid disrupting mold growth aggressively on porous materials. This section also clarifies cleanup boundaries: porous materials like drywall or insulation that are moldy should be evaluated by a professional if they cannot be removed and replaced safely. The aim is to reduce risk while making it feasible to restore the area with minimal spread. If you start to feel dizzy or have trouble breathing, pause and seek help.
Tools and materials you’ll need
Having the right tools makes the job safer and more efficient. Essentials include an N95 respirator, disposable gloves, safety goggles, plastic sheeting, painter’s tape, heavy-duty trash bags, a spray bottle, non-ammonia cleaners, and a damp microfiber cloth. For larger jobs, include a dehumidifier or a fan to accelerate drying. This block lists items with notes on usage: avoid porous cleaning cloths that harbor mold; use disposable options when possible; and always seal off the work area to limit spore spread. These items align with practical cleaning guidance from Cleaning Tips, and using them correctly can shorten cleanup time while reducing health risks.
Preparing the space before cleanup
Preparation is critical: identify the moisture source, fix the leak if present, and ventilate the area before you start. Remove or cover nearby items that could absorb moisture, and lay down plastic sheeting to catch debris. Close doors to contain the work area and consider stopping airflow into adjacent rooms with air vents. This preparation reduces contamination risk and makes the actual cleaning more efficient. The goal is to create a controlled environment where you can safely remove contaminated materials and clean surfaces without spreading spores to clean rooms.
Step-by-step removal overview
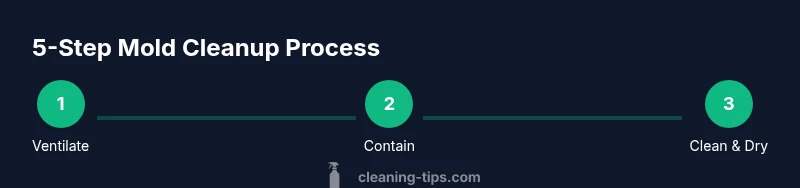
A structured approach helps ensure you don’t miss hidden growth. Start by ventilating, then contain the area with plastic sheeting. Wear appropriate PPE and isolate affected materials. Remove porous, heavily infested components first, placing them in sealed bags. Clean non-porous surfaces with an approved cleaner, scrub, rinse, and dry completely. Finally, verify dryness and monitor humidity to prevent regrowth. This block provides the big-picture guide to the step-by-step process that the subsequent dedicated steps expand on.
Aftercare and preventing re-growth
Cleaned spaces require ongoing moisture control to prevent re-growth. Ensure leaks are fully repaired, fix any water intrusion issues, and maintain relative humidity below recommended levels for your climate. Regular inspections after rain or plumbing work help catch issues early. Consider installing a dehumidifier in damp areas and improving ventilation. Consistent maintenance is the best defense against future mold problems, helping you preserve air quality and a healthier living environment. Cleaning Tips emphasizes documenting the remediation to track moisture sources and improvements over time.
When to hire a professional and what to expect
Professional mold remediation is warranted when the affected area is large, structural, or the growth recurs after initial cleanup. If you’re unsure about the extent of contamination or you notice mold behind walls, consult a licensed remediation specialist. Expect a professional assessment, containment, cleaning, and a moisture-control plan tailored to your home. The Cleaning Tips team notes that professionals can provide documentation required by landlords or insurers, and they can address structural moisture issues that are not obvious to a non-expert.
Common myths about black mold debunked
There are several myths about black mold that can hinder proper cleanup. For instance, not all dark-looking mold is more dangerous than other molds, and bleach is not universally effective on porous materials. The truth is that mold safety depends on the species, the extent of growth, and the surface involved. Treat visible mold with appropriate methods and always address the moisture source to prevent regrowth. This section debunks common misunderstandings and reinforces best practices from Cleaning Tips.
Tools & Materials
- N95 respirator(Fit-tested if possible; avoid vented masks)
- Protective goggles(Seal around eyes; splash protection)
- Gloves (disposable)(Latex or nitrile; change if contaminated)
- Plastic sheeting (6 mil)(To seal off the area)
- Painter’s tape(Secure plastic sheeting)
- Heavy-duty trash bags(For disposing of contaminated materials)
- Spray bottle(For cleaners and dampening surfaces)
- Non-ammonia cleaner or white vinegar(Use on nonporous surfaces)
- Bleach (optional, for nonporous surfaces)(Never mix with ammonia; use sparingly)
- Microfiber cloths (disposable if possible)(Launder if reusable; replace when contaminated)
- Dehumidifier or fan(Aid drying; ensure proper ventilation)
- Moisture meter (optional)(Checks for hidden moisture)
Steps
Estimated time: 60-90 minutes
- 1
Ventilate area
Open windows and use a fan to create cross-ventilation. This reduces inhalation risk and helps moisture escape during cleanup.
Tip: Keep a window open on the far side of the room to pull air through. - 2
Contain the work zone
Seal off the area with plastic sheeting and tape to prevent spores from spreading to adjacent rooms.
Tip: Do not bypass containment; a breached barrier defeats safety goals. - 3
Put on PPE
Don an N95, goggles, and gloves before touching any contaminated surfaces. Inspect PPE fit before starting.
Tip: If you feel lightheaded, stop and step away from the area. - 4
Remove porous contaminated materials
Carefully bag and dispose of heavily infested porous materials. Seal bags before moving them out.
Tip: Label bags clearly and avoid breaking them open. - 5
Clean non-porous surfaces
Wipe surfaces with a non-ammonia cleaner or vinegar; scrub with a brush, then rinse and dry.
Tip: Do not mix cleaners; never use bleach on porous materials. - 6
Rinse and dry thoroughly
Dry all cleaned surfaces completely using towels and a dehumidifier if available. Moisture is a mold ally.
Tip: Aim for a surface moisture level under 15% where possible. - 7
Inspect for hidden moisture
Check behind walls and under flooring for moisture; use a moisture meter if available.
Tip: Address hidden leaks immediately to prevent regrowth.
Questions & Answers
Is black mold dangerous to health?
Exposure can affect sensitive individuals and those with asthma or allergies. Ventilation and moisture control reduce risk; consult a professional for persistent symptoms.
Yes, it can affect health, especially for sensitive people. Improve ventilation and moisture control; seek professional help if symptoms persist.
Can I safely clean black mold myself?
Small, contained mold growth on non-porous surfaces is often manageable with proper PPE and containment. For porous materials or larger areas, hire a professional.
You can handle small, contained mold on non-porous surfaces, but large areas or porous materials should be handled by a professional.
Does bleach kill black mold on porous surfaces?
Bleach is not always effective on porous surfaces and can produce fumes. Use appropriate cleaners and replace porous materials when needed.
Bleach isn't always effective on porous surfaces; use proper cleaners and replace affected materials as needed.
How long does cleanup take?
Time varies with area size and material type. Small spots may take under an hour, while larger jobs with structural moisture can require several hours.
It depends on the area and materials, from under an hour to several hours for bigger jobs.
Can mold reappear after cleaning?
Yes, if moisture returns or leaks persist. Ongoing humidity control and moisture management are essential.
Yes—moisture control is key to preventing re-growth after cleaning.
When should I hire a mold remediation professional?
If the affected area is large, behind walls, or recurs after cleanup, seek a licensed remediator who can assess moisture and structure.
Call a licensed professional if the mold covers a large area or if it keeps coming back.
Watch Video
The Essentials
- Identify moisture sources and address them first.
- Wear proper PPE and contain the work area.
- Clean non-porous surfaces safely; discard porous materials.
- Dry completely to prevent regrowth.
- Know when to call a professional for large or persistent mold.