When Cleaning Up Blood: A Practical Step-by-Step Guide
Learn safe, step-by-step methods for cleaning up blood at home. PPE, surfaces, disinfectants, and stain prevention for homeowners and renters.

When cleaning up blood, prioritize safety: wear disposable gloves, protect nearby surfaces, and ventilate the area. This quick guide outlines the essential steps and materials you’ll need, so you can respond promptly and effectively. You’ll learn how to assess the spill, select appropriate cleaning agents, and reduce the risk of stains and contamination across common household surfaces.
What to Do Immediately After a Blood Spill
When a blood spill happens, time matters. Your first priorities are safety and containment. Put on disposable gloves and, if possible, eye protection. Gently surround the spill with a barrier of paper towels or absorbent cloths to prevent spreading. Do not touch the liquid with bare skin or allow it to contact you or other people. If the spill is large or involves a child or pet, consider seeking professional help. According to Cleaning Tips, quick containment reduces risk and makes subsequent cleaning simpler. Treat every spill as potentially hazardous and avoid rushing the process. For best results, designate one clean-ups-only area to avoid cross-contamination, and keep sterilized tools separate from everyday cleaning supplies. The plan here is practical and repeatable for common household surfaces, from tile to fabric.
Safety Gear and Environment
Protective gear is not optional—it's essential. Wear one-time-use nitrile gloves, and if splashes are possible, wear splash goggles. A lightweight disposable apron or old clothing helps prevent contamination of clothing. Ensure good ventilation by opening a window or turning on a fan, especially if you’ll be using liquid cleaners. Clear the area of children and pets, and remove fragrances or other irritants that could complicate cleanup. Use a damp cloth to wipe any nearby surfaces that might have been splashed, then dispose of all contaminated materials in a sealed bag. Cleaning Tips emphasizes safety-first protocols, and this approach keeps you in control from start to finish.
Assess the Surface and Choose Cleaning Agents
Different surfaces require different approaches. Nonporous hard surfaces (like ceramic tile or sealed concrete) are easier to clean than porous surfaces (like untreated wood or fabric). Always check the surface manufacturer’s instructions if possible. Start with cold water and a mild detergent to lift fresh blood; avoid hot water, which can set proteins and make stains harder to remove. For many households, a hydrogen peroxide solution at low concentration is effective on nonporous surfaces but may discolor fabrics or finishes, so test in an inconspicuous spot first. If you’re dealing with organic stains on fabrics, enzymatic cleaners can help by breaking down proteins in blood. Cleaning Tips suggests keeping a small, dedicated kit for stain removal to speed up response time in future incidents.
Cleaning on Hard Surfaces (Tile, Concrete, Wood Finish)
Proceed with a two-step approach. First blot to lift as much liquid as possible using clean towels, then apply a small amount of detergent solution to the area and blot again. Rinse with clean water and blot dry. If the stain persists on tile or sealed surfaces, apply a minute amount of a hydrogen peroxide solution and wait 1–2 minutes before blotting. Do not mix cleaners inside a container; use separate clean cloths for each cleanser to avoid cross-contamination. Always air-dry the surface and re-check for any smear marks after drying; residual color can indicate a deeper stain that may require a specialty cleaner. Cleaning Tips notes that patience and repeat gentle blotting often beat aggressive scrubbing.
Cleaning on Fabrics and Carpets
Fabrics and carpets require more care to avoid setting the stain. Blot gently to remove as much blood as possible, avoiding rubbing, which can push blood deeper into fibers. Rinse with cold water from the back of the fabric if possible. Apply a stain-removal or enzyme cleaner following the product’s directions, then blot and rinse again. For persistent stains on upholstery, consider a professional cleaning method, especially on delicate materials. On carpets, a carpet-safe enzymatic cleaner is typically effective after the initial blotting, and you may use a gentle propellant-free spray to adapt the cleaner to the pile. Always test a hidden area first to ensure colorfastness.
Disinfection and Stain-Prevention Steps
Disinfection is the final critical step to reduce the risk of contamination. After the visible stain is removed, apply a disinfectant suitable for the surface type and let it sit for the product’s recommended contact time. Do not mix disinfectants with other cleaners unless the label explicitly allows it. Rinse settings vary by material; on fabrics, use an appropriate rinse method to remove cleaner residues. Drying thoroughly is essential to prevent mildew and odor. Cleaning Tips stresses using the product’s label for timing and concentration so you preserve surface integrity while achieving disinfection.
Drying, Ventilation, and Odor Control
Thorough drying prevents microbial growth and odors. Use fans or a dehumidifier to reduce humidity in the area, and open windows if weather permits. For fabrics, air-dry away from direct heat to avoid shrinking. On hard surfaces, wipe away any remaining moisture with clean towels and allow the area to dry completely before reuse. If a lingering odor persists, clean with a fresh solution and ventilate longer. Prompt drying is a simple but effective step that can dramatically improve outcomes in blood cleanup.
Common Mistakes and Preventing Recontamination
Avoid rubbing or scrubbing vigorously, as this can spread stains and damage fibers. Never mix bleach with ammonia cleaners; this combination creates dangerous fumes. Do not reuse contaminated rags for other tasks until they are properly laundered or disposed of. If you’re unsure about a surface, perform a small test patch first. Keep your cleaning kit separate from daily supplies to minimize cross-contamination. These small habits collectively reduce the chance of recontamination and ensure a safer cleanup process.
When to Call Professional Help
Some spills are beyond DIY cleanup, especially in large quantities, on porous materials like upholstery, or when contamination risk is uncertain. If you cannot remove the stain after several attempts, or if the spill occurred in a public or shared space, seek professional cleaning services or medical guidance as appropriate. Cleaning Tips recommends erring on the side of caution for biohazard situations; professional cleaners have specialized equipment and trained protocols to handle more complex cleanups safely.
Tools & Materials
- Disposable gloves(FDA-approved medical disposable gloves; use one pair per spill.)
- Protective eyewear(Optional if splashes are possible.)
- Absorbent towels or paper towels(For initial blotting and containment.)
- Mild detergent(Dish soap or pH-neutral cleaner.)
- Cold water(Use for initial dilution and rinsing.)
- Hydrogen peroxide 3%(Use on nonporous surfaces after testing.)
- Enzymatic stain remover(Helpful for fabrics and carpets.)
- Microfiber cloths(For lifting stains with minimal abrading.)
- Bucket(Optional for larger surface areas.)
- Disinfectant (surface-appropriate)(Check compatibility with surface.)
- Sealable plastic bags(For disposing contaminated items.)
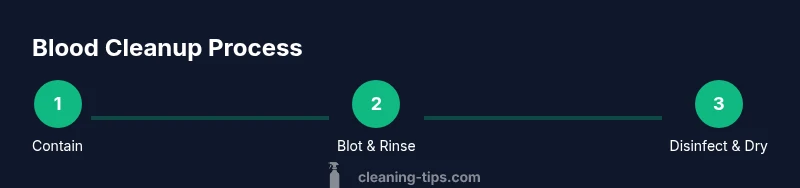
Steps
Estimated time: 30-60 minutes (depending on spill size and surface type)
- 1
Put on protective gear
Don gloves and protect your eyes if splashes are possible. This minimizes exposure to pathogens and reduces contamination risk as you begin cleanup.
Tip: Keep extra gloves nearby so you can replace them if they become contaminated. - 2
Contain the spill
Use paper towels to surround and contain the spill, preventing it from spreading to adjacent surfaces or textiles.
Tip: Work from the outside edge toward the center to minimize spreading. - 3
Blot, don’t rub
Blot the liquid with clean towels to lift as much as possible without pushing it deeper into fibers.
Tip: Repeat with fresh towels until you lift most of the liquid. - 4
Apply detergent and rinse
Dampen a cloth with cold water and mild detergent; blot the area, then rinse with clean water.
Tip: Avoid hot water as it can set stains. - 5
Use hydrogen peroxide on hard surfaces
On nonporous surfaces, apply a small amount of 3% hydrogen peroxide, wait 1–2 minutes, then blot and rinse.
Tip: Test a hidden spot first to avoid color or finish damage. - 6
Treat fabrics and carpets
For fabrics, apply an enzymatic cleaner following the product directions, then blot and rinse. For carpets, use the cleaner and a carpet brush if needed.
Tip: Always test colorfastness in a hidden area first. - 7
Disinfect and dry
Apply a surface-appropriate disinfectant and allow it to sit for the label’s recommended contact time, then dry thoroughly.
Tip: Ventilate the area to speed drying and reduce odors. - 8
Check for recontamination
Inspect the cleaned area for any remaining stains or colors and repeat cleaning steps if necessary.
Tip: Do not reuse contaminated towels; launder or discard properly.
Questions & Answers
What PPE should I wear when cleaning up blood?
Wear disposable gloves and eye protection if splashes are possible. Consider a disposable apron to protect clothing.
Always wear gloves and eye protection if splashes could happen; use an apron to keep clothes clean.
Can I use bleach on blood stains?
Bleach is sometimes suitable on hard, nonporous surfaces but may damage porous materials. Follow label instructions and avoid mixing with other cleaners.
Bleach can be used on hard, nonporous surfaces if the label allows it, but avoid it on fabrics and porous surfaces.
How do I clean dried blood from fabrics?
Rehydrate with cold water and a gentle cleaner, then use an enzymatic stain remover as directed. Blot, don’t rub, and rinse.
Rehydrate with cold water, then blot with enzymatic cleaner following the product directions.
Is hydrogen peroxide safe on fabrics?
Hydrogen peroxide can discolor fabrics; test in a hidden area first and use on nonporous surfaces when possible.
Test fabric first; hydrogen peroxide can whiten or discolor some fabrics.
How long should disinfectants stay on surfaces?
Follow the product label for contact time; do not estimate—let it sit for the recommended duration.
Usually, you should let the product sit for the label's specified time for effective disinfection.
What if blood spills on carpet?
Blot up excess liquid, then treat with an enzymatic cleaner designed for carpets and repeat as needed. Avoid scrubbing.
Blot, not scrub, then use a carpet-friendly enzymatic cleaner and repeat as needed.
Watch Video
The Essentials
- Wear PPE before starting cleanup.
- Contain spills to prevent spread and contamination.
- Choose surface-appropriate cleaning agents and follow label guidance.
- Blot, don’t rub, and air-dry thoroughly.
- Disinfect and recheck for any remaining stains.